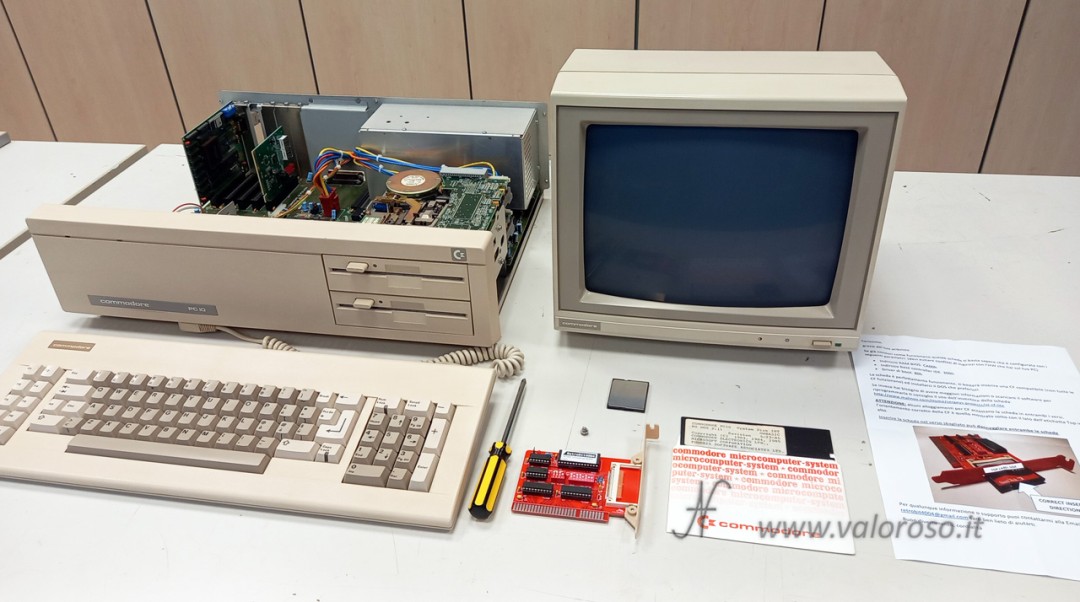
If you are a retro-computing enthusiast, you will surely have encountered the problem of damaged mechanical hard drives in old computers. Or, as in my case, an old IBM compatible PC that just doesn't have a hard disk. Fortunately, there is a practical and economical solution: the XT-CF Lite v4.1 card, which allows you to replace the mechanical hard disk with a Compact Flash (CF), also improving system performance.

Where to buy the XT-CF Lite v4.1? On eBay from the seller RetroBit4004.
In this in-depth guide, we will see how to install and configure the XT-CF Lite card in a vintage computer, a Commodore PC10, choose the right Compact Flash, install the MS-DOS operating system and transfer files between the Retro PC and a modern computer. The XT-CF Lite card can be installed on any IBM compatible PC with an 8-bit or 16-bit ISA slot.
Step 1: Install the XT-CF Lite card into your computer
Mounting the Support on the Board
First of all, you need to mount the holder on the XT-CF Lite card, which allows you to install the card in an ISA slot. The support guarantees greater mechanical stability to the card and is equipped with a slot for inserting the compact flash behind the computer.
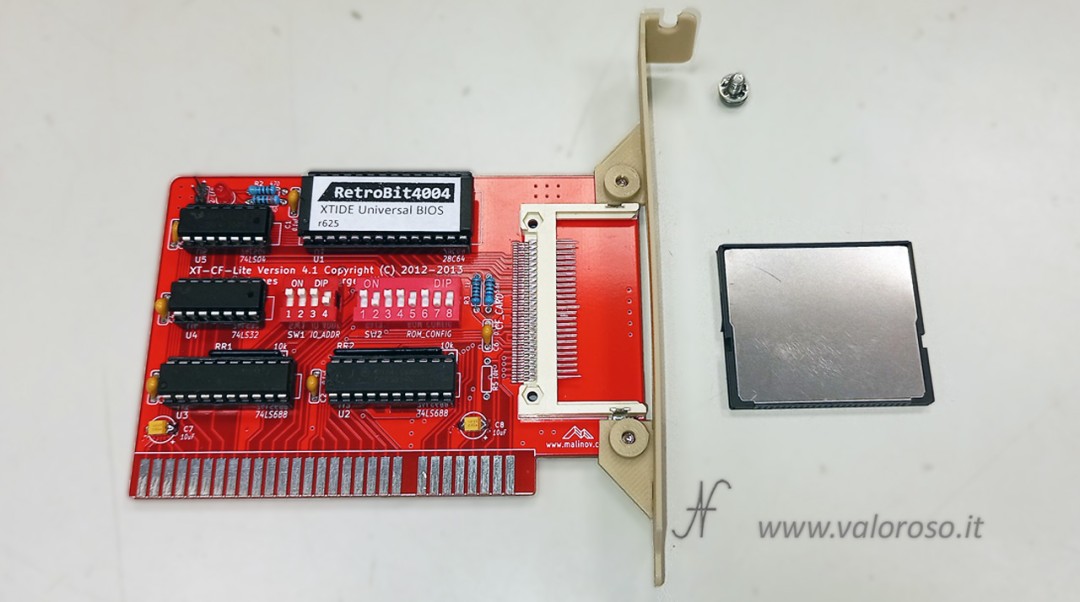
DIP Switch Configuration, XT-CF Lite v4.1
Configuring the DIP switches on the XT-CF Lite card is useful for avoiding conflicts with other peripherals in the system. These switches allow you to set the XTIDE BIOS and I/O addresses.

Here are the address reference tables, taken directly from Sergey Kiselev's (skiselev) GitHub page. The notation 0x300 is equivalent to 300h and means 300 on a hexadecimal basis.
SW1 – I/O Address Selection
| SW1.1 | SW1.2 | SW1.3 | I/O Address |
| ON | ON | ON | 0x300 |
| ON | ON | OFF | 0x320 |
| ON | OFF | OFF | 0x360 |
| OFF | ON | ON | 0x380 |
| OFF | ON | OFF | 0x3A0 |
| OFF | OFF | ON | 0x3C0 |
| OFF | OFF | OFF | 0x3E0 |
SW1.4 – Not Used
SW2.1 – EEPROM Enable

| SW2.1 | EEPROM Enable |
| OFF | EEPROM disabled |
| ON | EEPROM enabled |
SW2.2 – EEPROM Write Enable
| SW2.2 | EEPROM Write Enable |
| OFF | EEPROM write disabled |
| ON | EEPROM write enabled |
SW2.3 – SW2.7 – EEPROM Address Selection
| SW2.3 | SW2.4 | SW2.5 | SW2.6 | SW2.7 | EEPROM Address | ||||
| ON | ON | ON | ON | ON | 0xC0000 | ||||
| ON | ON | ON | ON | OFF | 0xC2000 | ||||
| ON | ON | ON | OFF | ON | 0xC4000 | ||||
| ON | ON | ON | OFF | OFF | 0xC6000 | ||||
| ON | ON | OFF | ON | ON | 0xC8000 | ||||
| ON | ON | OFF | ON | OFF | 0xCA000 | ||||
| ON | ON | OFF | OFF | ON | 0xCC000 | ||||
| ON | ON | OFF | OFF | OFF | 0xCE000 | ||||
| ON | OFF | ON | ON | ON | 0xD0000 | ||||
| ON | OFF | ON | ON | OFF | 0xD2000 | ||||
| ON | OFF | ON | OFF | ON | 0xD4000 | ||||
| ON | OFF | ON | OFF | OFF | 0xD6000 | ||||
| ON | OFF | OFF | ON | ON | 0xD8000 | ||||
| ON | OFF | OFF | ON | OFF | 0xDA000 | ||||
| ON | OFF | OFF | OFF | ON | 0xDC000 | ||||
|
| |||||||||
| ON | OFF | OFF | OFF | OFF | 0xDE000 | ||||
| OFF | ON | ON | ON | ON | 0xE0000 | ||||
| OFF | ON | ON | ON | OFF | 0xE2000 | ||||
| OFF | ON | ON | OFF | ON | 0xE4000 | ||||
| OFF | ON | ON | OFF | OFF | 0xE6000 | ||||
| OFF | ON | OFF | ON | ON | 0xE8000 | ||||
| OFF | ON | OFF | ON | OFF | 0xEA000 | ||||
| OFF | ON | OFF | OFF | ON | 0xEC000 | ||||
| OFF | ON | OFF | OFF | OFF | 0xEE000 | ||||
| OFF | OFF | ON | ON | ON | 0xF0000 | ||||
| OFF | OFF | ON | ON | OFF | 0xF2000 | ||||
| OFF | OFF | ON | OFF | ON | 0xF4000 | ||||
Attention:
- Make sure the I/O and EEPROM addresses do not conflict with other devices
- Address 0xC0000 – 0xC6000 conflicts with EGA/VGA BIOS
- Address 0xC8000 – 0xCA000 may conflict with the XT Hard Disk BIOS
- Address 0xE0000 or higher may conflict with the BIOS of newer mainboards
- It is recommended to disable writing to EEPROM
In my case, I used the default settings provided by RetroBit4004:

- BIOS address CA000h
- I/O address 300h
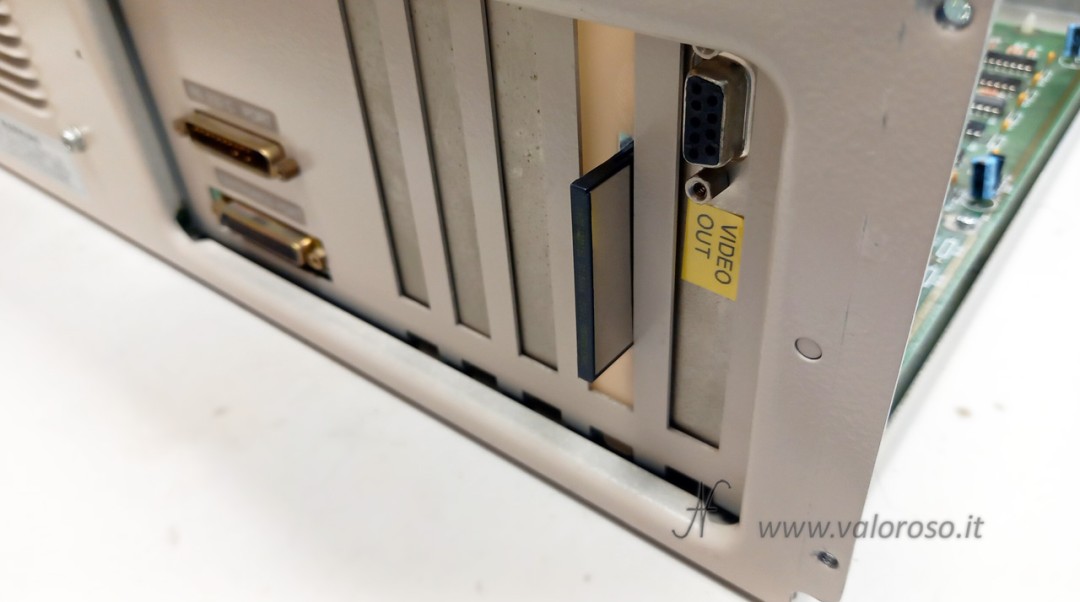
Mounting the XT-CF Lite v4.1 card in a free ISA (8-bit or 16-bit) slot
Once the DIP switches have been configured, the card can be installed in a free ISA slot on the computer. The card is compatible with both 8-bit and 16-bit slots. Insert the card carefully into the slot, making sure all contacts are inserted before pressing and snapping it into place.
Point it so that the compact flash connector is oriented toward the outside of the computer.
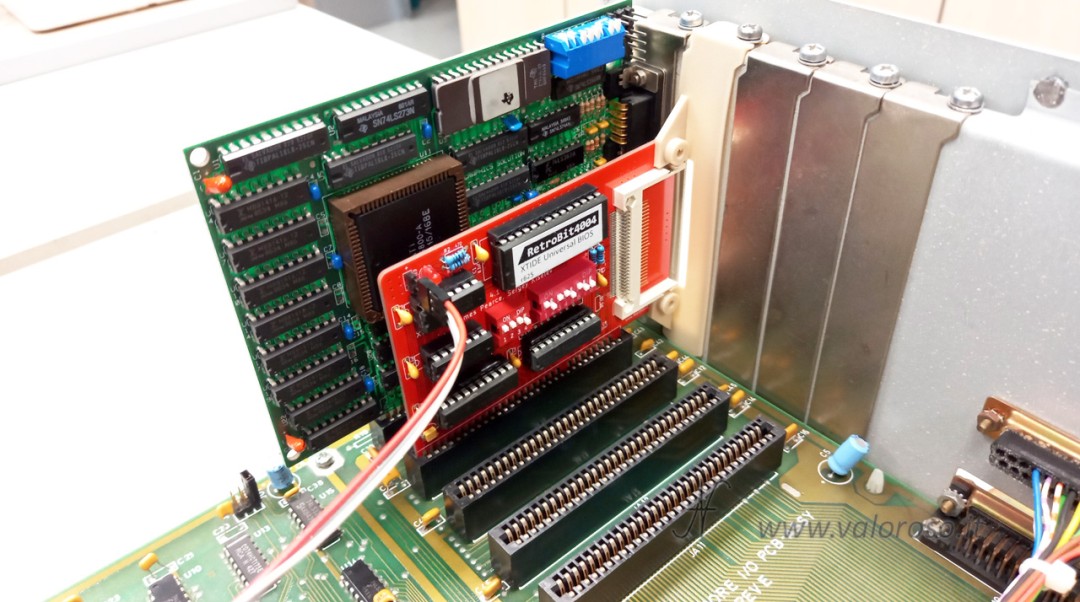
Connecting the LED cable
Finally, we connect the LED cable to the board. This connection will allow you to view the activity of the XT-CF Lite card on the computer case LED.
Phase 2: Choice of Compact Flash
The choice of Compact Flash (CF) is an important step for the correct functioning of the system. It is important to purchase a CF that is compatible with the version of MS-DOS you intend to install.
Furthermore, it should be kept in mind that not all Compact Flash cards are compatible with the card. I've been lucky and all the ones I've tried have worked.
Capabilities supported by MS-DOS Versions
Different versions of MS-DOS support different hard disk capacities:
- MS-DOS 2.0-2.11: Support for disks up to 16 MB. In reality, "third party" MS-DOS, like the Commodore one I have, supports 32 MB disks.
- MS-DOS 3.0-3.3: Support for disks up to 32 MB.
- MS-DOS 3.31: Support for partitions up to 512 MB.
- MS-DOS 4.0-4.01: Support for partitions up to 2 GB.
- MS-DOS 5.0 and later: Support for partitions up to 2 GB.
From MSDOS version 3.3 it is possible to use larger Compact Flash cards, but the size of each individual partition cannot exceed the indicated one.
In the case I showed in the video, I wanted to install MS-DOS 2.11, so I chose a Compact Flash with a maximum capacity of 32 MB. Even using a 64 MB one, the size recognized by the system was still 32 MB.
The Compact Flash must be inserted into the appropriate slot on the XT-CF Lite card, with the computer turned off.
Phase 3: Configuring the Compact Flash and installing the MS-DOS operating system
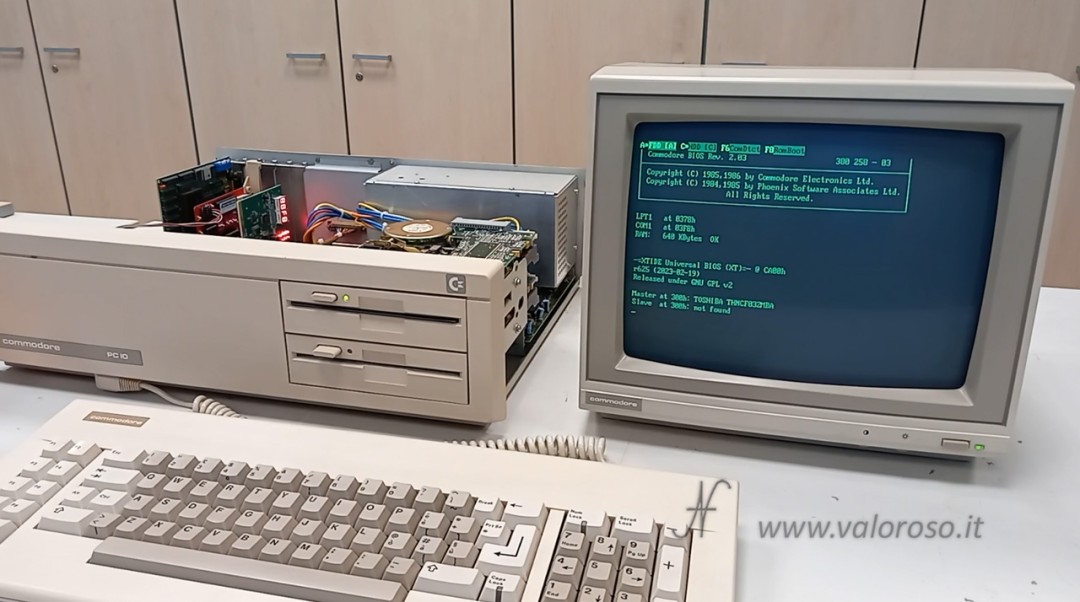
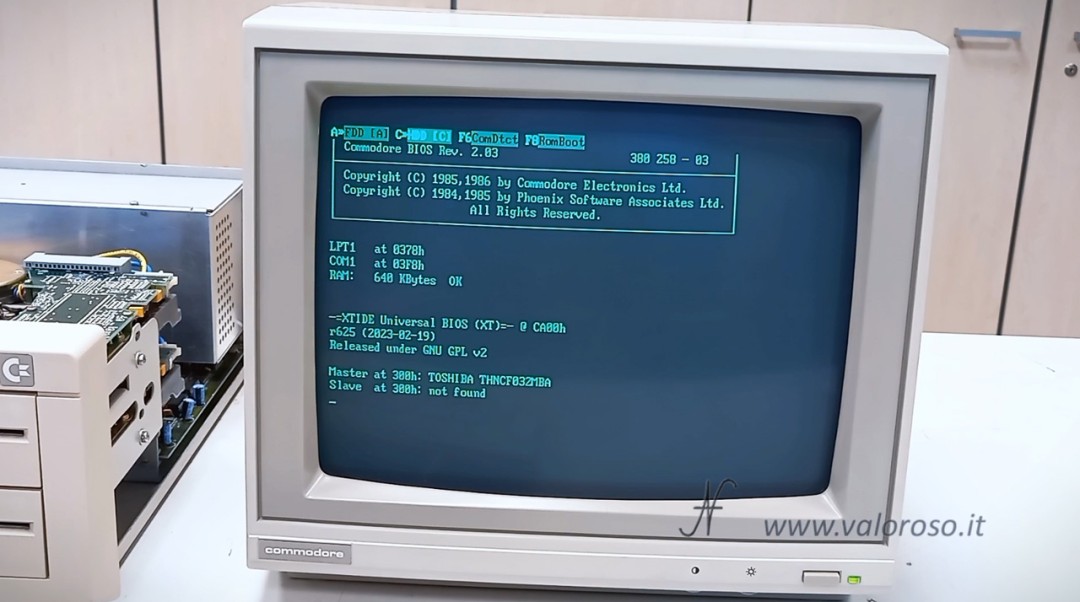
Turn on the computer. When the XTIDE BIOS prompts you to boot the system from the MSDOS diskette A:. Do not boot from C:, because the compact flash is not yet configured.
Erasing the Master Boot Record (MBR), XT-CF Lite v4.1
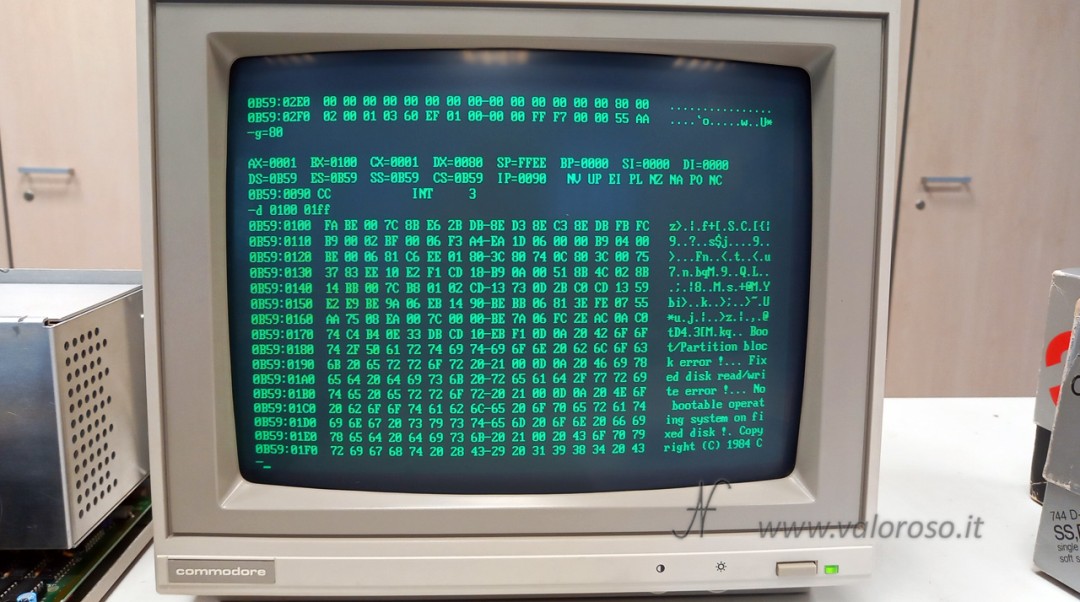
Before proceeding with the installation of the operating system, you must delete the Master Boot Record (MBR) of the Compact Flash to avoid conflicts or errors. In fact, the memory card may have been formatted with versions of the operating system that are not compatible with the vintage PC, which could therefore block at startup, not booting the operating system from the hard disk. As you can see in the following photo, if you do not delete the MBR, it may contain data.
Clearing the MBR can be done using a dedicated program or, for MS-DOS versions 5.0 or higher, via the FDISK /MBR command.
For older versions of MSDOS, there is an assembler program that can be typed directly into the vintage computer. I found these programs on the site minuszerodegrees.com
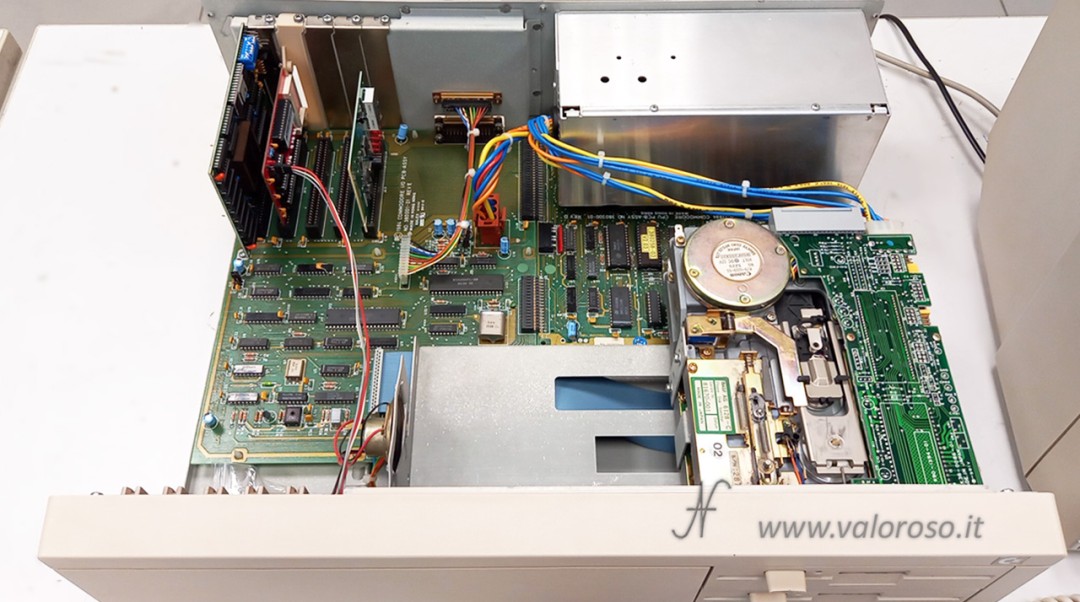
I suggest removing any other hard disk that may be present inside the computer! The following programs erase the MBR of disk 0.
If, by mistake, you delete the MBR of your hard disk, you will lose all the data inside, also because the Master Boot Record also contains the Partition Table. In short, you will have to reset and reformat the entire hard disk.
Starting the computer from the MS-DOS diskette, run the DEBUG command.
The DEBUG command prompt is a simple dash!
Inside the DEBUG prompt, type the following commands:
f cs:1000 1200 00
a 100

xxxx:0100 mov ah,00
xxxx:0102 mov dl,80
xxxx:0104 int 13
xxxx:0106 mov ax,0301
xxxx:0109 mov bx,1000
xxxx:010C mov cx,0001
xxxx:010F mov dx,0080
xxxx:0112 int 13
xxxx:0114 int 3
xxxx:0115      <-------- just press ENTER at this line

g=100
In lines xxxx:0100 and following, only the mov and int commands can be typed. Address lines are automatically set by the computer. At line xxxx:0115 simply press the ENTER key to return to the DEBUG prompt.
As soon as you type g=100 and press ENTER, the program starts executing, which takes very little time.

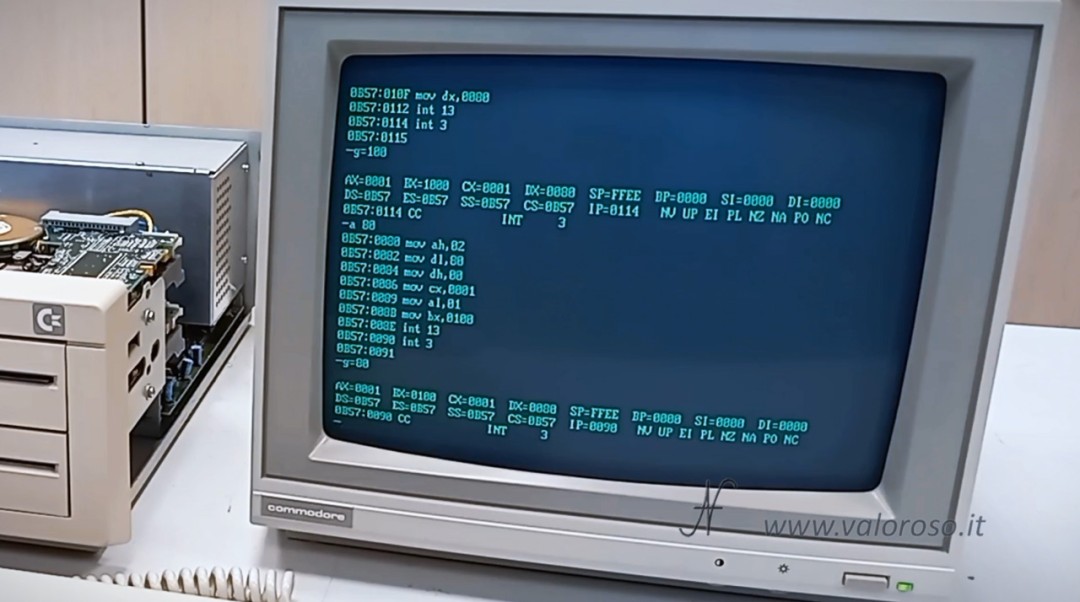
Next, let's check that the MBR has actually been deleted. Staying in DEBUG, type:
a 80

xxxx:0080 mov ah,02
xxxx:0082 mov dl,80
xxxx:0084 mov dh,00
xxxx:0086 mov cx,0001
xxxx:0089 mov al,01
xxxx:008B mov bx,0100
xxxx:008E int 13
xxxx:0090 int 3
xxxx:0091      <-------- just press ENTER at this line

g=80
In lines xxxx:0080 and following, only the mov and int commands can be typed. Address lines are automatically set by the computer. At line xxxx:0091 simply press the ENTER key to return to the DEBUG prompt.
As soon as you type g=80 and press ENTER, the program starts executing, which takes very little time.
A copy of the MBR is now present in RAM. The MBR is 512 bytes, so now let's view all these 512 bytes and verify that they are all at 00.
Still in DEBUG, at the prompt with the dash, we type:
d 0100 01FF
The system displays the first 256 bytes of the MBR. Let's check that they are all at 00.

In DEBUG, at the prompt with the dash, we type:
d 0200 02FF
The system now displays the next 256 bytes of the MBR. Even now, let's check that they are all at 00.
If everything is ok, you should have verified that all 512 bytes of the MBR are now at 0, as you can also see in the video accompanying this article. Now we can press Q to exit DEBUG and return to the MSDOS command prompt.
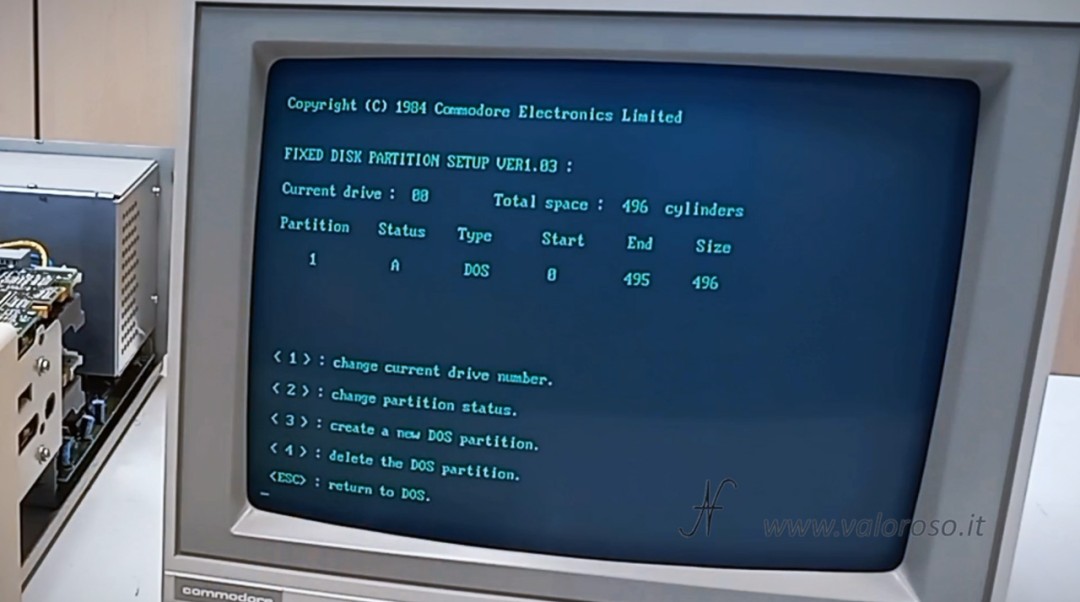
Partition creation with FDISK, XT-CF Lite v4.1
We use the FDISK command to create a new MSDOS partition on the Compact Flash.
First, FDISK will have to independently create the MBR that we deleted in the previous step. It is an automatic operation.
Then, we create a partition using all the space available on the Compact Flash (for this reason I suggested using a compact flash of the size supported by the operating system).
Finally, after creating the partition, make it ACTIVE using the appropriate function in the FDISK menu.
Turn on the computer. When the XTIDE BIOS prompts you to boot the system from the MSDOS diskette A:. Do not boot from C:, because the compact flash is not yet configured.
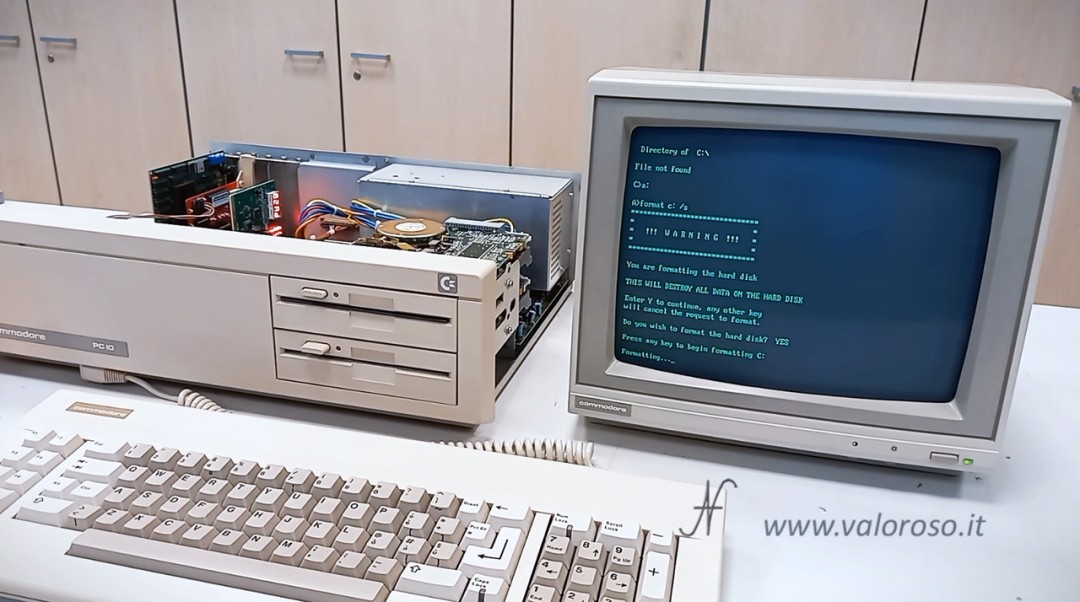
Formatting the Compact Flash, XT-CF Lite v4.1
After creating the partition, you need to format it. We use the FORMAT C: /S command to format the disk and copy the system files necessary for booting.
Copying other system files, XT-CF Lite v4.1
To make things easy... you can now copy all the files from the MSDOS diskette into C:.
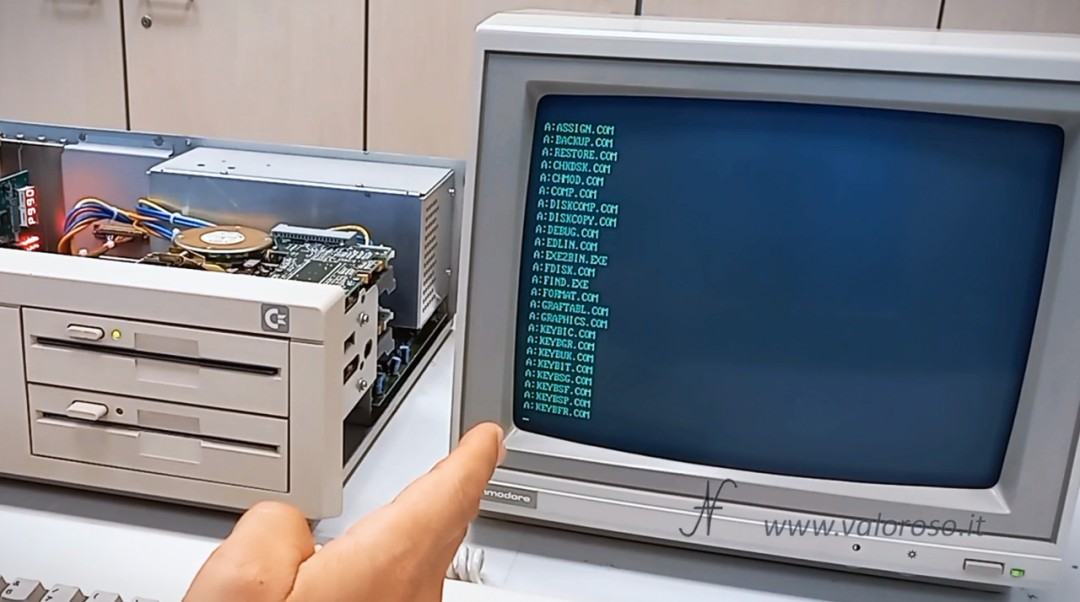
If you want to make things a little more complicated, but tidy, you can create a DOS folder inside the C: hard disk and copy all the system files.
In the root of the C: disk, only these files should remain:
IO.SYS
MSDOS.SYS
COMMAND.COM
CONFIG.SYS
AUTOEXEC.BAT
The first 2 files can be invisible, so you won't see them if you run the DIR command.
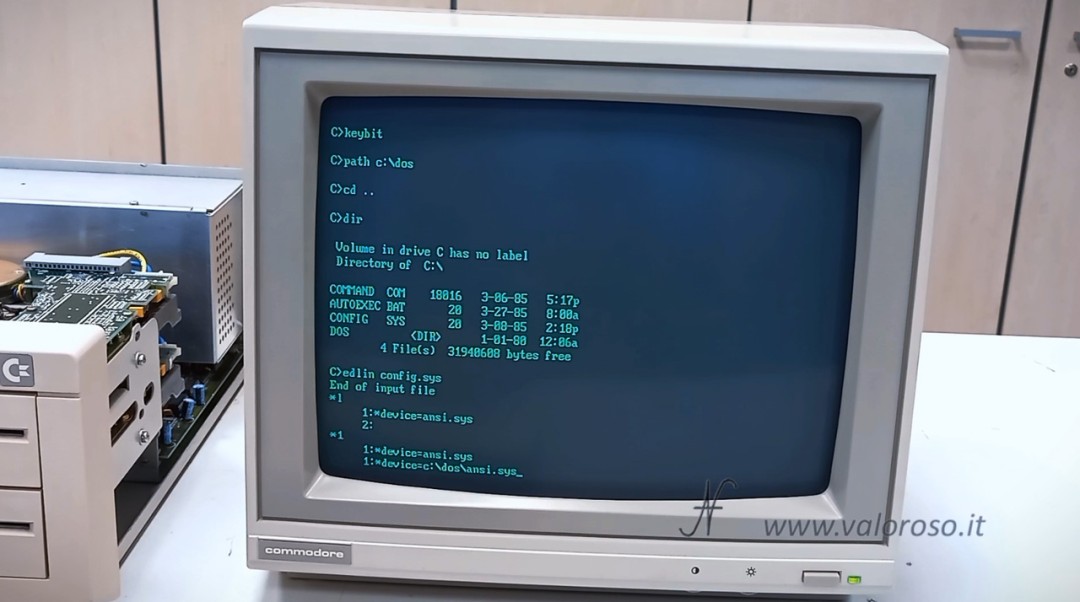
Modify CONFIG.SYS and AUTOEXEC.BAT
If you have opted to copy the system files to the DOS folder instead of C:, you will have to modify the AUTOEXEC.BAT and CONFIG.SYS to look for the various commands in the DOS folder.
Furthermore, you can add the following command, in order to execute the various DOS commands in whatever path or drive you are in.
PATH C:\DOS
In the video, I show how to use the MSDOS EDLIN command to modify the AUTOEXEC.BAT and CONFIG.SYS system files.
At this point you can restart your computer. When the XTIDE BIOS prompts you, tell it to boot the system from the C: drive. Alternatively, if you do not respond within a few seconds, the computer will boot from disk C:.
If the computer does not start from C:, crashes or returns errors, it means that you have used the wrong compact flash or that you have not followed ALL the steps listed above in sequence.
Step 4: Transfer files to and from modern computers
One of the great conveniences of using Compact Flash is the ability to easily transfer files between the Retro PC and a modern computer running Windows.
Obviously, to be able to carry out this step, you need a modern computer equipped with a Compact Flash reader. There are internal and external readers, USB.
With the vintage computer turned off, remove the CF from the XT CF Lite card and insert it into the reader of the modern computer.
Ignore any errors and DO NOT proceed with disk error correction.
At this point, you will see the compact flash as if it were a normal drive and you will be able to copy files to and from it. You can search for programs (compatible with your vintage computer) on the Internet and copy them to the CF.
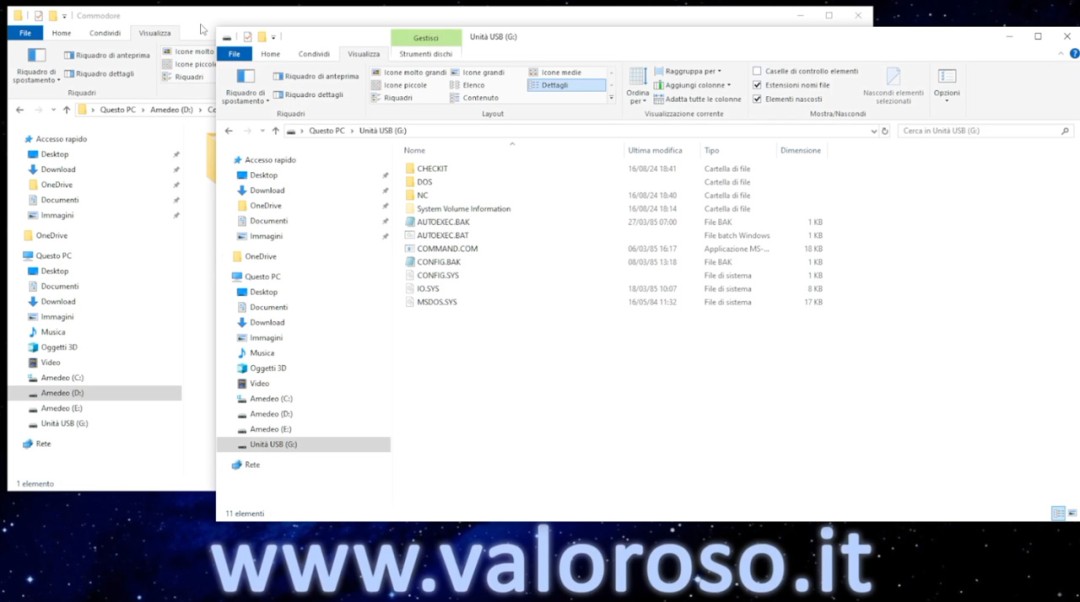
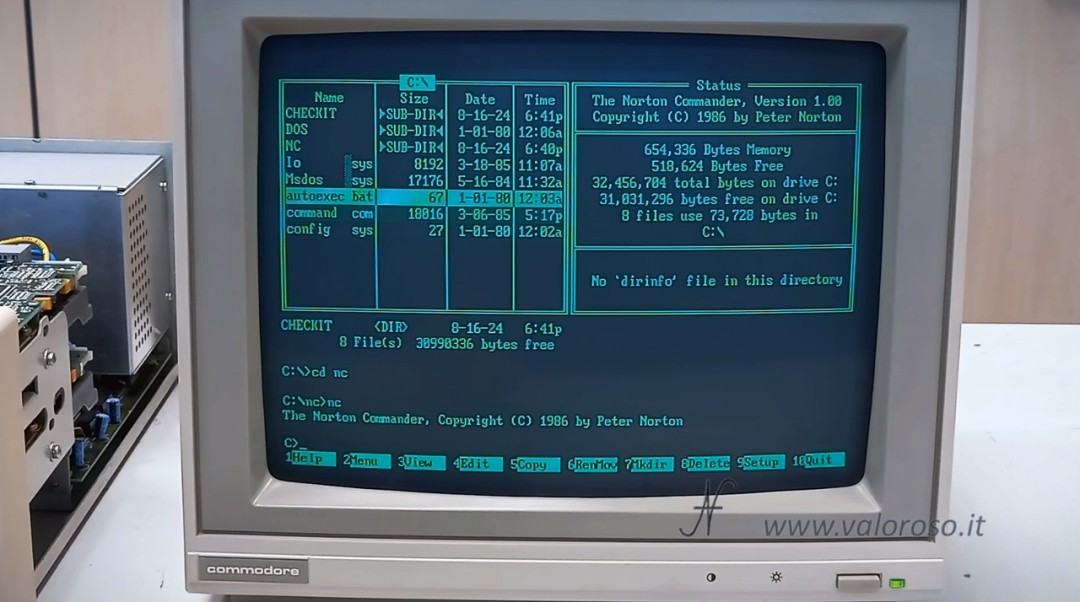
In the video, I show how to copy Norton Commander and Checkit. They are really nice and useful utilities. Once you have copied the files to the CF, remove it from the modern computer and insert it into the vintage computer. Start the vintage computer and you will find the files already on the hard disk!
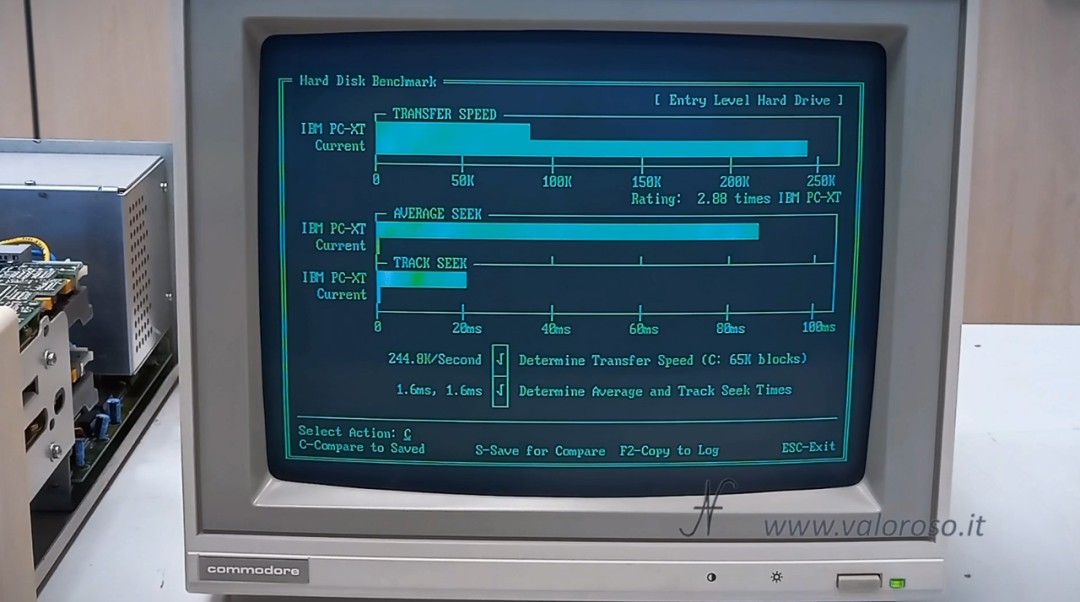
Using the CHECKIT utility I measured the performance of the XT CF Lite v4.1, comparing it to the speed of a mechanical hard disk. The results are, predictably, really better. Compared to an IBM PC-XT computer (equivalent to the Commodore PC10), data transfer speed is 2.88 times better from less than 100 KB/s to 244 KB/s.
Regarding the access time, we also find some nice surprises here: the XT CF Lite v4.1 has an access time of 1.6 ms, compared to significantly longer times, even over 80 ms, for a mechanical hard disk.
If you found this guide useful, I invite you to subscribe to the YouTube channel @ValorosoIT for further content on vintage computers and retro-computing. You can also find me on TikTok, Instagram, Facebook, etc…