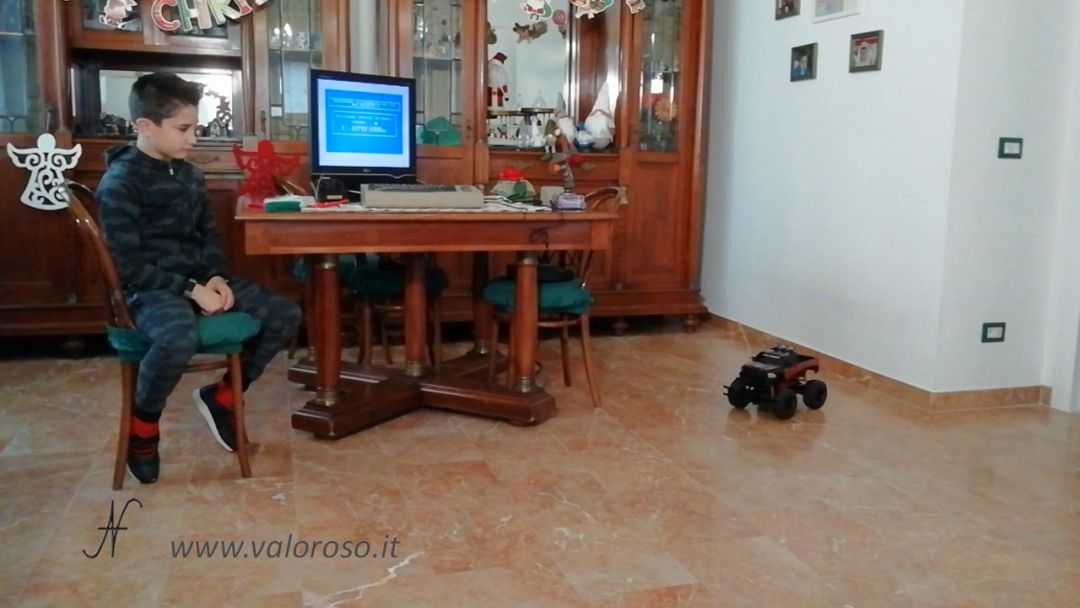
In this experiment, I connected a remote controlled car to the Commodore 64 user port. It is a nice experiment, which you can carry out with your children or grandchildren.

Hardware connections
To connect the remote controlled car to the Commodore 64 user port, you must immediately open and modify the remote control.
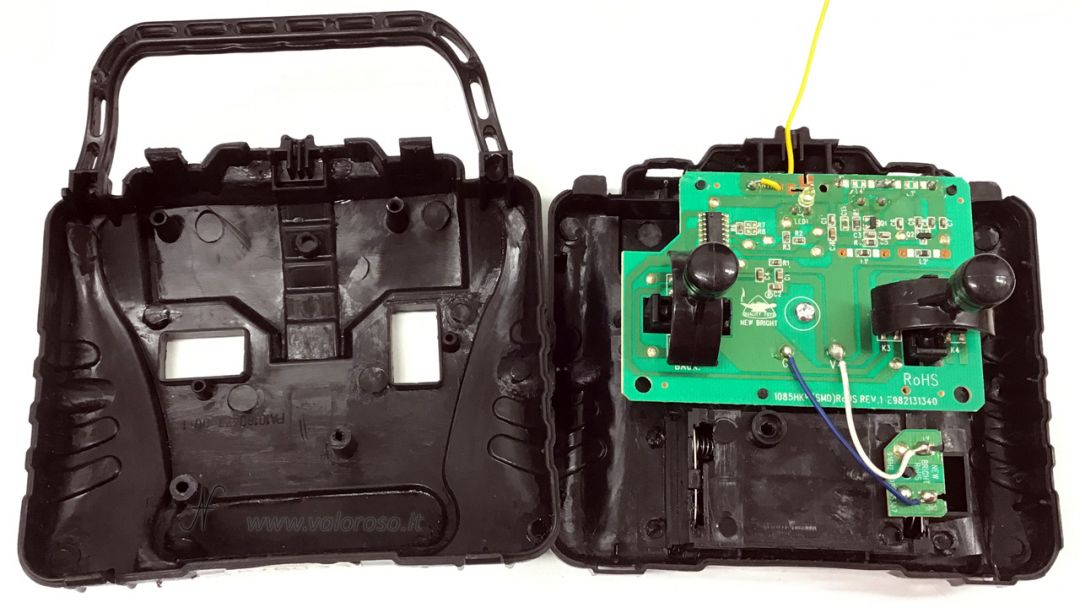
With the remote control at my disposal, I therefore realized that the 4 buttons that control the machine all have a common ground contact.
The wiring diagram to make is the following, but be careful: it is valid only if your remote control is similar to mine and works at a voltage lower than 5V.
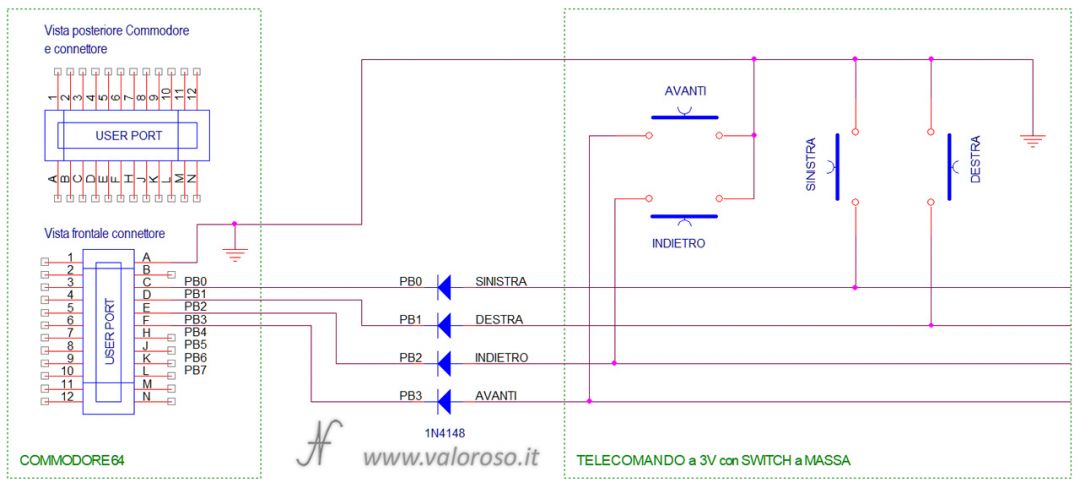
I connected 5 wires to the various contacts: the ground and also the 4 controls of the toy car: forward, backward, left and right.

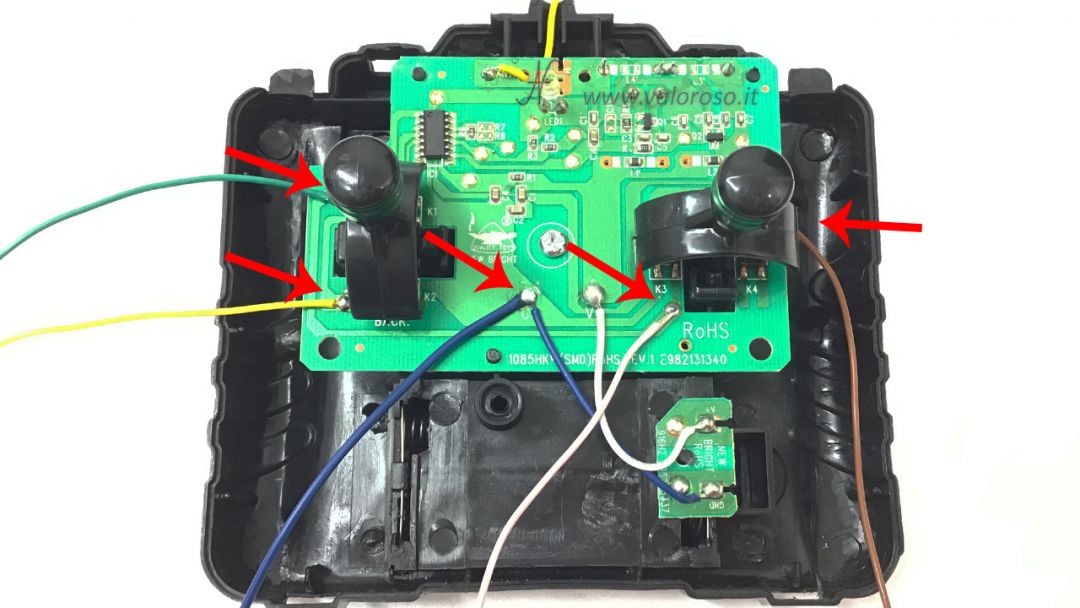
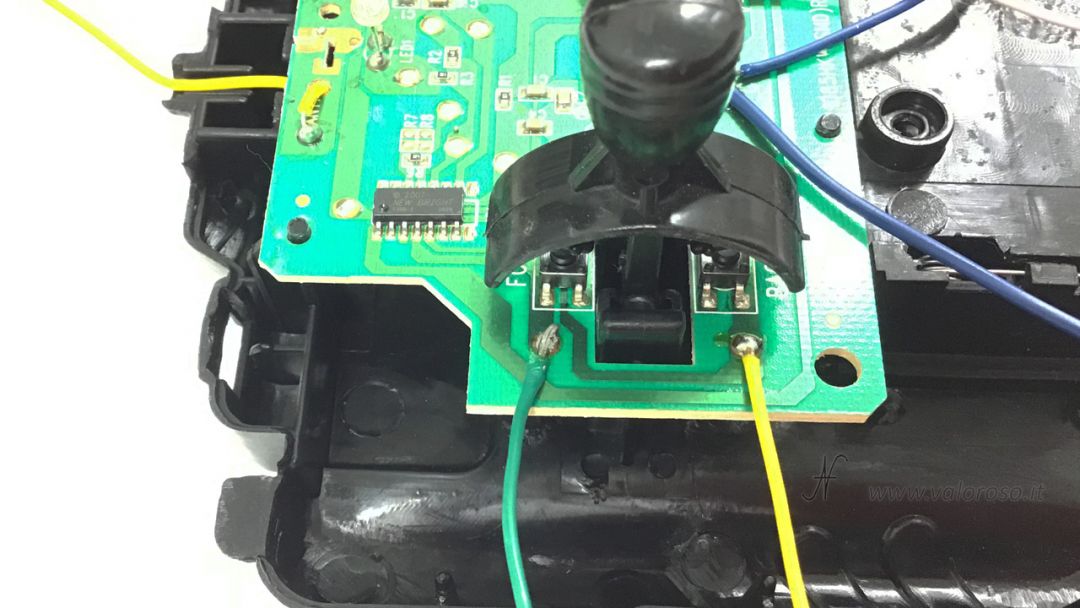
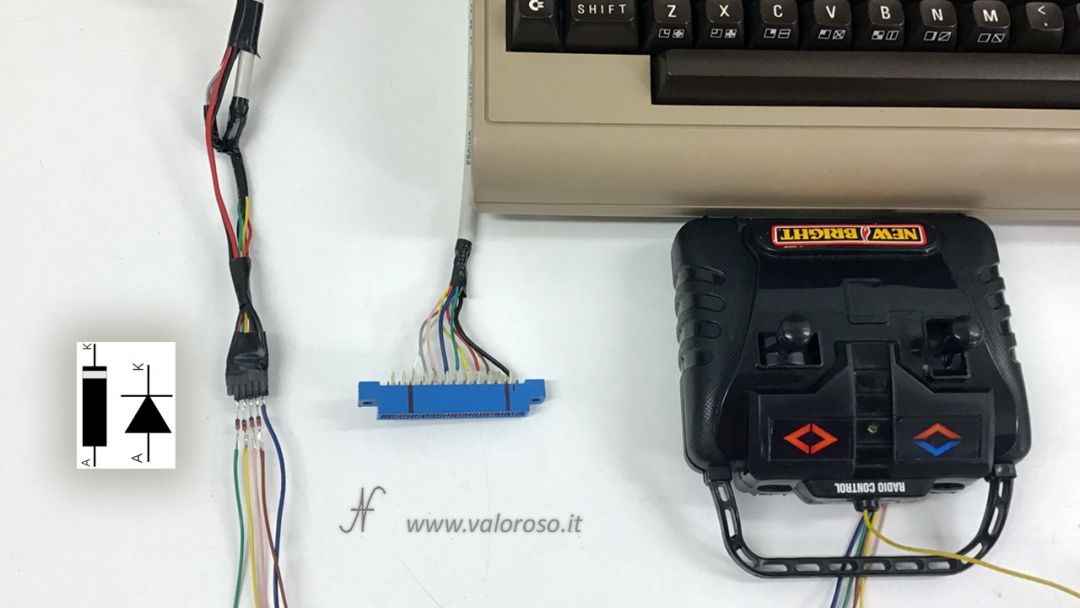
Then, I took the electrical cables out of the remote, using an existing hole.
To simulate pressing the remote control buttons from the Commodore, you must then ground the signal of each button. For example, if you want to drive the machine forward, you need to ground the feed button signal.
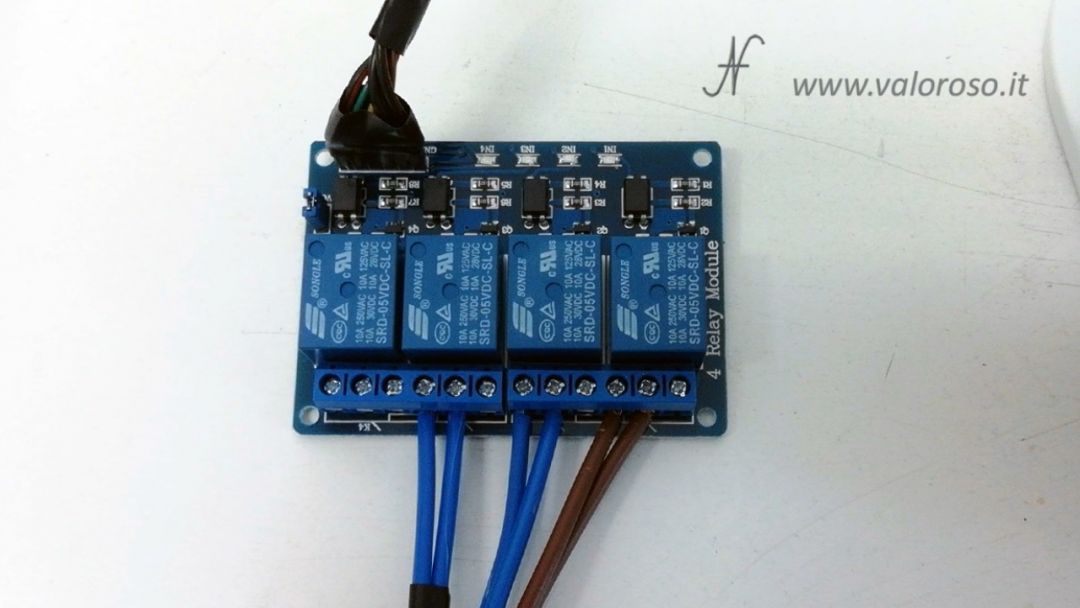
To connect these threads to the User Port of the Commodore, I could have used the usual interface to 4 relays and photos that I use in my experiments. I described it in various articles, including this. The solution of the relay card is valid if the remote control works at a voltage higher than that of the Commodore (for example 9V), or if the switches do not have the common negative.
In this experiment, I connected the wires directly to the Commodore 64 user port, in order to simplify the project. To prevent the Commodore's 5V from entering the remote control, which instead works at 3V, I used 4 1N4148 diodes. In this way, only the logic 0 (the signal to ground) will be able to pass from the Commodore to the remote control, activating it. As already explained, this trick applies to a remote control that works with a voltage lower than that of the Commodore, which is 5V.

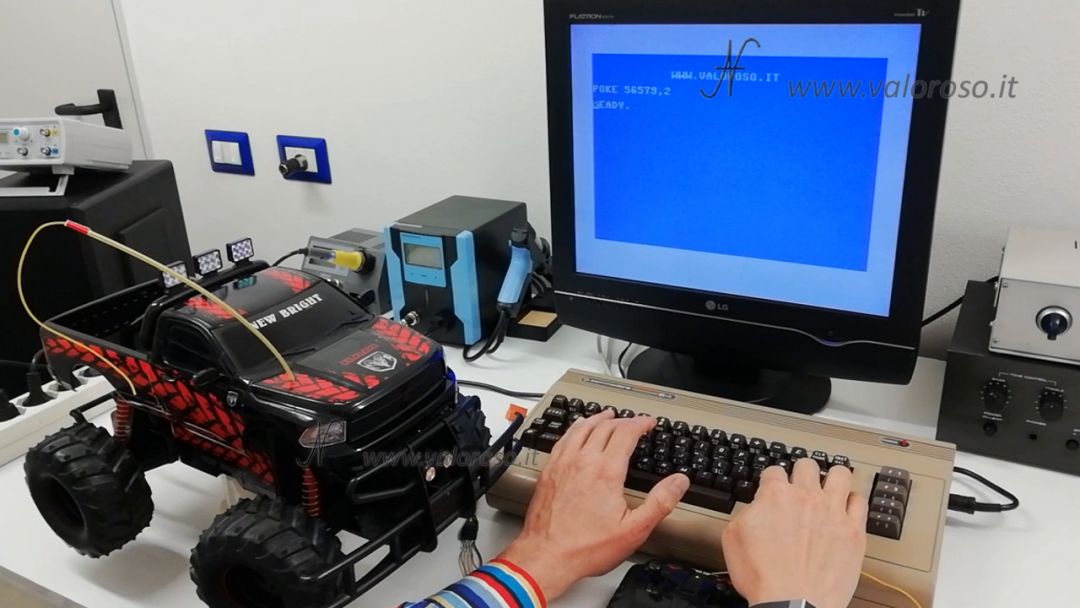
Remember to turn on the Commodore 64 BEFORE the toy car, otherwise it will move without your consent!
Commodore 64 remote-controlled car, commands in Basic
If you have followed the correspondence of the signals indicated in the above wiring diagram, here are the commands to control the remote controlled car from the Commodore 64.
Turn right:
POKE 56579, 1
Turn left:
POKE 56579, 2
Going back:
POKE 56579, 4
To move on:
POKE 56579, 8
Finally, to stop the Commodore 64 remote controlled car:
POKE 56579,0
Basic program to drive the radio-controlled car with the Commodore 64
The program I created in Basic performs these operations: in fact, it converts the signals it receives from the joystick, and then drives the Commodore 64 user port. You can download it at the bottom of this page.
To load the car's control program, I use the Kung Fu Flash, which allows you to start it immediately when the Commodore is turned on.
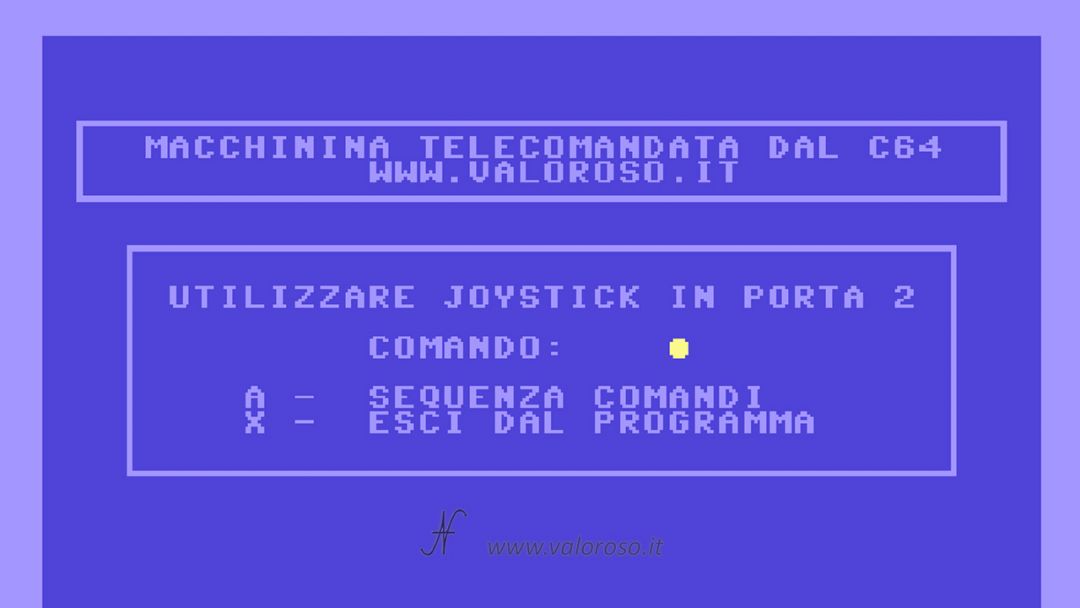
The joystick connects to Commodore port 2. It is possible to command the remote controlled machine by moving the joystick. The yellow ball next to the writing "COMANDO:" indicates A (forward), I (back) and even if there is a direction: "<" left and ">" right. It changes color according to the direction of movement of the radio controlled car.
Furthermore, being connected to a computer, the toy car can also execute preset sequences of commands. In the Basic program, I have included a simple sequence, which is activated by pressing A.
Finally, X The execution of the program ends, also stopping the radio -controlled machine. Before turning off the Commodore, remember to turn off the toy car.
Connect the joystick to the remote control, without going through the Commodore
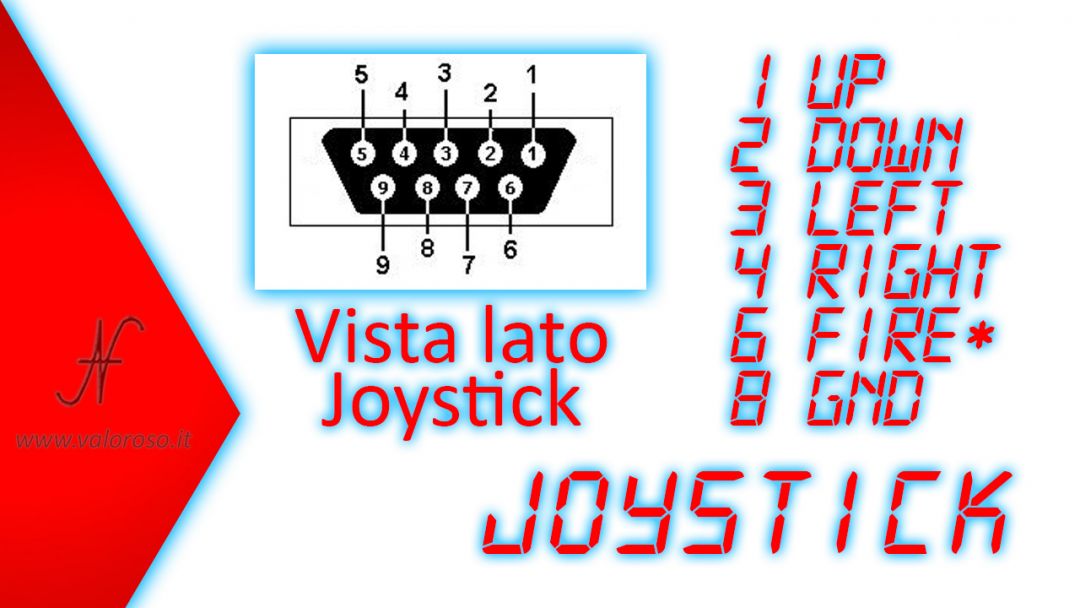
The joystick, like the remote control I used, also uses switches with a common ground. To connect the joystick directly to the remote control of the toy car, without going through the Commodore 64, simply connect the common negative of the remote control switches to pin 8 of the joystick connector.
The other remote control signals must be connected to the respective pins of the joystick connector (contacts 1 to 4).
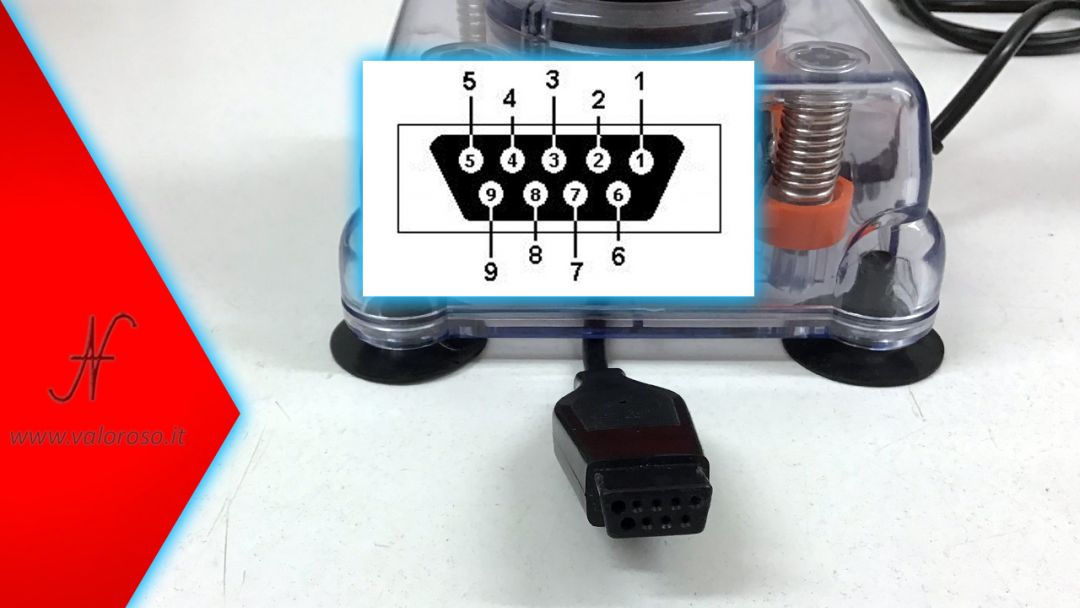
Normally, the Commodore 64 joystick port pinouts are viewed from the computer side.
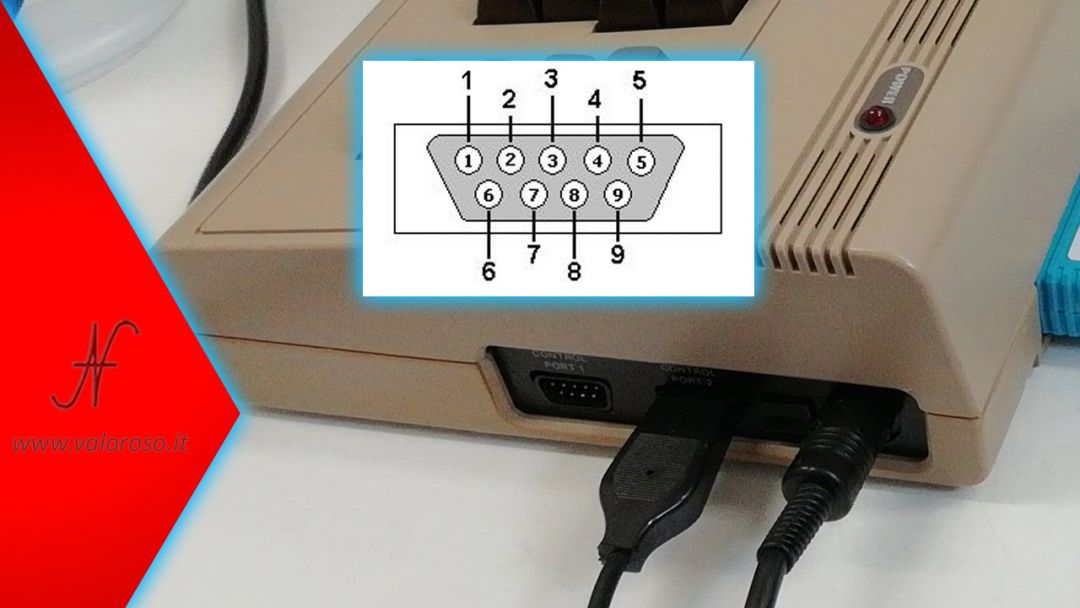
In this case, we have to turn the view upside down: we have to take the signals from the joystick and not from the computer.
List of the program in Basic
And here is the listing of the program in Basic to drive the remote controlled car from the Commodore 64.
The program is available in two formats:
- TOY CAR-REMOTE-CONTROLLED-C64. TXT, in text format, to analyze it on a PC (this file can not be immediately loaded or transcribed on the Commodore 64: to convert it into PRG you have to use C64LIST);
- REMOTE-CONTROLLED-MACHINE-C64.PRG, to be unpacked, in loadable and bootable format from the Commodore 64 and emulator.
Credits: in the video tutorial, SID music is Tune Nr. 2 by Klaus Grøngaard (Link).