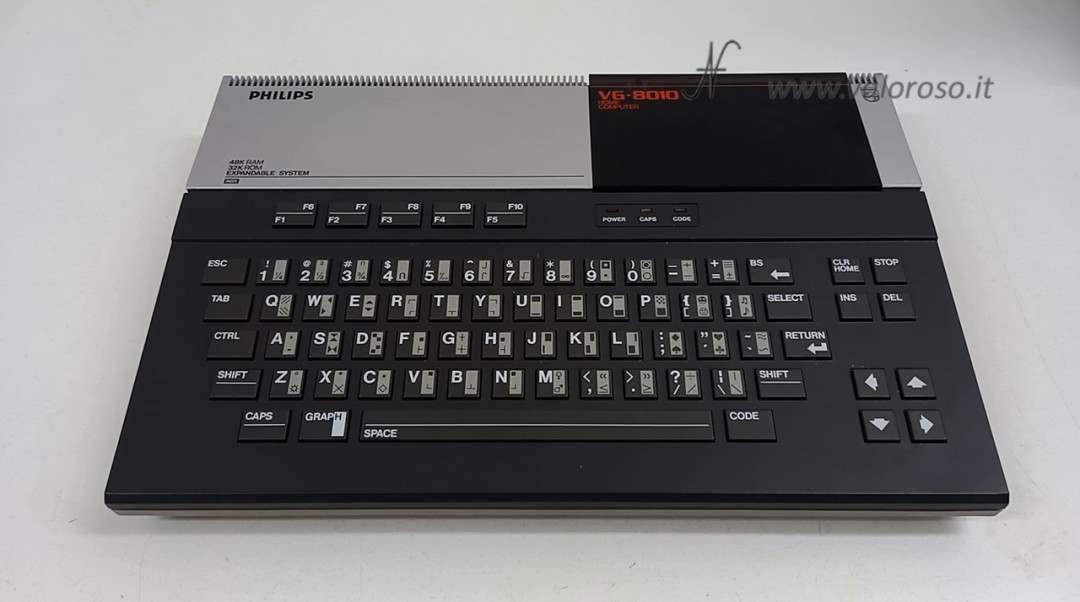
I found the insertion of this computer on eBay: it is a Philips VG 8010 msx, which I missed in the collection. He had a price, all in all, quite interesting, because other offers I had found on the same computer, in reality, were more expensive.

Read the full video transcript →
In the video, we see the purchase on eBay of the vintage computer, the unboxing of the package received and the test of the computer. It's not the first MSX computer I bought. I also have a couple of Philips VG-8020.
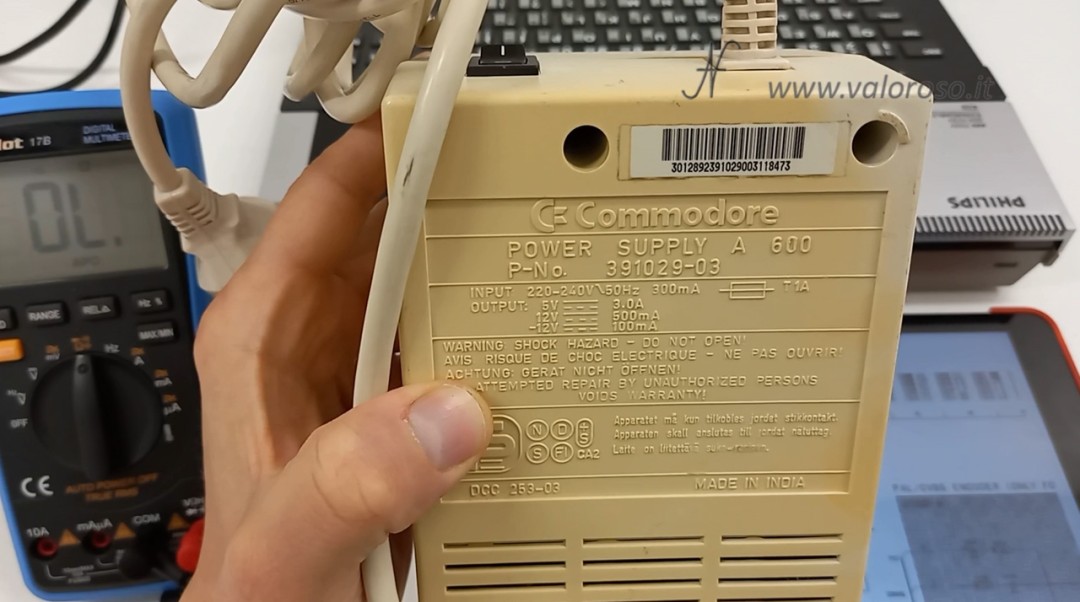
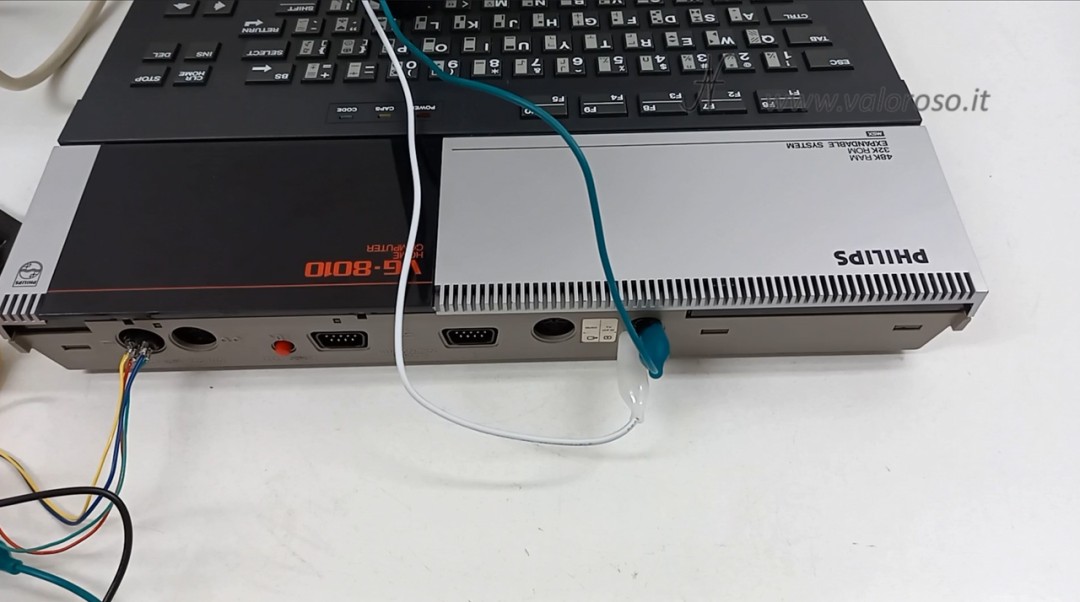
The computer is not equipped with original power supply. So, to try it, I had to connect it to a power supply ... which is not his. I identified, in the power supply of a Amiga 600, the correct voltages.
When I buy on eBay, I always ask sellers to take care of packaging. I ask to leave a lot of space on the edges of the computer (therefore: above, below and all four sides), which must be filled with packaging material. This packaging serves to make sure that, if the external box should take a blow, the strength of the impact does not go to reach the inside, where there is the computer.

In this case, the seller did a good thing: he packed the computer with a box, then, with other packaging material, he put this box inside another box.
In fact, the computer arrived intact and in excellent aesthetic condition!
How to power your Philips VG 8010 MSX computer
If you do not have the original power supply, as in this case, powering the Vintage Philips VG 8010 MSX computer can be a problem. I opted for a temporary solution. I used a 5 -pole DIN connector to connect to the computer. In addition, I used a power supply of an Amiga 600, which has the same tensions that are needed at Philips.
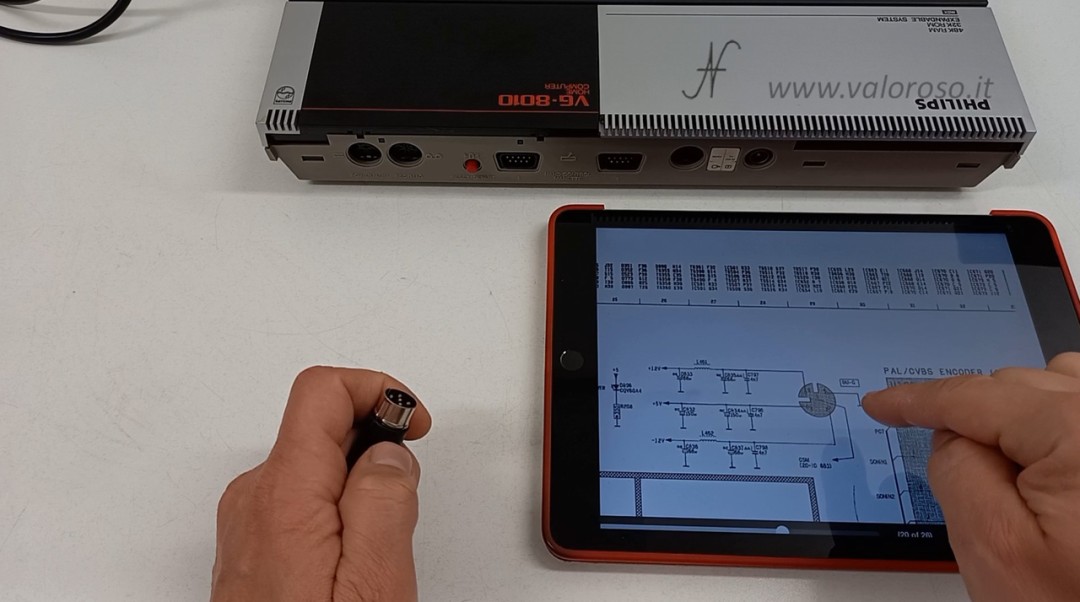
Through the service manual of the MSX computer (which you can find at the bottom of this page), I found the exact arrangement of the power pins. I then soldered some cables to the connector.

Pinout of the power connector of the Philips VG8010, looking at the back side of the computer:
Pin 1, center: not connected
Pin 2, bottom left: +5V
Pin3, bottom right: -12V (negative)
Pin 4, top right: GND
Pin 5, top left: +12V
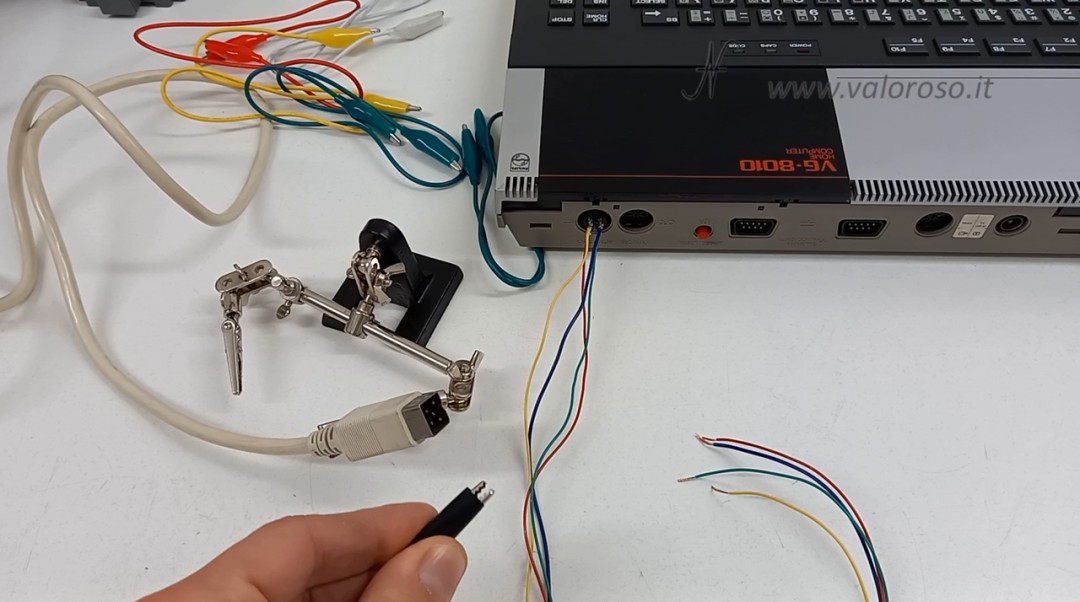
Through crocodiles, I connected these conductors to the connector of the power supply of an Amiga 600.
To insert the crocodiles in the power connector, I found many problems! In the video, you can see some despair!
Deepening: Ohm's Laws
The two laws of Ohm deserve an in -depth analysis, as, in the video, I mention it. To power the computer I used some thin cables. I had to make a definitive cable, I would have opted for thick cables.
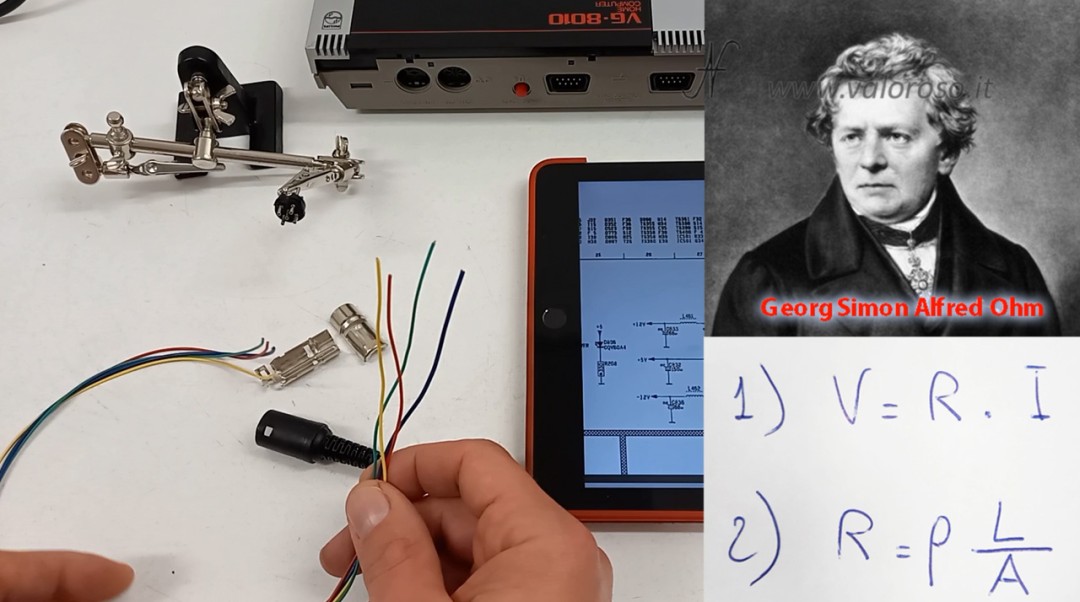
Ohm's second law states that the resistance of a cable is directly proportional to its length and inversely proportional to its cross-section. So, if I have a very thin cable, the resistance of this cable tends to increase. If the resistance increases, by Ohm's first law, the voltage drop on this cable also increases.
In practice, for example, 5 V start from the power supply 4.5 V on the computer ...
Through a shorter length of the cables, due to Ohm's second Law, we tend to reduce this resistance, so the voltage drop will tend to reduce (first Ohm's Law).
By shortening the cables, for example, if 5 V start from the power supply, 4.9 to the computer arrive. In short, we try to compensate for the lower section of the cable with a lower length of the same.
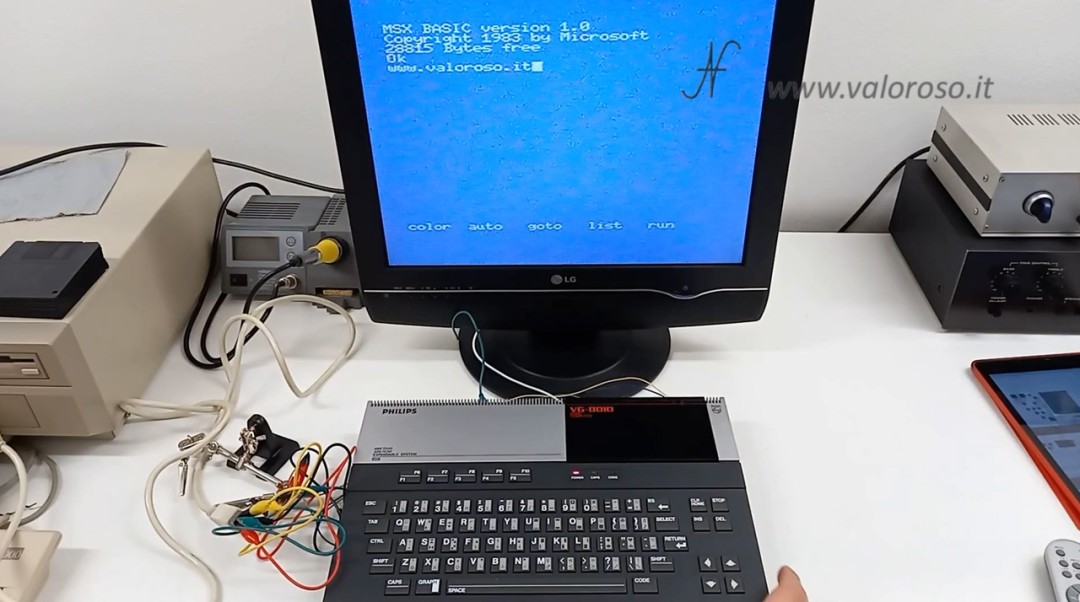
Testing your Philips VG 8010 MSX computer
Among the various bad luck I found, trying to try this computer, I also happened to have forgotten the RF cable in the office ... I had to use cables and crocodiles also to connect the computer to the monitor!
Obviously, this provisional solution tends to significantly lower the quality of the image on the video, because the cables are not shielded and receive several interference.
Anyway, despite all these difficulties, I managed to boot the back computer and try all the keys on the keyboard. Works!
Papers
Philips VG 8010 service manual
If you like the back computer and vintage electronics, I invite you to subscribe to the YouTube channel and activate the notification bell.