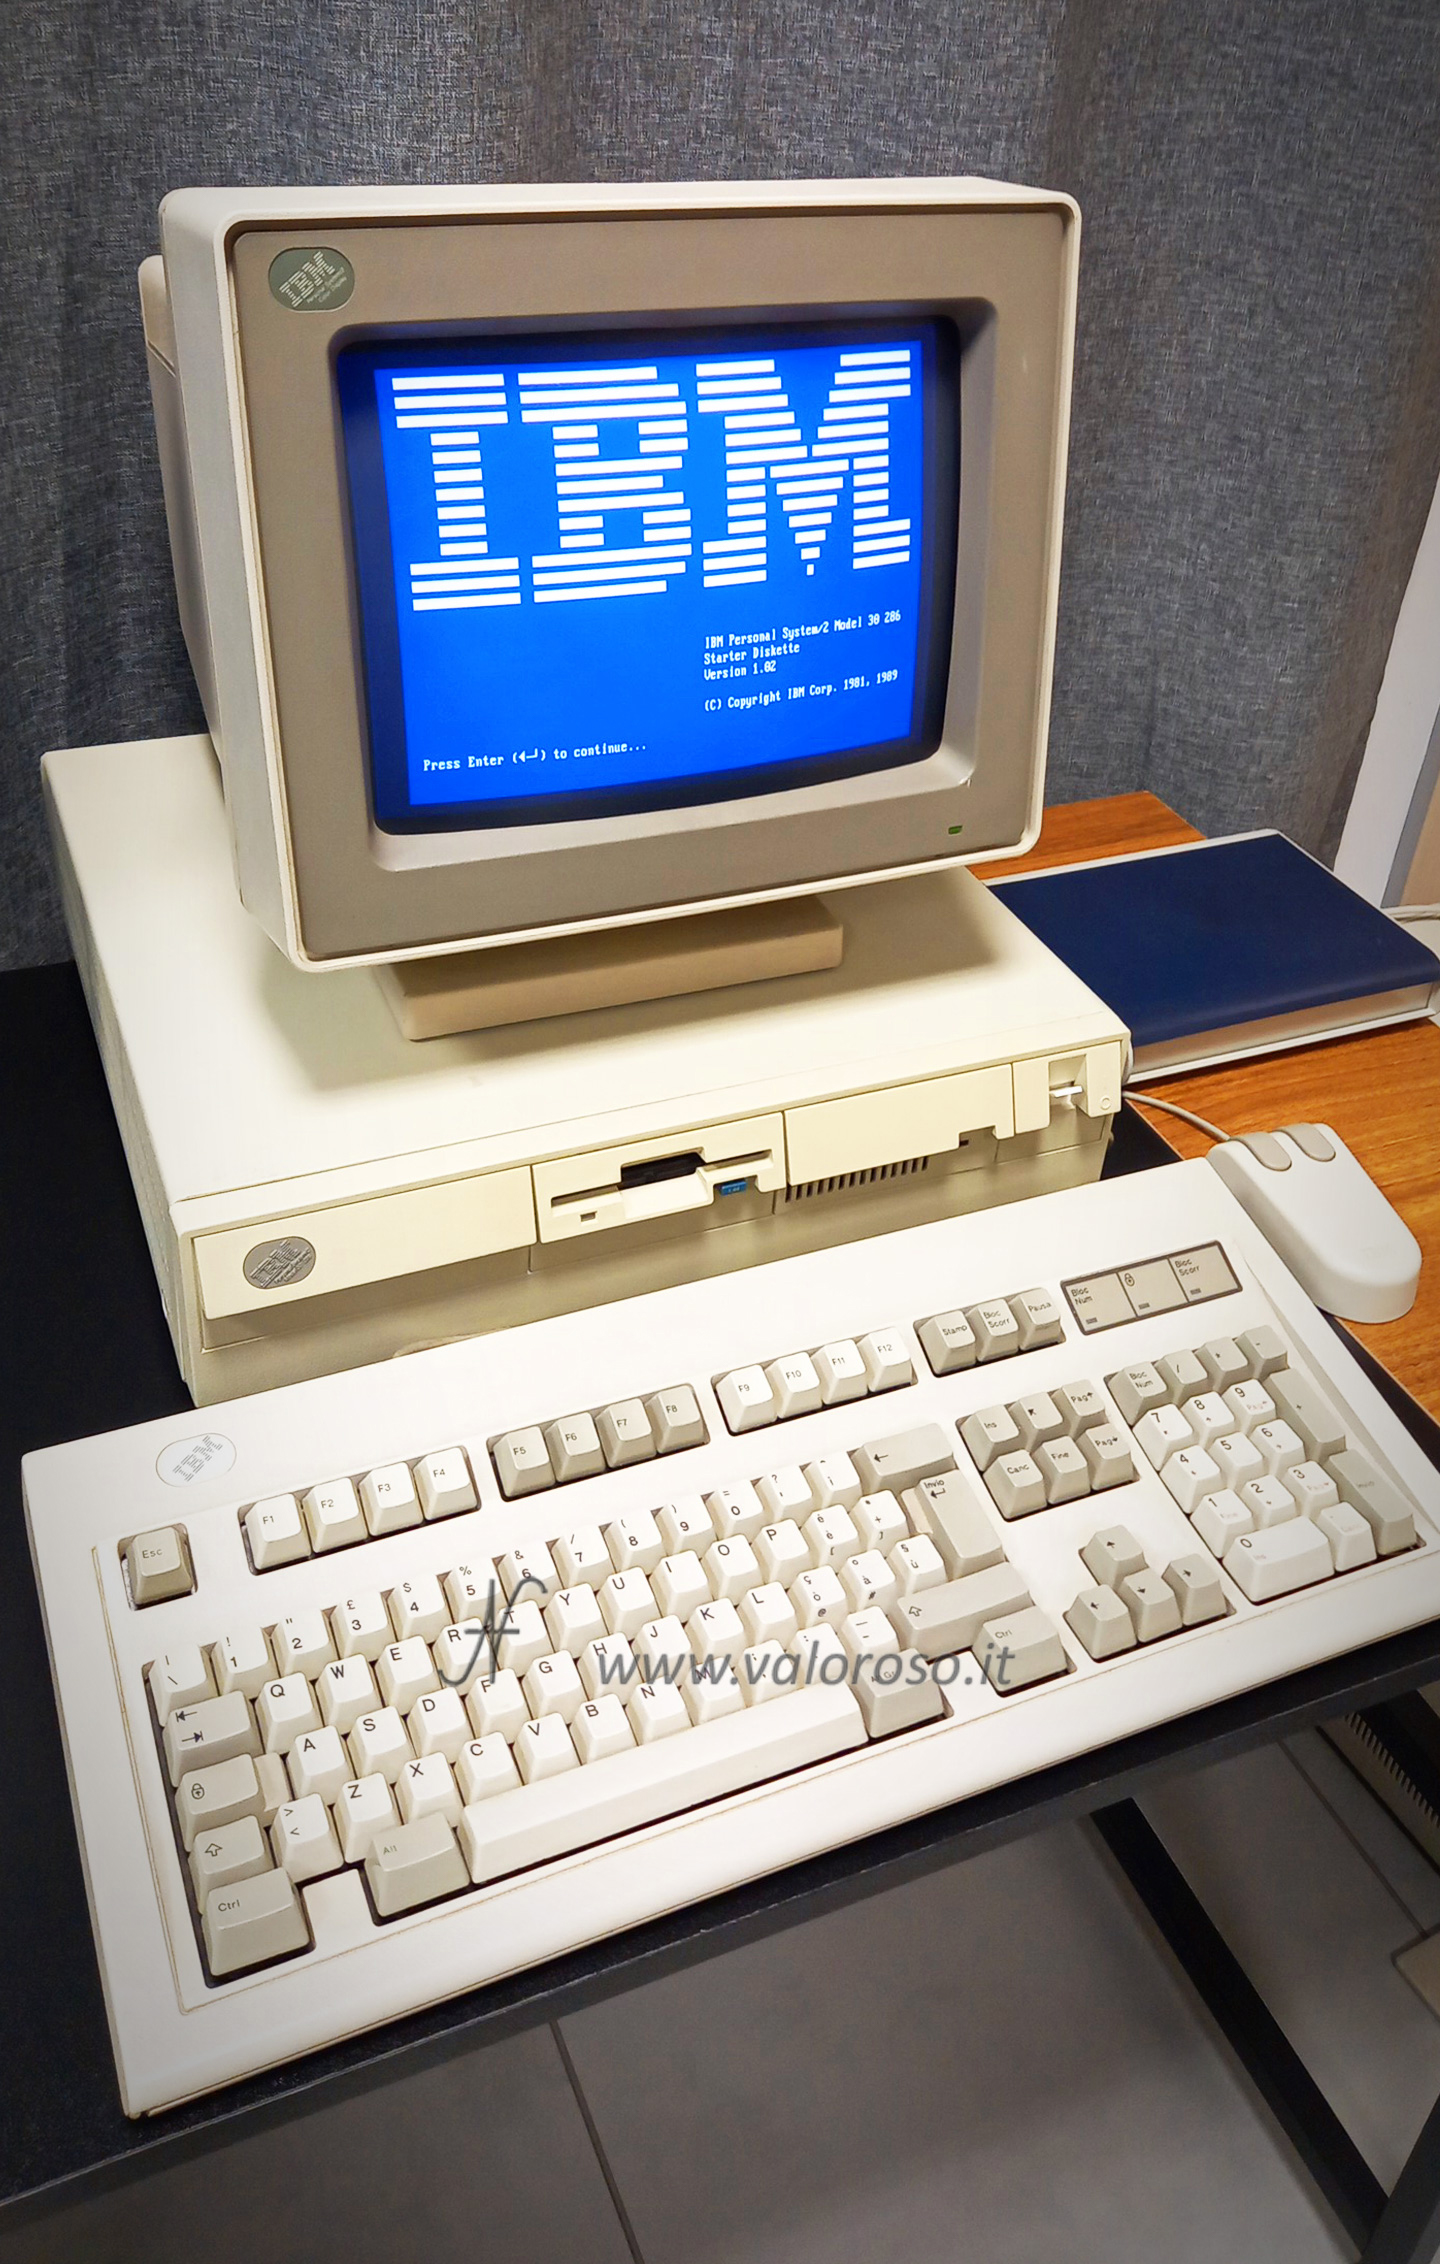
Do you have an old IBM computer, maybe a PS/2 Model 30 or another machine from the late 80s or early 90s, that no longer maintains the BIOS configuration? Do you end up with errors 161, 162, and 163 when I start up? Probably the problem is in the Dallas DS 1287...

These codes indicate known issues related to the CMOS battery:
- 161 – Bad CMOS battery
- 162 – Configuration error
- 163 – Clock not updating or invalid time set
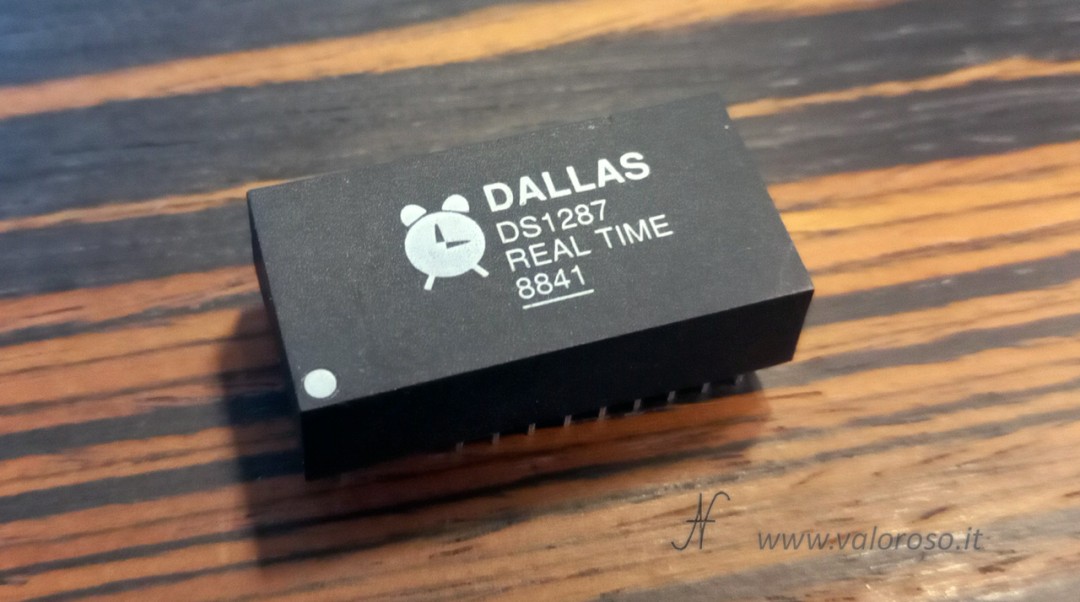
The main cause is the discharged internal battery. However, on many vintage computers, this battery is not mounted in a common battery holder on the motherboard, but is encapsulated inside a plastic chip: the Dallas DS 1287, also known as the "Real Time Clock" (RTC) with integrated battery.
Fortunately, if you have a bit of manual dexterity and the right tools, you can modify the original Dallas DS 1287 chip to install a replaceable external battery. In this technical guide we see how to perform the modification of the Dallas DS 1287 external battery, step by step.
What is the Dallas DS 1287
The Dallas DS1287 is an all-in-one chip that incorporates:

- A real-time clock (RTC)
- CMOS memory for BIOS settings
- An internal 3V battery (non-replaceable)
The problem is that, after 30 to 40 years, this battery is now dead, but there is no way to replace it without physically modifying the chip.
Available Options
Sostituire il chip con un’alternativa moderna, come l’nwX287 by Necroware: soluzione plug & play, perfetta per chi preferisce evitare il fai-da-te (piuttosto spinto, come vedremo dopo).
I talked about it in this article.
Modify the original Dallas DS 1287 chip, by extracting the contacts of the old battery and connecting an external CR2032 battery.

Here we focus on the second option.
Attention to safety
Before proceeding with the modification of the Dallas DS 1287, disconnect the power supply to the computer, remove the plug, and make sure that you know how to safely use tools such as soldering irons, cutters, and testers.
Tools Needed
- Mini cutter or Dremel with cutting disc or cutter bit
- Digital Tester
- Small slotted screwdriver or sharp scissors
- Fine-tipped and tin soldering iron
- Thin electrical wires (red and black)
- Battery holder for CR2032
- Glue or double-sided adhesive to attach the battery holder
Steps for modifying Dallas DS 1287 external battery
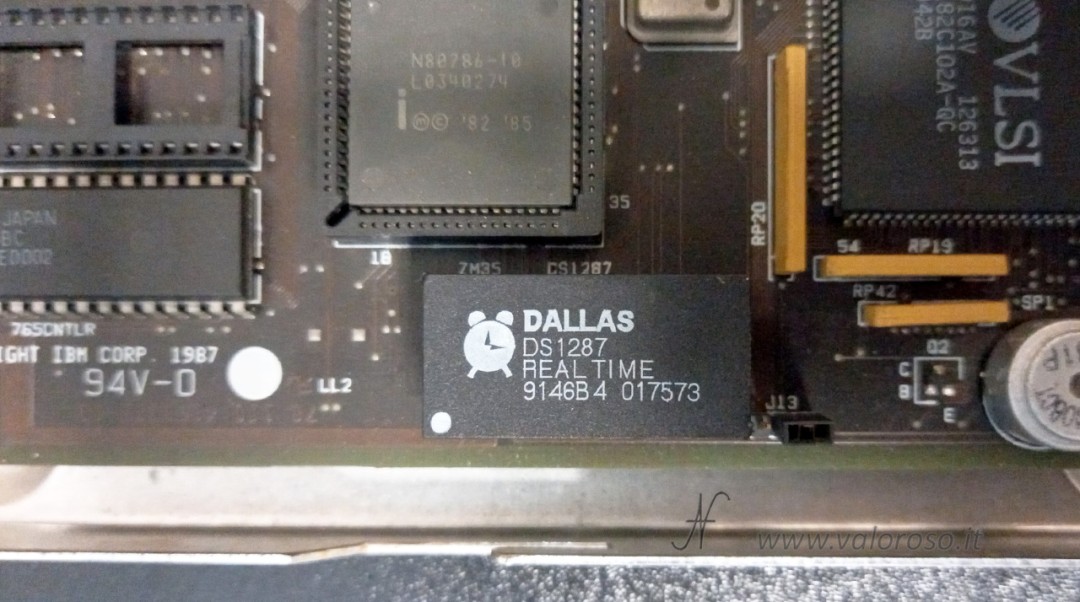
Remove the Dallas DS 1287 chip
On most motherboards, the DS1287 is socket mounted. If so, you can simply remove it by gently prying it off. If, on the other hand, it is paid, it will have to be unsoldered.
It is necessary to remember the orientation of the chip! Write it down or take a photo before removal.

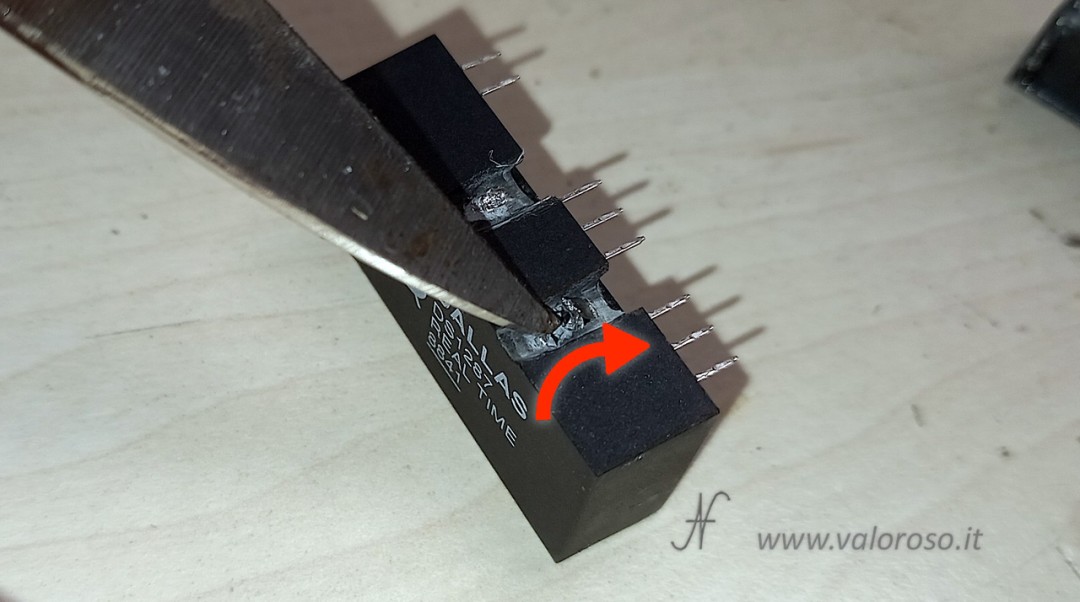
Identify the internal battery contacts
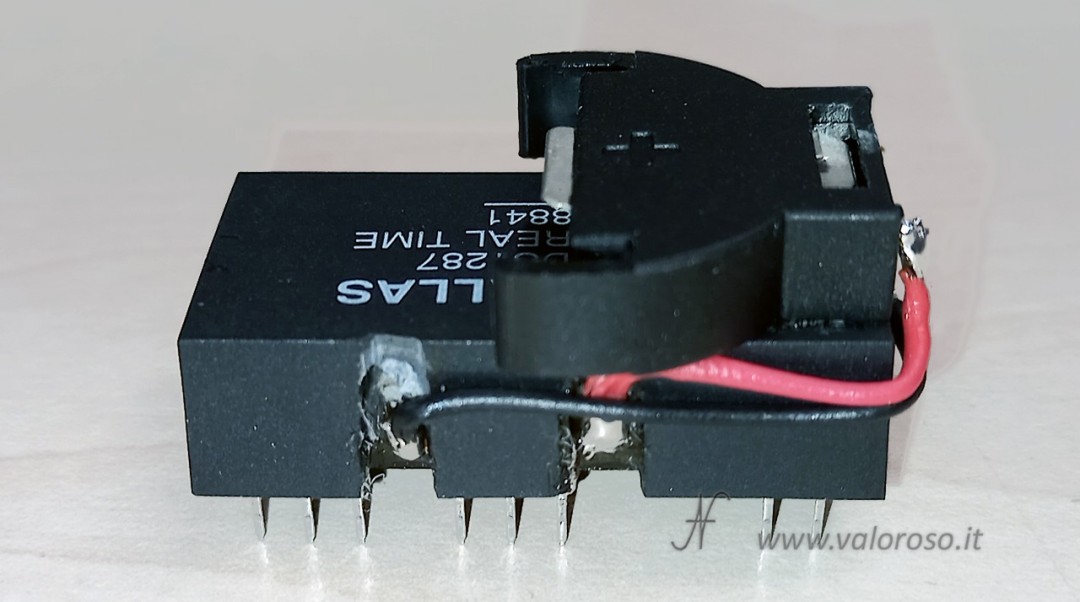
Place the chip on its side and identify the area where pins 16 and 20 are located, which correspond to the negative (GND) and positive (VCC) terminals of the battery.
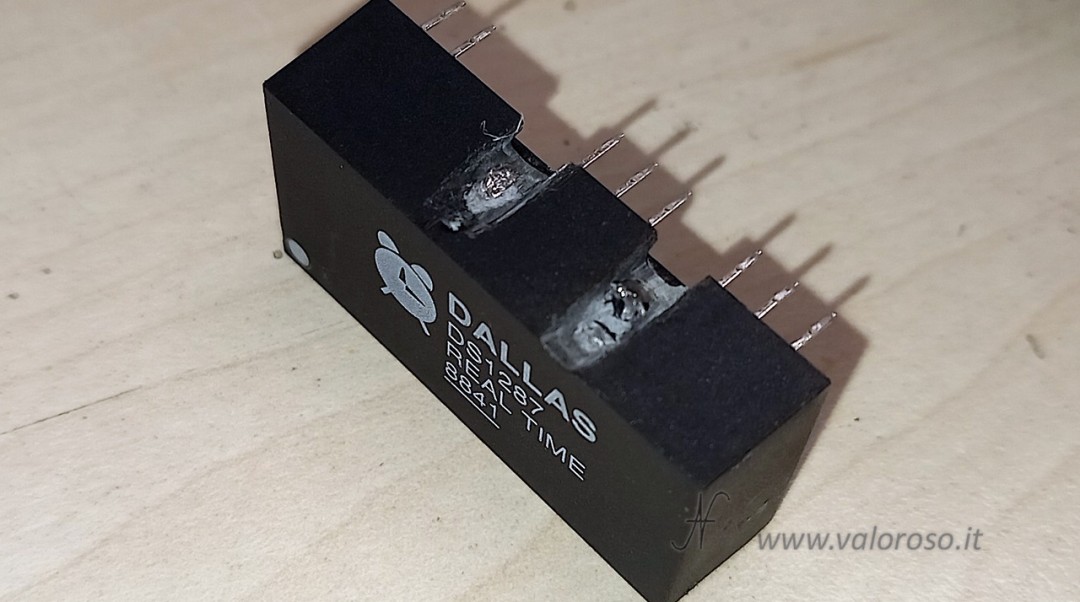
These two feet are missing, but their hypothetical position must be identified to mark the part that will be milled.

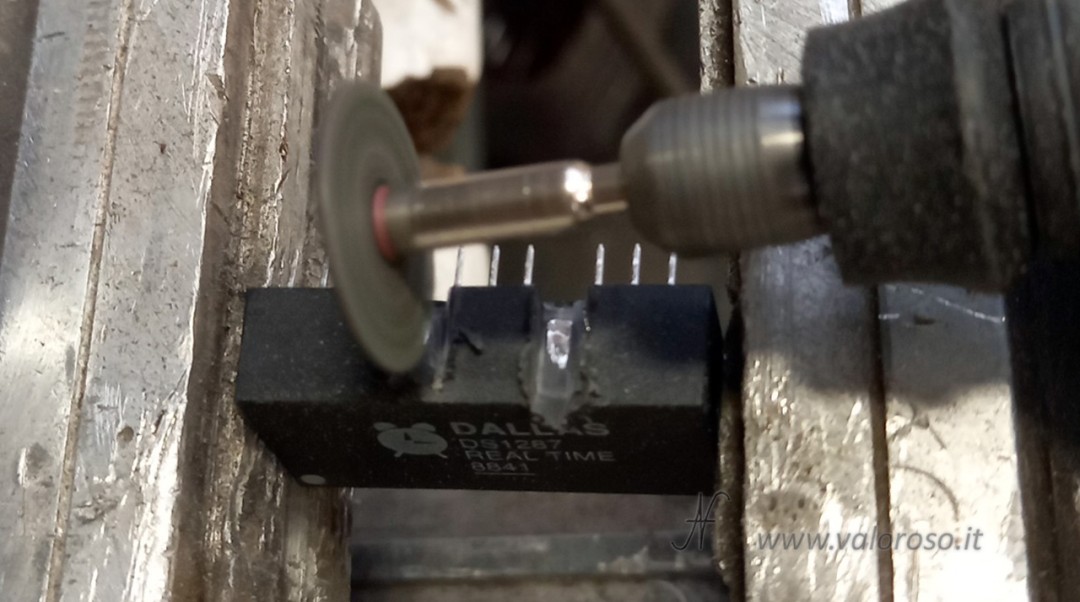
Milling plastics carefully
Using a precision mini cutter, such as the Dremel described above, slowly remove the plastic over the inner contacts at pins 16 and 20. Without haste: the goal is to dig up the plastic to get to the metal underneath, without damaging it.
Measuring the voltage with the tester
Optional step. Apply the test leads of the tester to the exposed contacts. Since the internal battery is discharged, the measured voltage will likely be a few tens of millivolts. A charged battery would provide about 3V.
Stop the negative contact of the internal battery
Using a sharp object (e.g. small slotted screwdriver or pointed scissors), break and slightly lift the negative contact (pin 16). Work from the top (opposite side of the pins) downwards, drilling the metal lamella and lifting it slightly. This will break the connection between the old battery and the rest of the circuit.
This step is crucial, although you will find articles online that omit it entirely. If you do not break contact, the new battery will discharge through the old one, affecting the durability and functionality of the change.
To check for the break, measure the voltage again: different values must be read on the two sides of the contact. In particular, between the positive and the blade towards the chip cover, the same voltage as before will be measured. Instead, between the battery and the reed towards the pins of the chip, there will be a lower voltage, perhaps nothing, but still different.
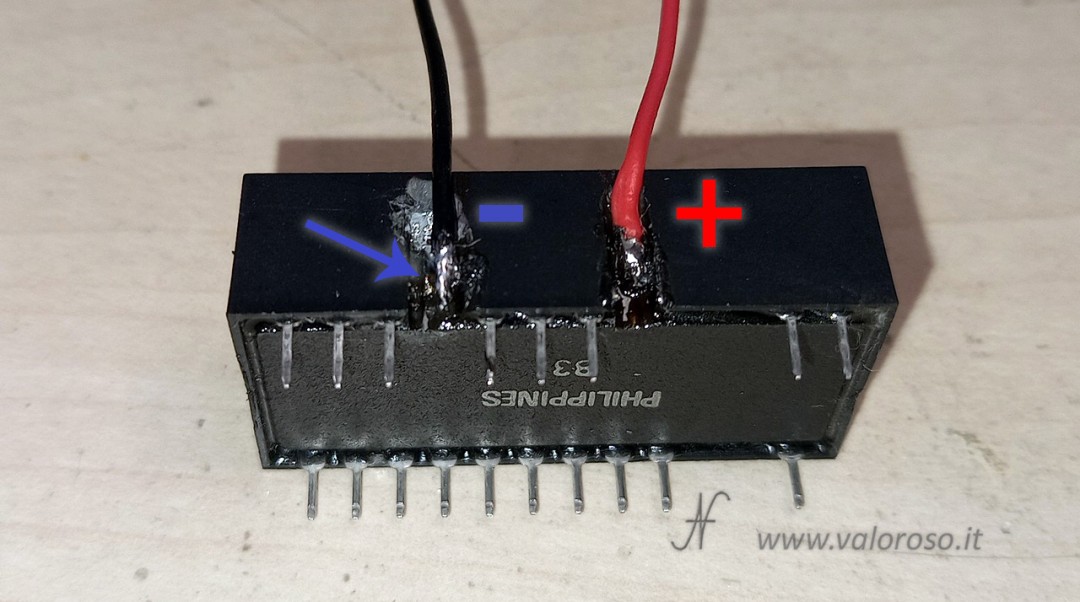
Solder the wires for the new battery
Red wire: to be soldered on the positive contact (pin 20).
Black wire: to be soldered on the negative contact (pin 16, from the side towards the pins).
Work with precision!
Attach the CR2032 battery carrier
Attach the battery case on top of the DS1287 chip with Bostik glue for plastics, super attack or strong double-sided tape.
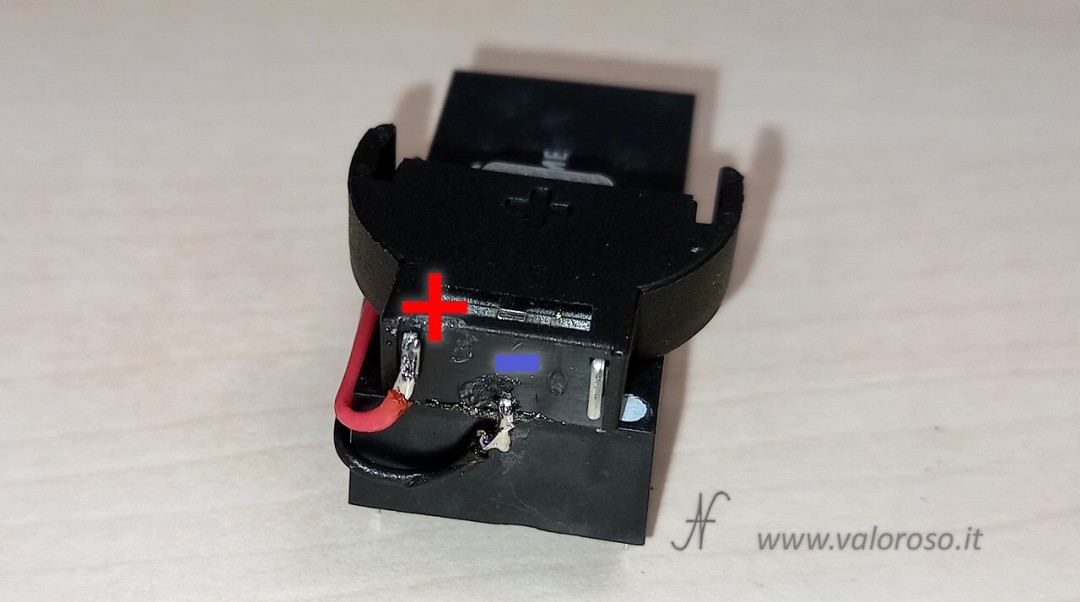
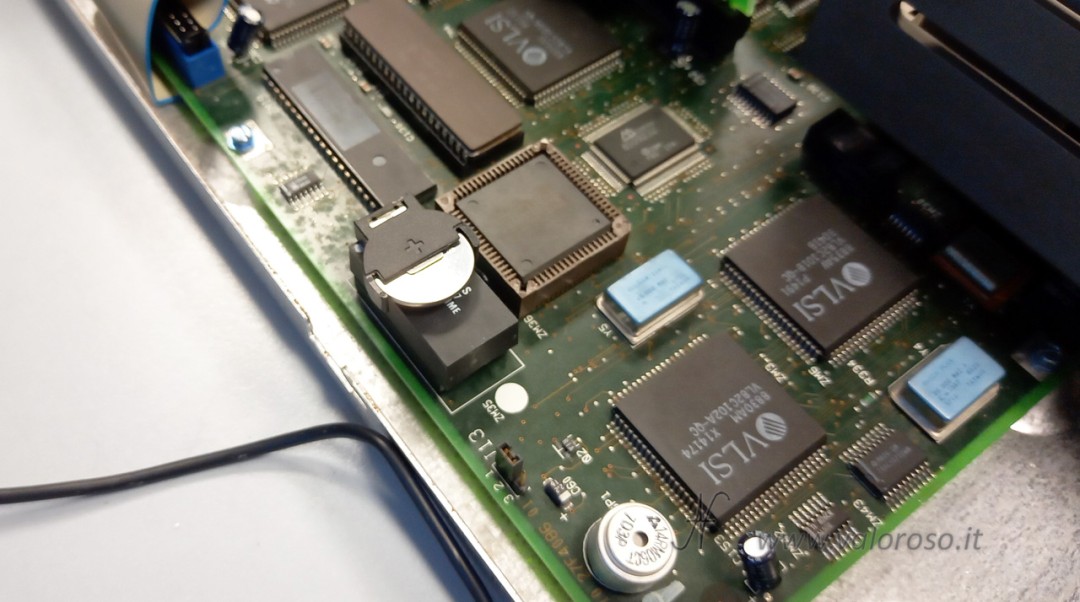
Before gluing the battery case, it is good to check the space in the case of the vintage computer: in my IBM PS/2 there is plenty, but in other cases you may have to move the battery holder to a freer area, using longer wires.
The battery holder I chose accepts different types of lithium batteries: CR2032, CR2025 and CR2016. I prefer the CR2032 battery, which has a larger capacity than the CR2025 or CR2016. It will last longer, before it runs out.
Insert the modified chip into the motherboard
Insert the chip back into its socket (or solder it again) in the original orientation.
Now insert the lithium battery, always respecting the polarity.
Reset BIOS configuration
Despite all the work done so far, when starting the computer, there will still be errors 161, 162 and 163 - this is normal.
If your computer is an IBM PS/2, follow these steps to resolve the errors.
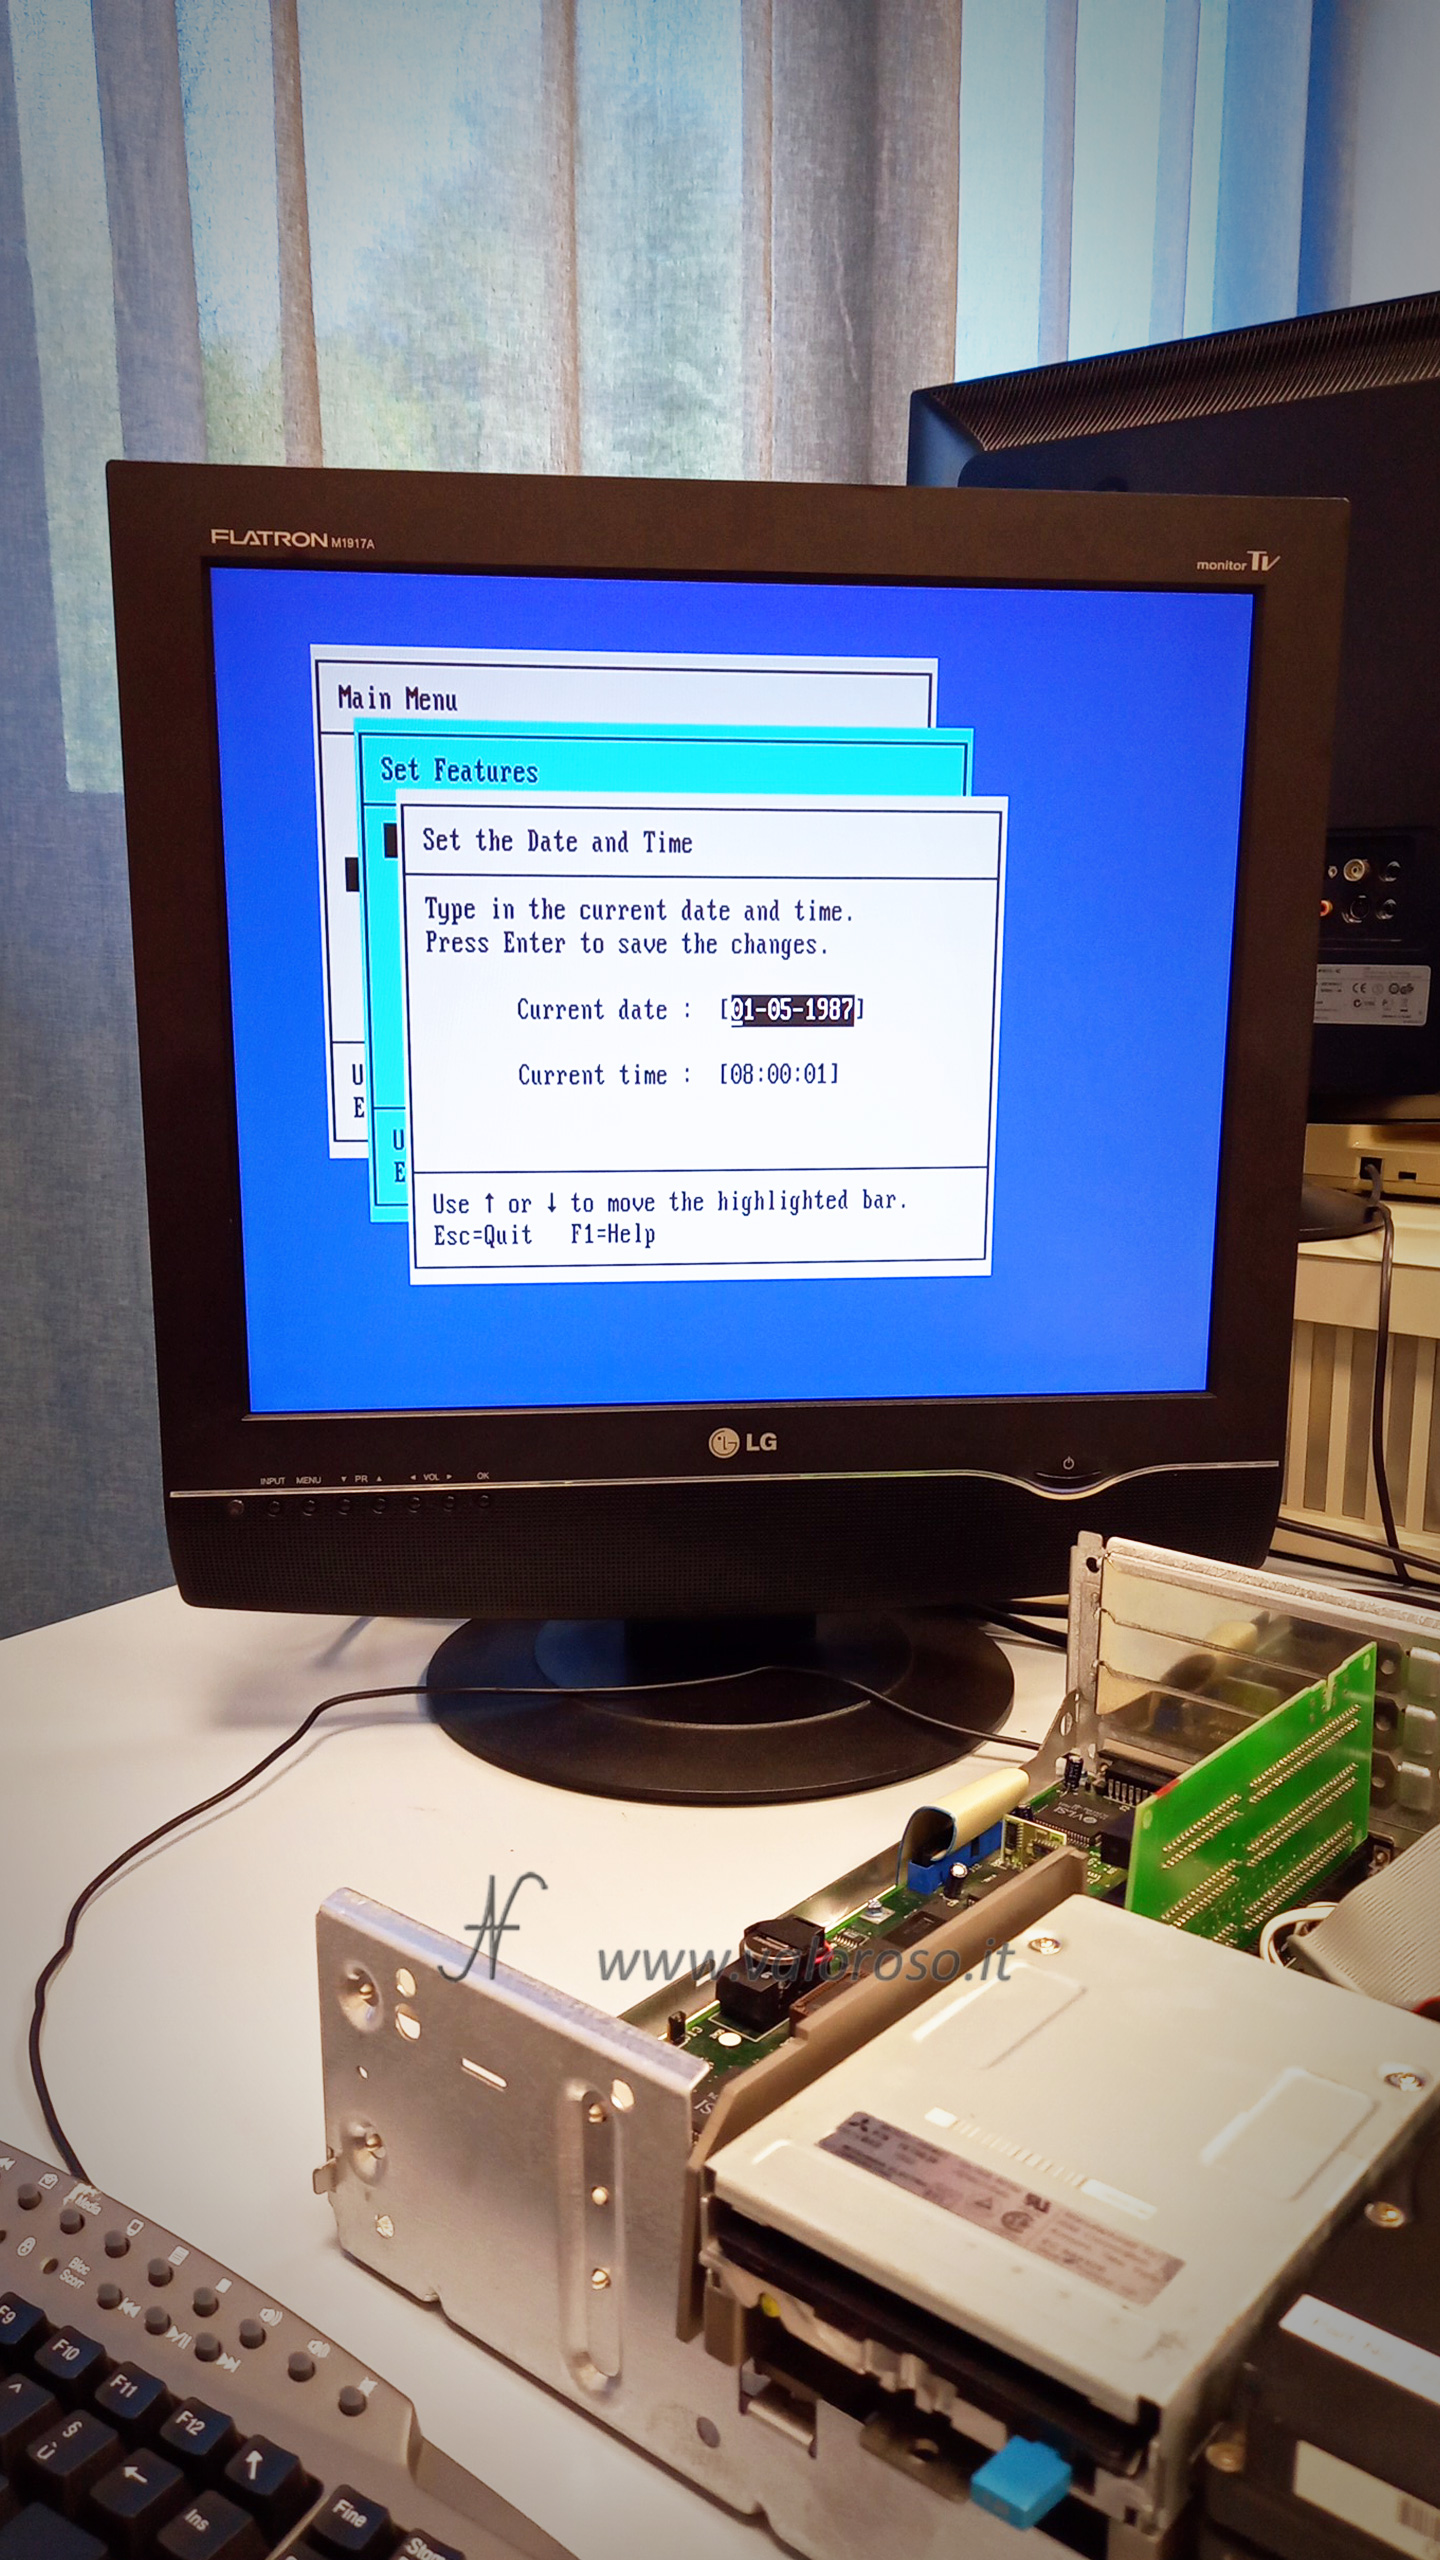
Insert the IBM Starter Diskette before turning on the computer.
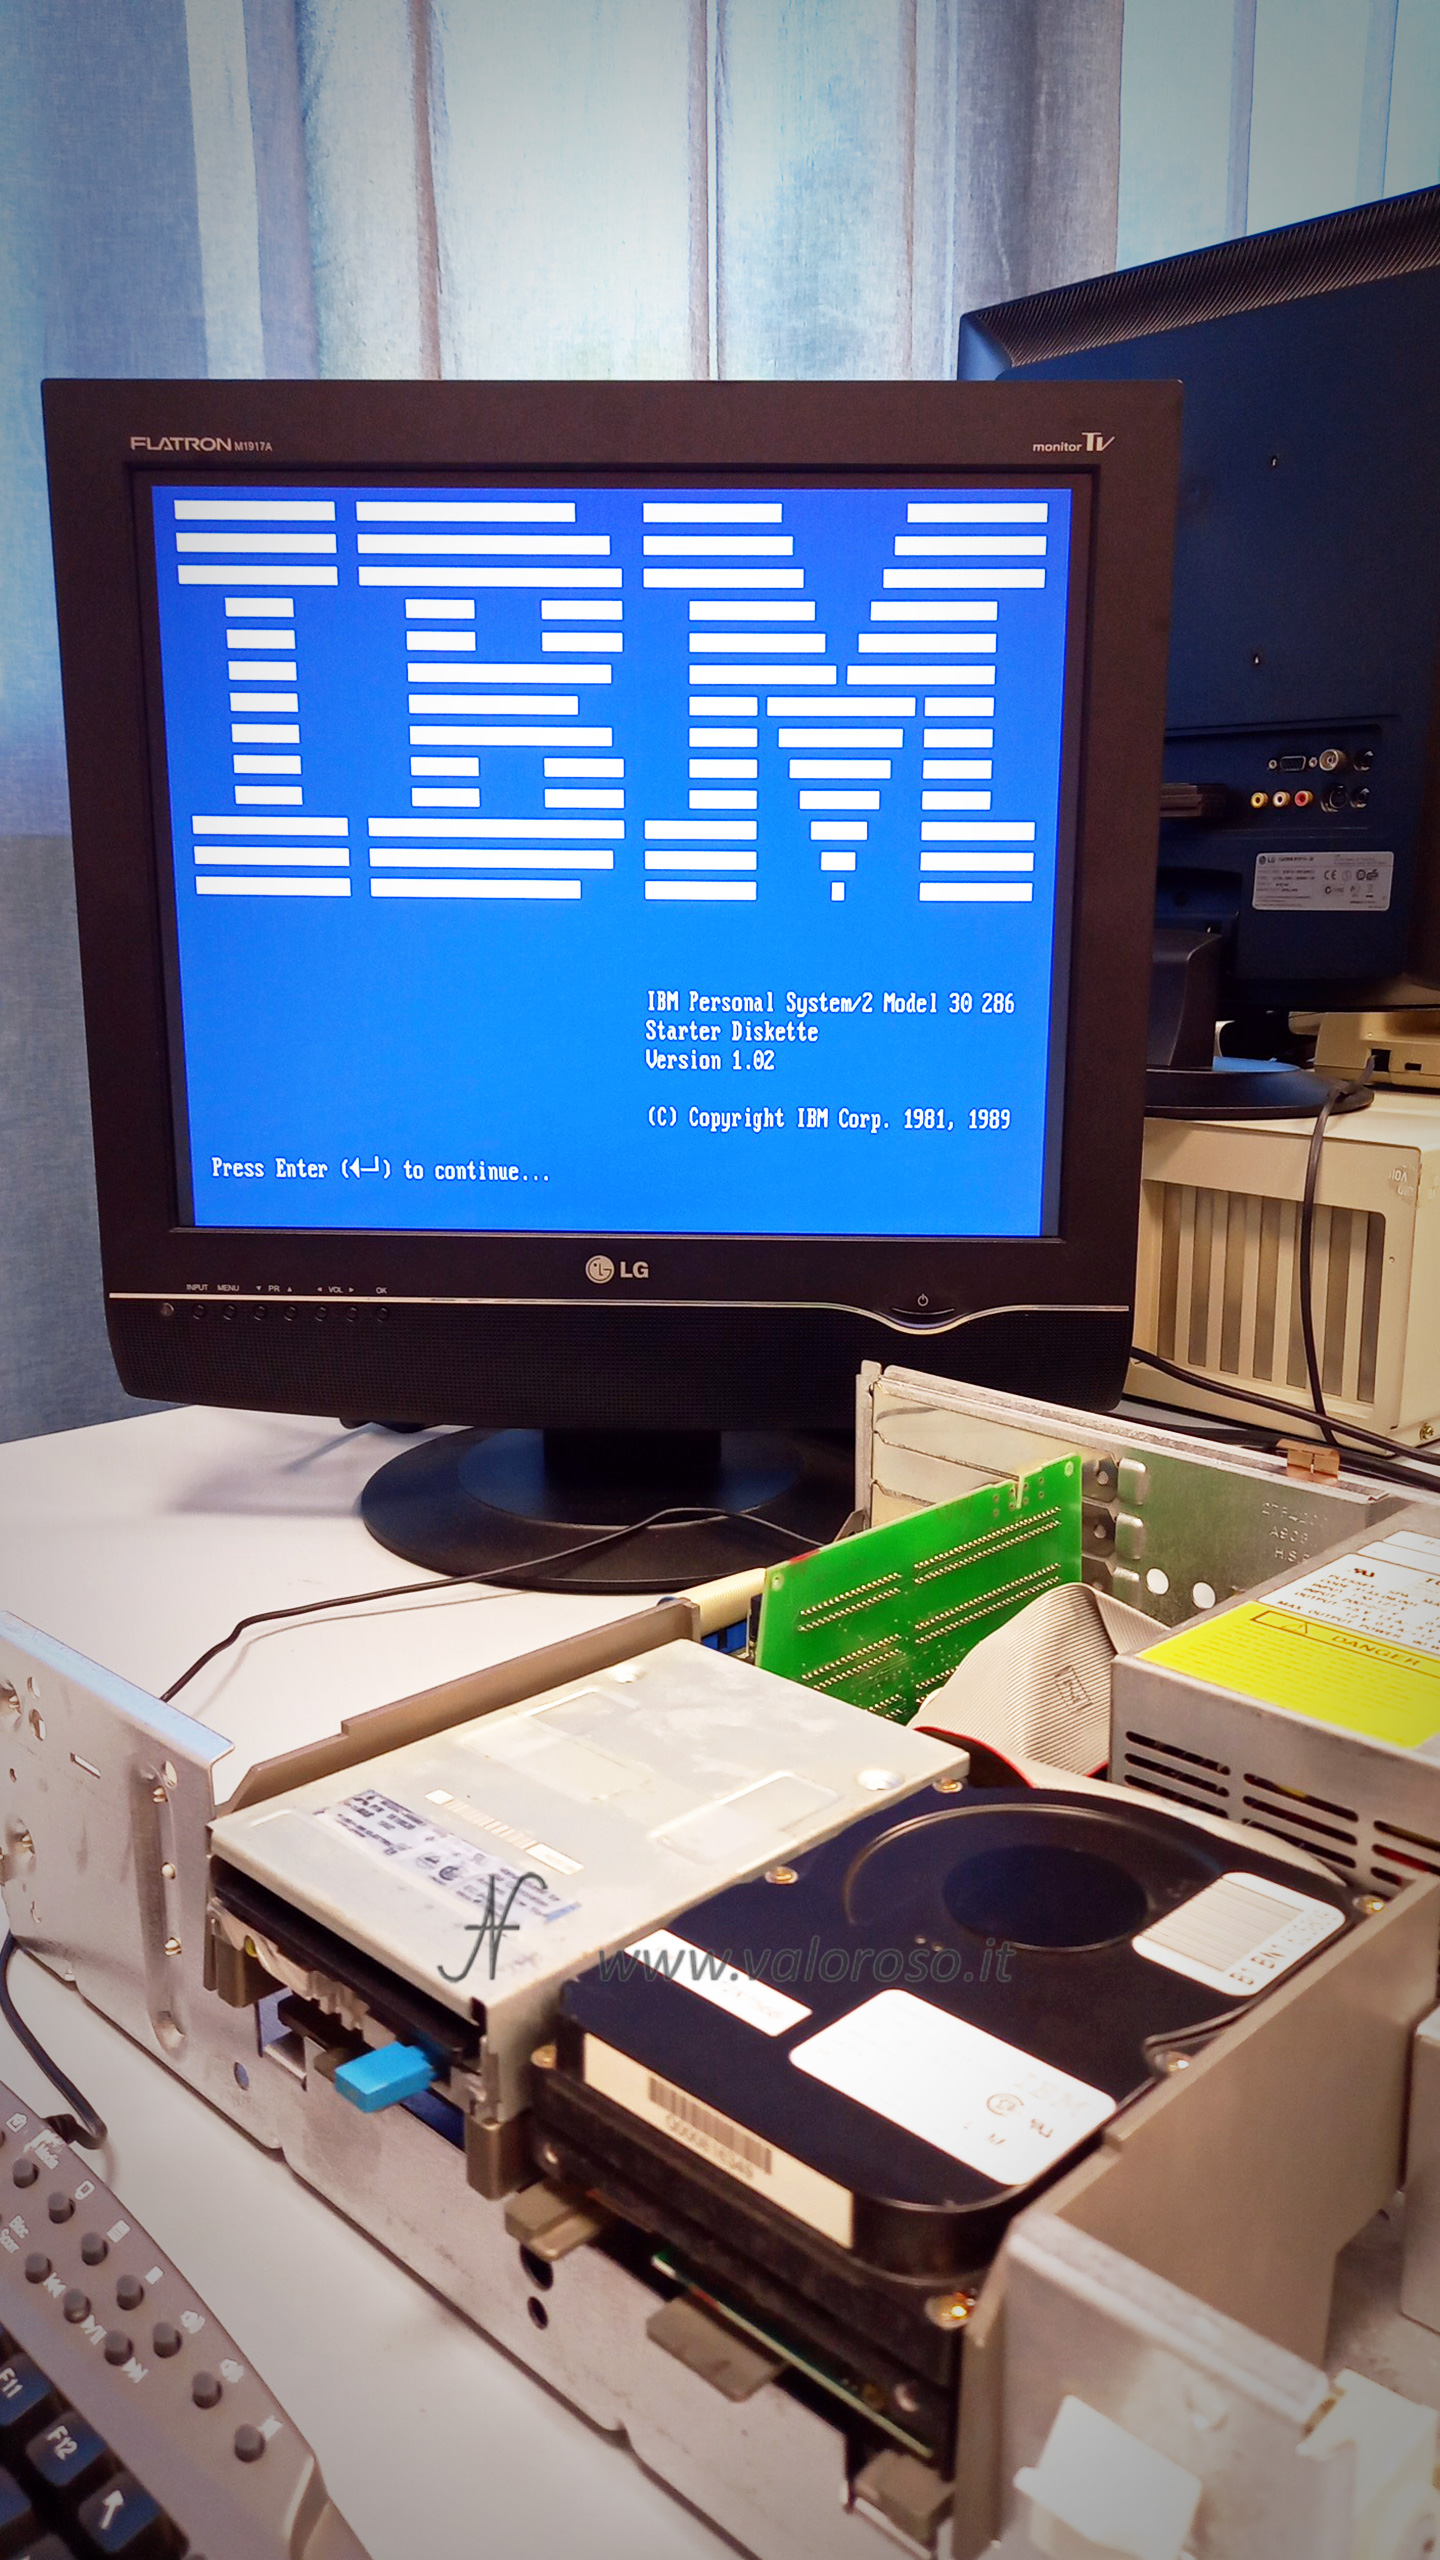
Follow the automatic setup steps.
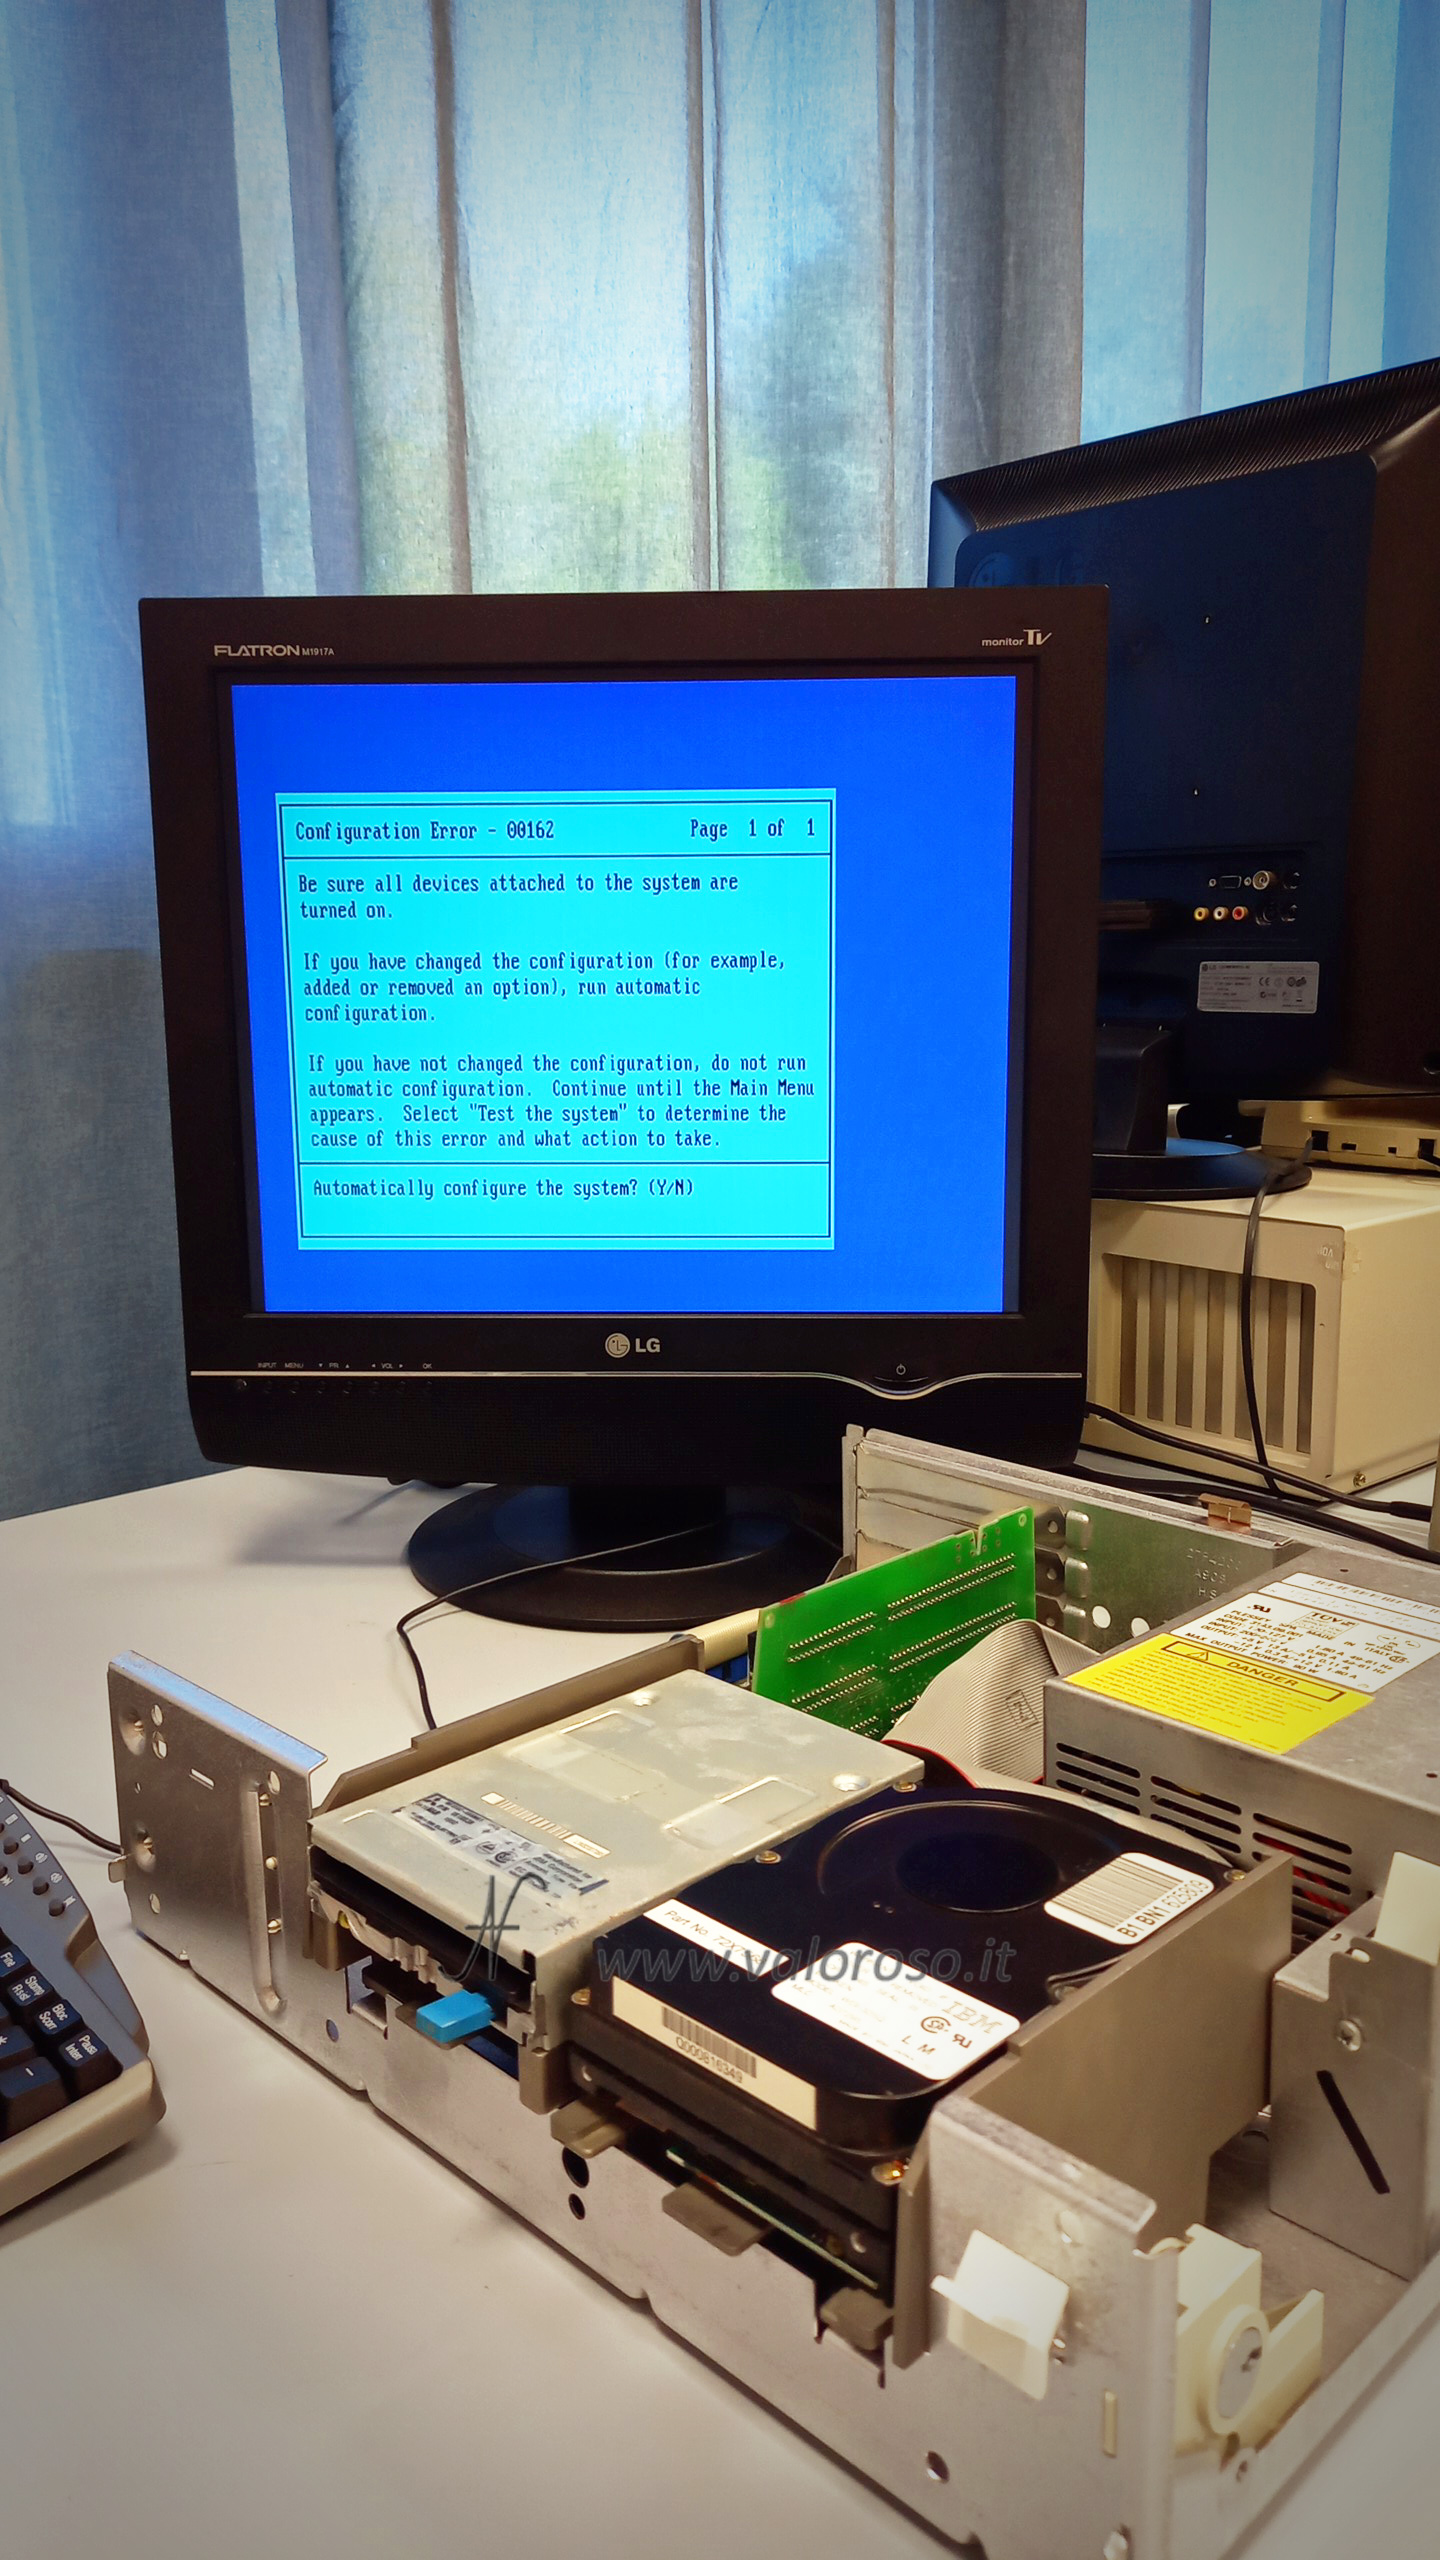
After rebooting, still with the floppy disk inserted, you can then set the date and time.
Now your vintage computer is back up and running and retains its settings properly, even when it's turned off!
If you have other computers, the setup process might be different. Your computer may need a specific diskette, or it may have a built-in BIOS setup utility.
Passionate about vintage computers?
If you liked this technical guide, follow me on @ValorosoIT on YouTube, TikTok, Facebook, Instagram and Threads, for more tutorials on repairs, unboxing, modifications and curiosities from the world of vintage computers!