Welcome to the third article about Windows storage spaces. Today I describe how to eliminate the storage spaces of Windows 10 and beyond. Before I delete storage, I do two more experiments on virtual drives:

- I think two virtual drives in the same storage space;
- I imposed a virtual drive with capacity greater than the hard disk pool.
Experiments are always carried out in mirroring 2-way, useful setting to mirror files on two hard drives in real time, reducing the chances of losing data in the event of a physical disk failure.
For those who had lost them, here are the links of the previous articles:
- Windows 10 Storage Spaces, mirroring to protect data (This article explains how to create a mirrored storage space);
- Archive spaceszWindows 10 ion, performance and simulation of a failure.
Mirrored virtual drive, with a capacity greater than that of the hard disk pool
By creating a 2 -way virtual unit in mirroring, I am surprised that it was possible to set up a higher capacity than that of the smaller hard drive that composes the pool. In case of mirroring, the ideal would be to install two hard disks of the same ability and similar performance. In the case of the experiment described in this article, I used two different hard drives. The hard drive of lower capacity is 250GB (equal to 231GB useful), and this is the capacity that I have set, at least initially, for the virtual unit. In fact, since the data is mirrored, in an identical way, on two physical hard drives, the virtual unit's ability is limited by that of the low disk of lower size.
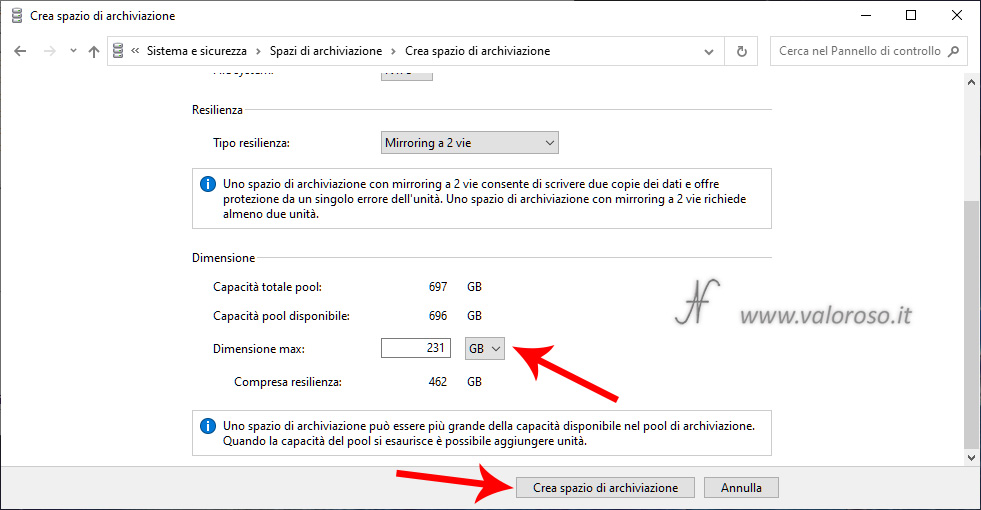
But what happens if you set a capacity greater than the theoretical one? Windows already suggests the answer, in the appropriate information box. I then tried to set 1000GB, instead of 231GB. For the exact procedure of how to get to this screen, I invite you to read the first article related to storage spaces.

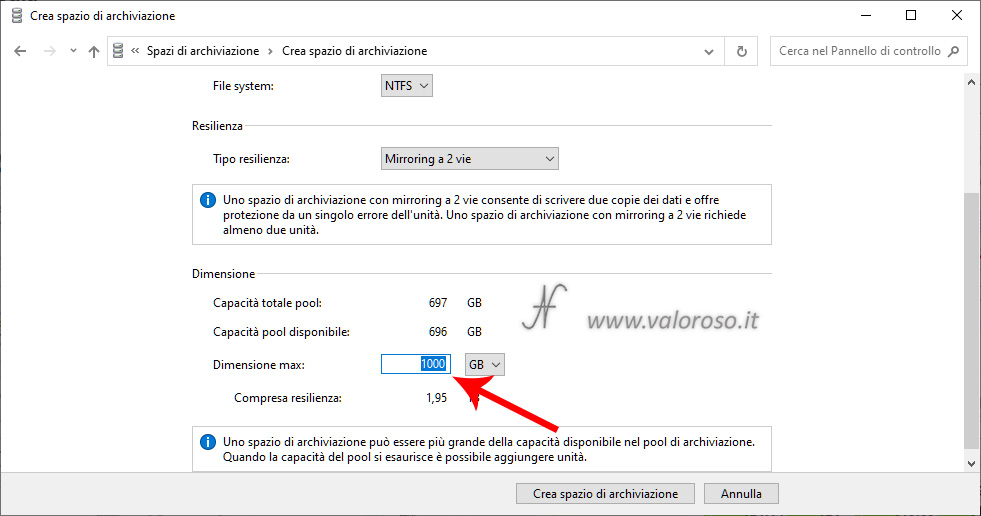
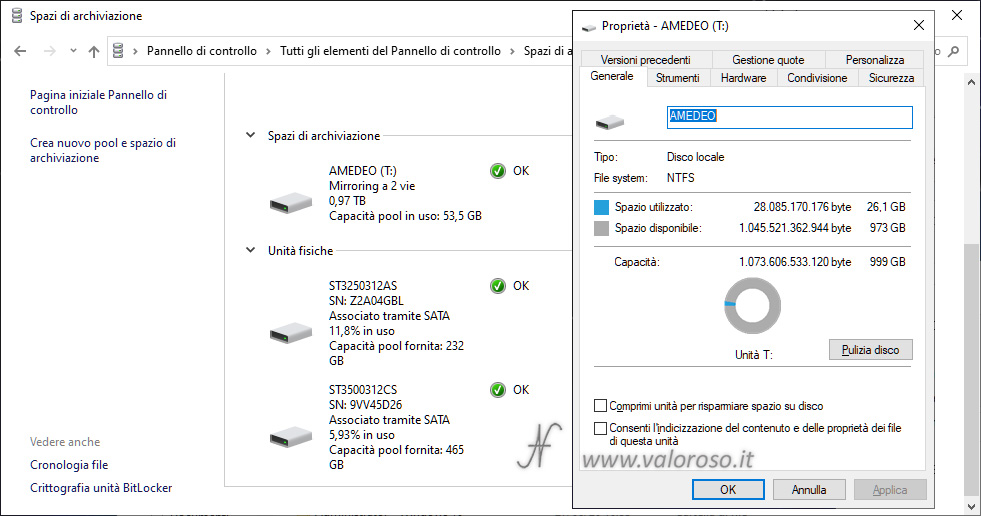
While setting a virtual unit of higher size than those allowed, Windows remains impassive! The unit (which I assigned the letter t) is created and the space is also available in the properties of the disc.
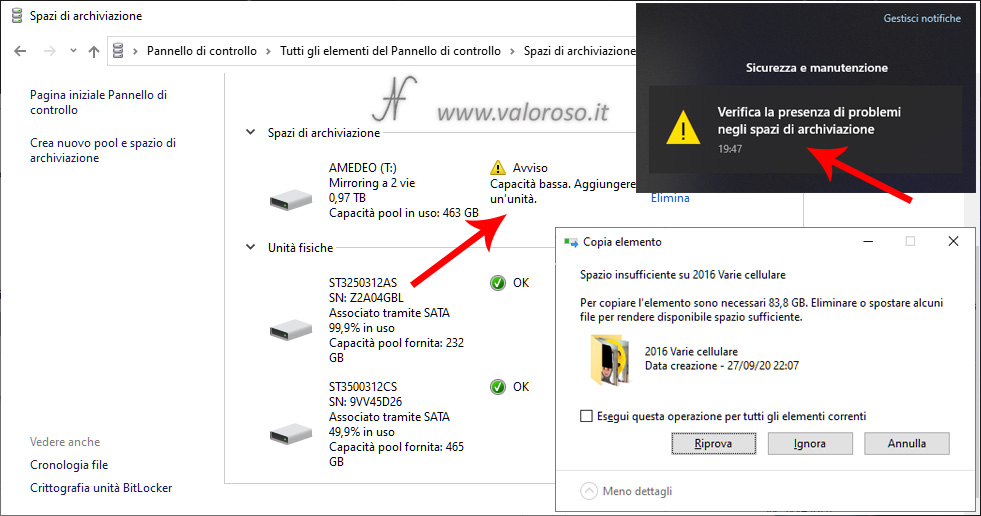
Obviously, the space available in the virtual unit of the storage space cannot be created from nothing. By trying to fill virtual unit T with some files, the capacity cannot exceed theoretical hardware limits, in this case 231gb.
Some errors are displayed: both during the copy of the files and in the notification area. In fact, Windows asks to add some hard disks, to reach the desired ability. Being a virtual unit in 2 -way mirroring, we will have to add double the hard disks necessary to reach the desired capacity.
Two virtual drives (2-way mirrored) in the same Windows 10 Storage
Another experiment that I carried out, before proceeding with the elimination of the storage spaces of Windows 10, is that of create two virtual drives (2-way mirrored) in the same storage space.

Also in this case, the sum of the capabilities of the two virtual units must not exceed the maximum allowed by the hardware, in this case 231gb. As already seen in the previous paragraph, Windows still allows you to set higher capacities, but in any case an error would be shown to fill the lower -size hard disk.
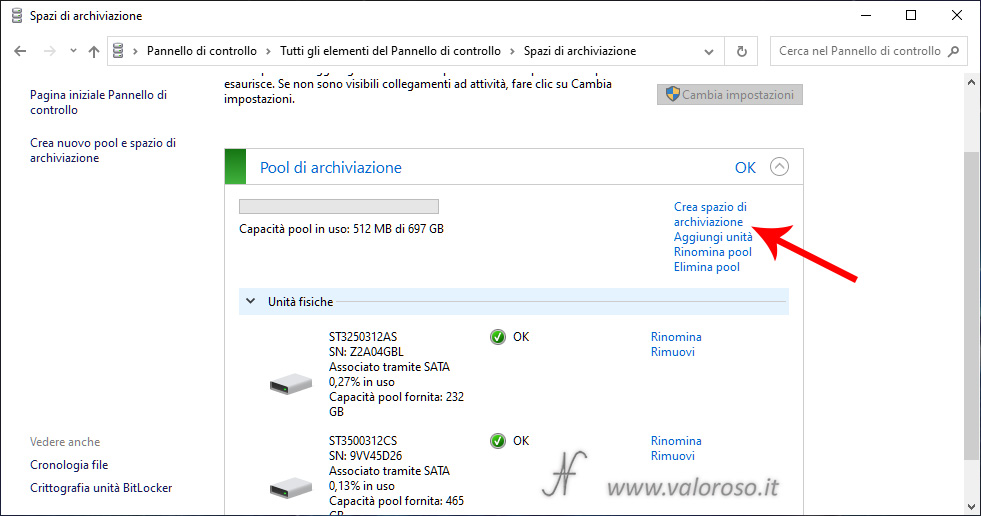
As already seen above, from the Pannello di controllo, System and security, Storage spaces, the storage pool must first be created, which, in this case, includes the two SATA hard drives of 250GB and 500GB. Next, you have to create the first storage space, by clicking on Create storage space.
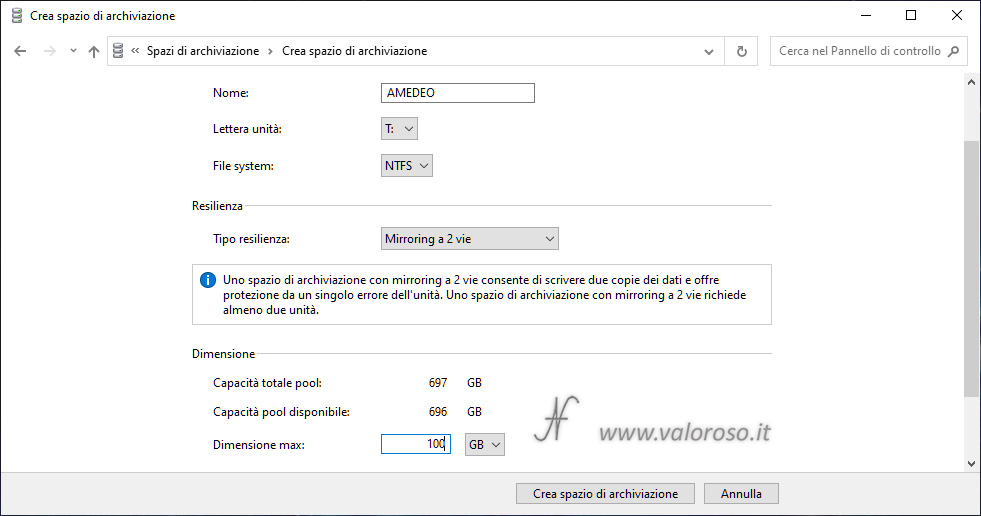
You have to set the first virtual drive, to which I assigned the letter T and a capacity of 100GB. To increase data resiliency (i.e. protection in case of failures), I selected the Mirroring a 2 vie.
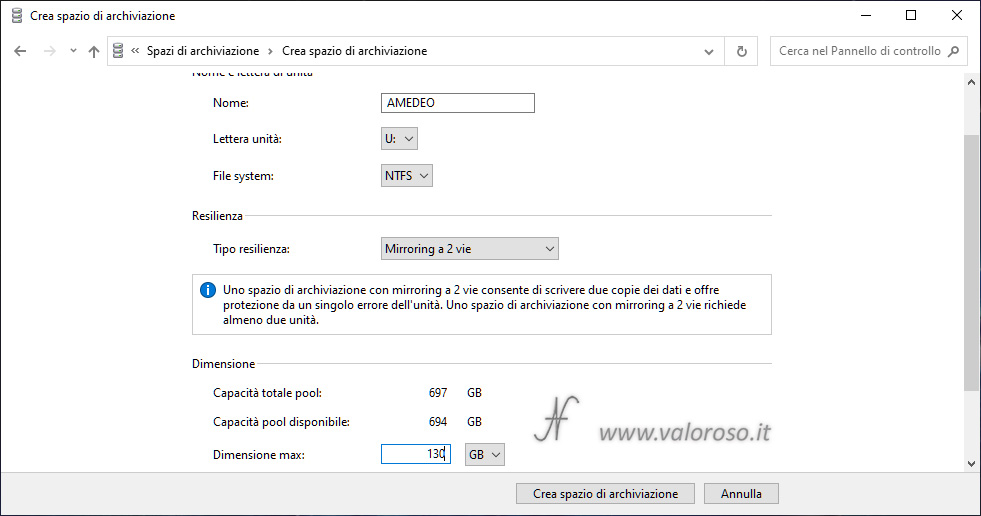
Subsequently, repeating the operation described first, I set the second virtual unit, to which I assigned the letter u and a capacity of 130GB.
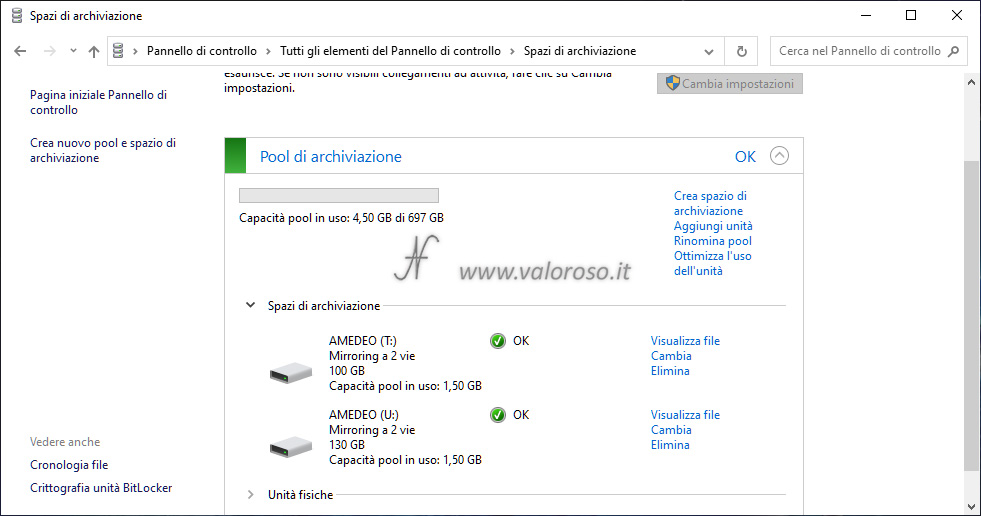
after you create the two virtual drives they are visible both between the Storage spaces, and also in Disk management, as if they were two normal hard drives. Being in mirroring, we already know that the files will be saved identical, on two hard drives, in real time.
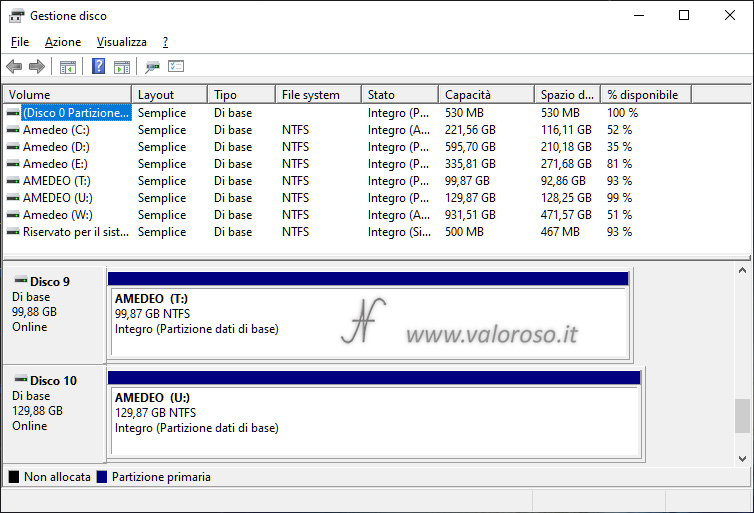
By repeating the experiment carried out in the previous article, simulating a fault, I tried to move one of the two hard drives of the pool to a second computer, always with Windows 10 operating system. The hard disk is visible and the data of the two virtual drives are also accessible from the second computer.
Deleting Windows 10 Storage Spaces
To be able to use the hard drives as singles again, you need to proceed with deleting Windows 10 storage spaces.
Any data that may be present in the virtual drives will be erased!
It is therefore necessary to enter from Pannello di controllo, System and security, Storage spaces. Click Change settings (Administrator privileges required.)
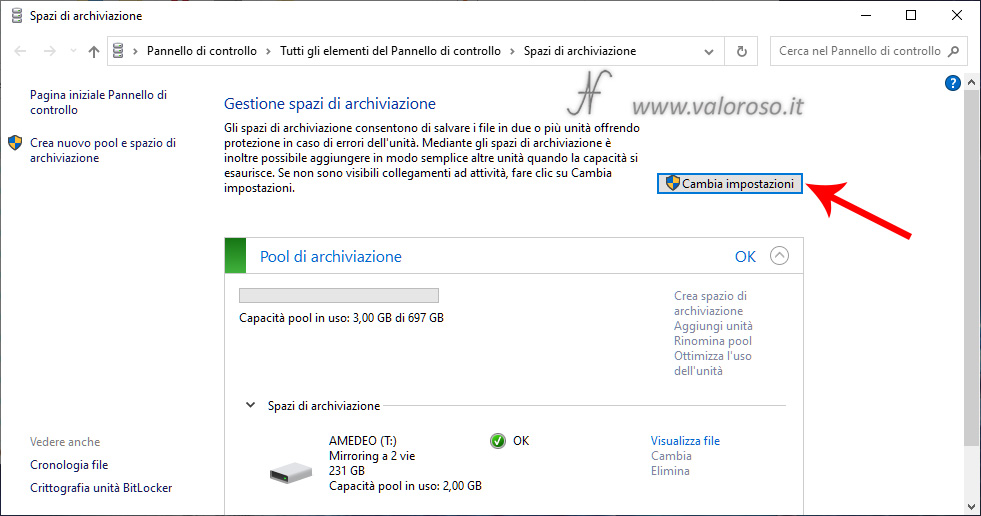
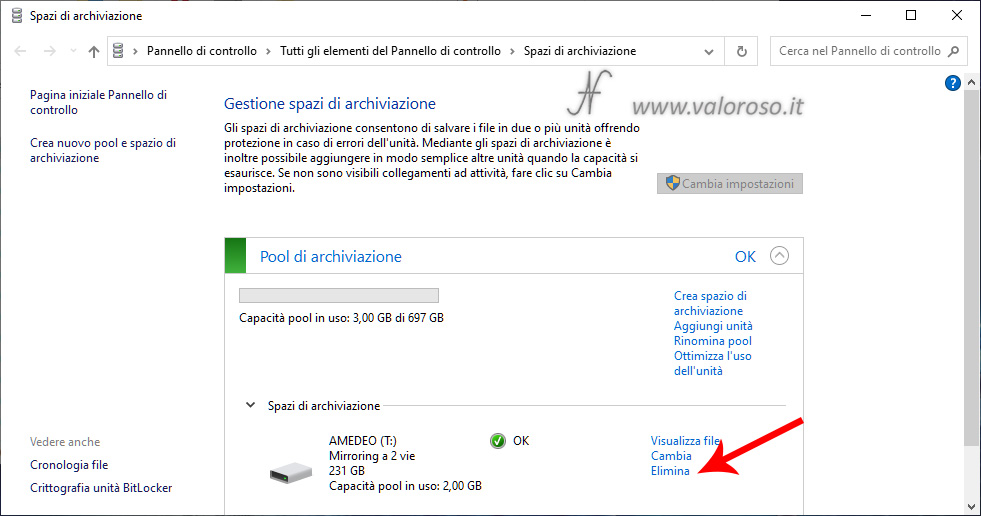
You must first delete the storage spaces (virtual drives). In this case, there is only one virtual drive, but if there were more, it would be necessary to remove them one by one. From the window Storage space management, expand the Storage spaces for the pool you want to delete, then click Remove.
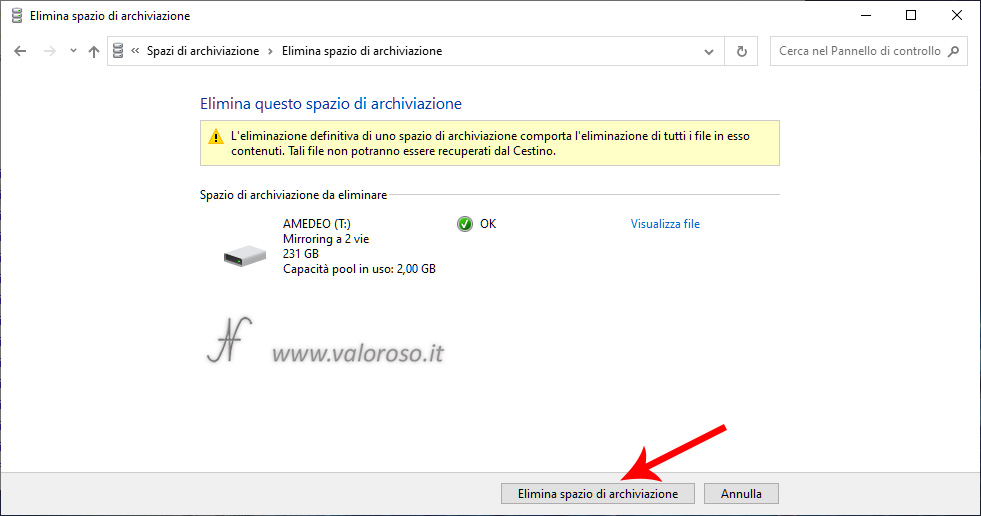
Confirm the deletion of Windows 10 storage spaces by clicking on Eliminate storage space.
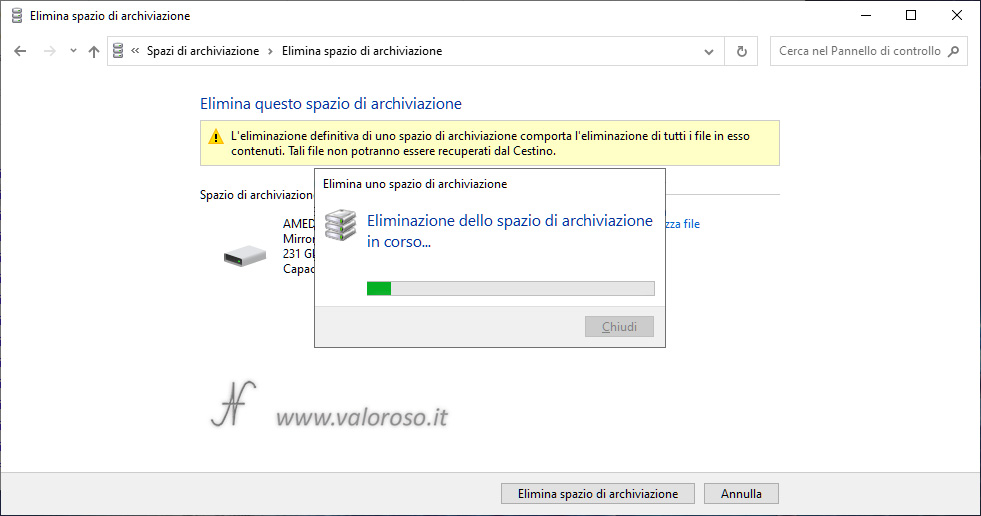
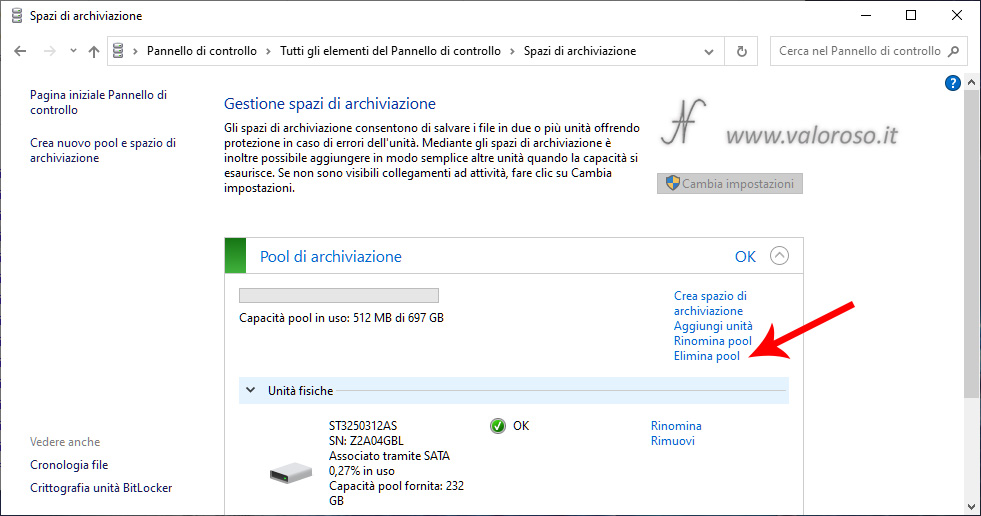
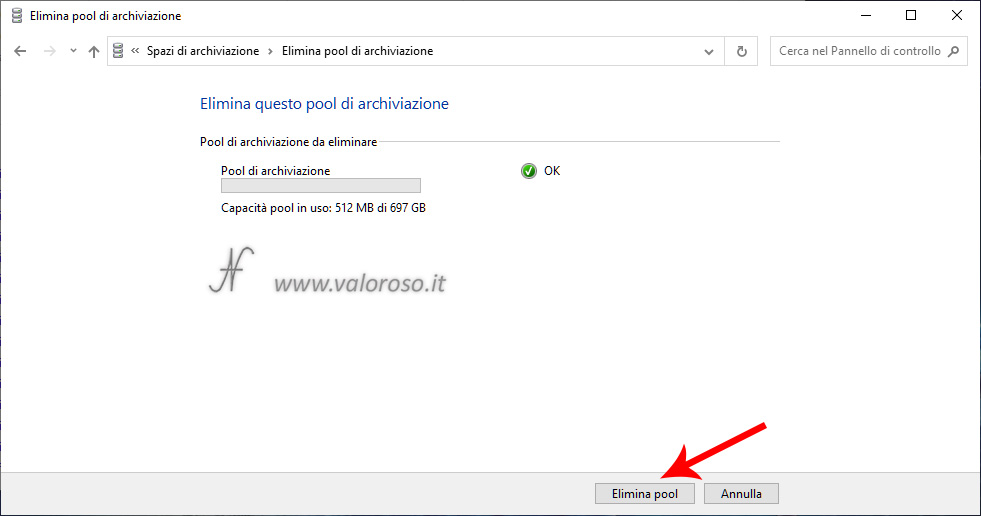
Only after removing all the virtual drives, you can proceed to remove the storage pool (the group of hard disks or SSDs). Then click on Eliminate pool, in the window Storage space management, then confirm again Eliminate pool.

At this point, the hard disks, which made up the storage pool, will again be free and empty.
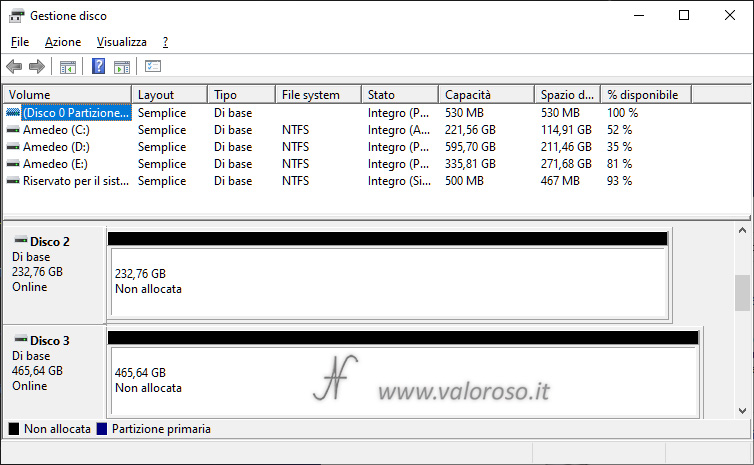
Further developments
The storage experiments aren't over yet! In the'last article of the series I have:
- created a simple storage space (a virtual unit with a capacity equal to the sum of the hard disks that compose it);
- moved storage space from one computer to another.
Simple storage spaces, unlike mirrored storage spaces, do not increase data resiliency.
