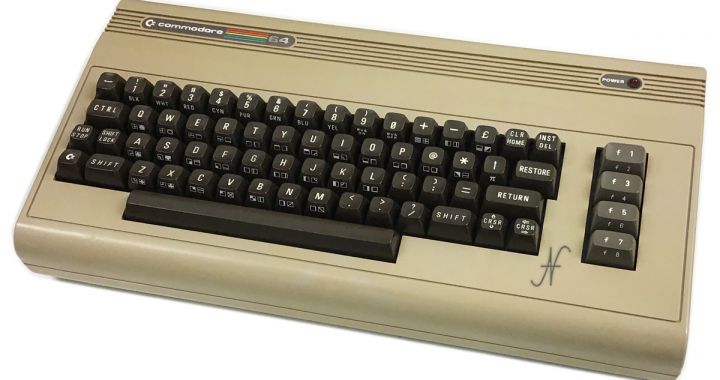
This article relating to the repair of the memory of a Commodore 64 is part of a much wider restoration. In fact, I found an old Commodore 64 retrocomputer on Facebook Marketplace for a few euros, but it presented several defects. First of all, all accessories were missing (also the power supply). The keyboard had two missing keys, the monitor showed strange characters and, finally, the audio of the computer did not work! A huge mess!

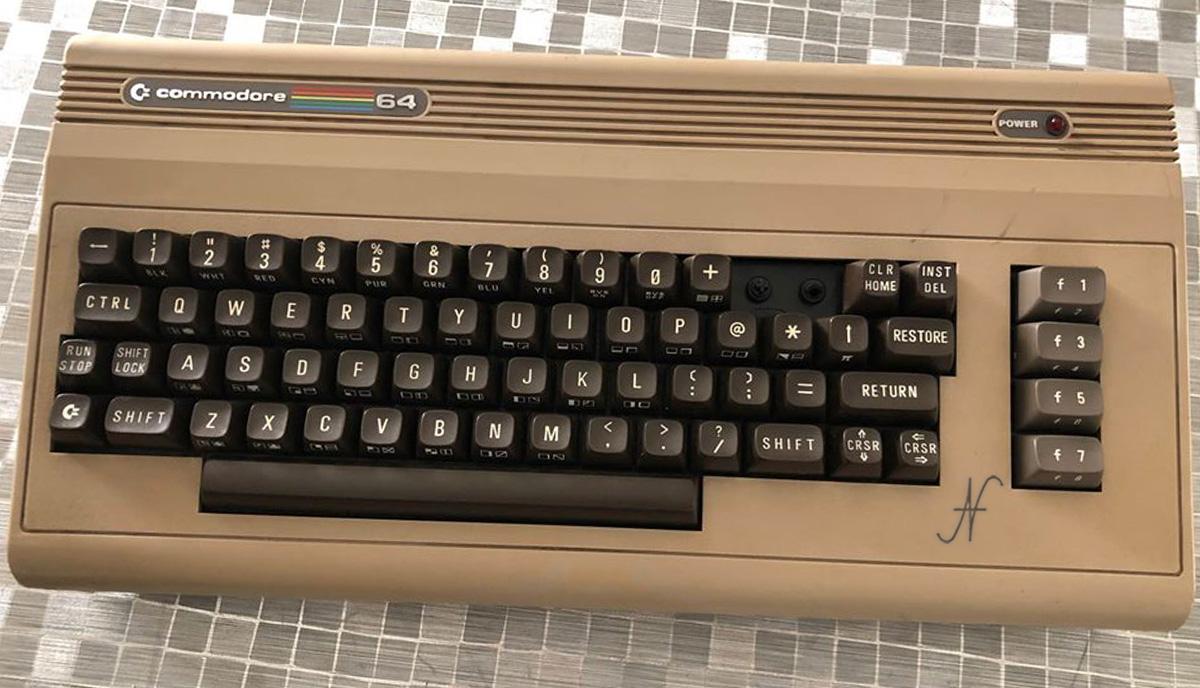
Initially I had thought of using this computer to withdraw the spare parts for another Commodore 64 that I wanted to adjust, but ... repairing such extensive damage would have been quite a challenge!
Commodore 64 memory defect diagnosis
The defect of the memory of the Commodore 64 immediately presented itself to the ignition:
- era presente l'errore "OUT OF MEMORY ERROR IN 0";
- the monitor showed strange characters in random positions.
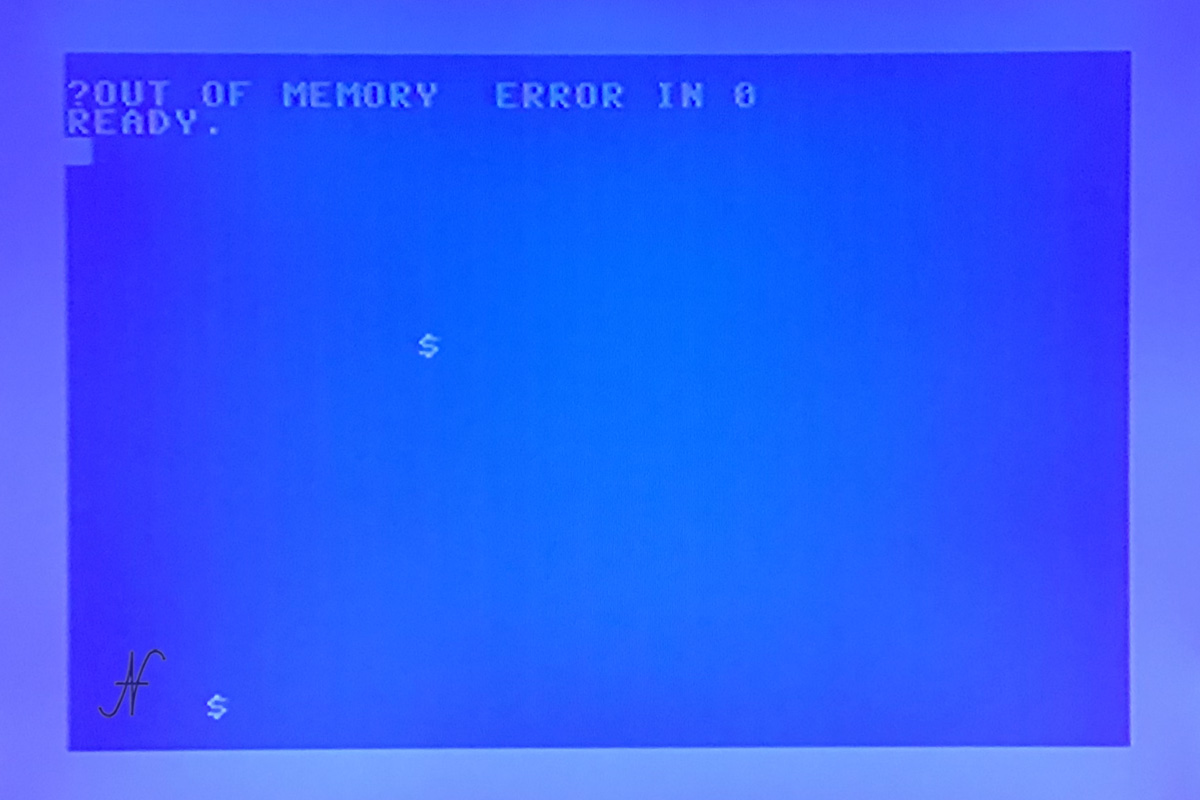
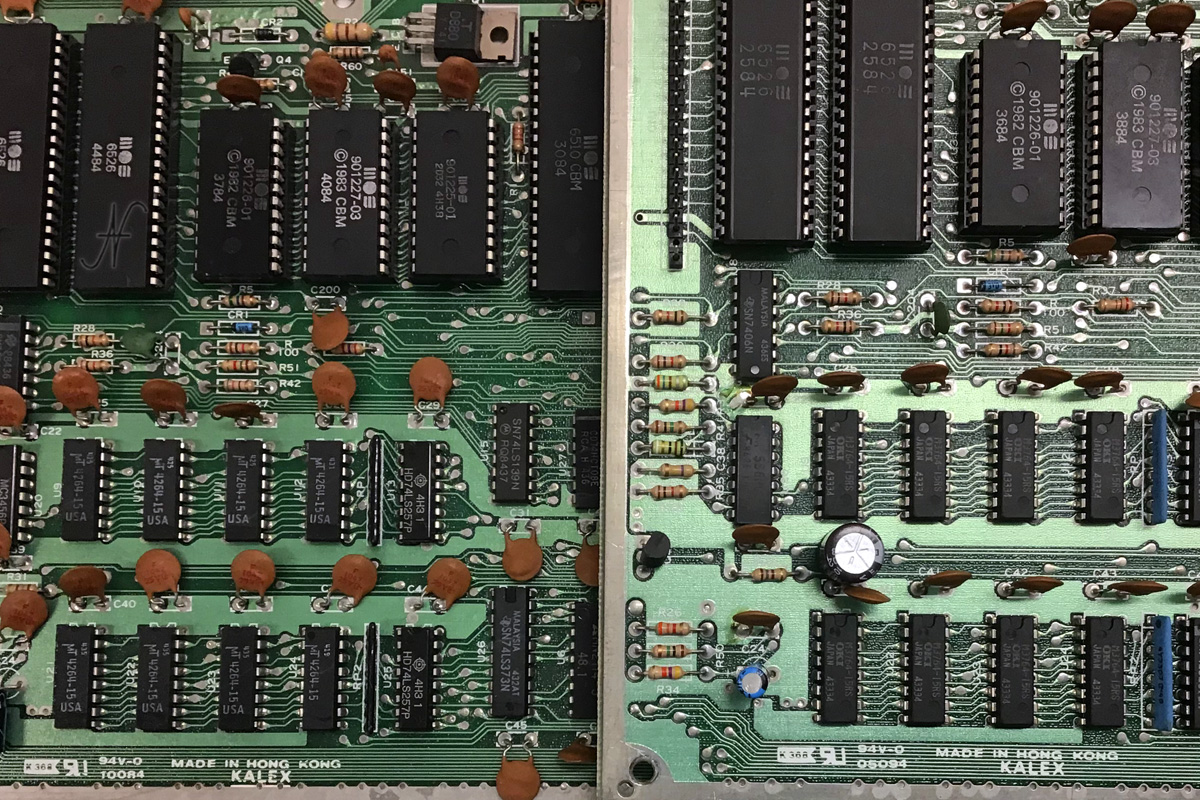
Without memory available, because it was defective, it was not even possible to load a diagnostic program for the memory itself, to understand which was the faulty RAM chip. I then consulted the Commodore 64 service manual (attached at the bottom of this page) to retrieve the electrical diagram of the memory.
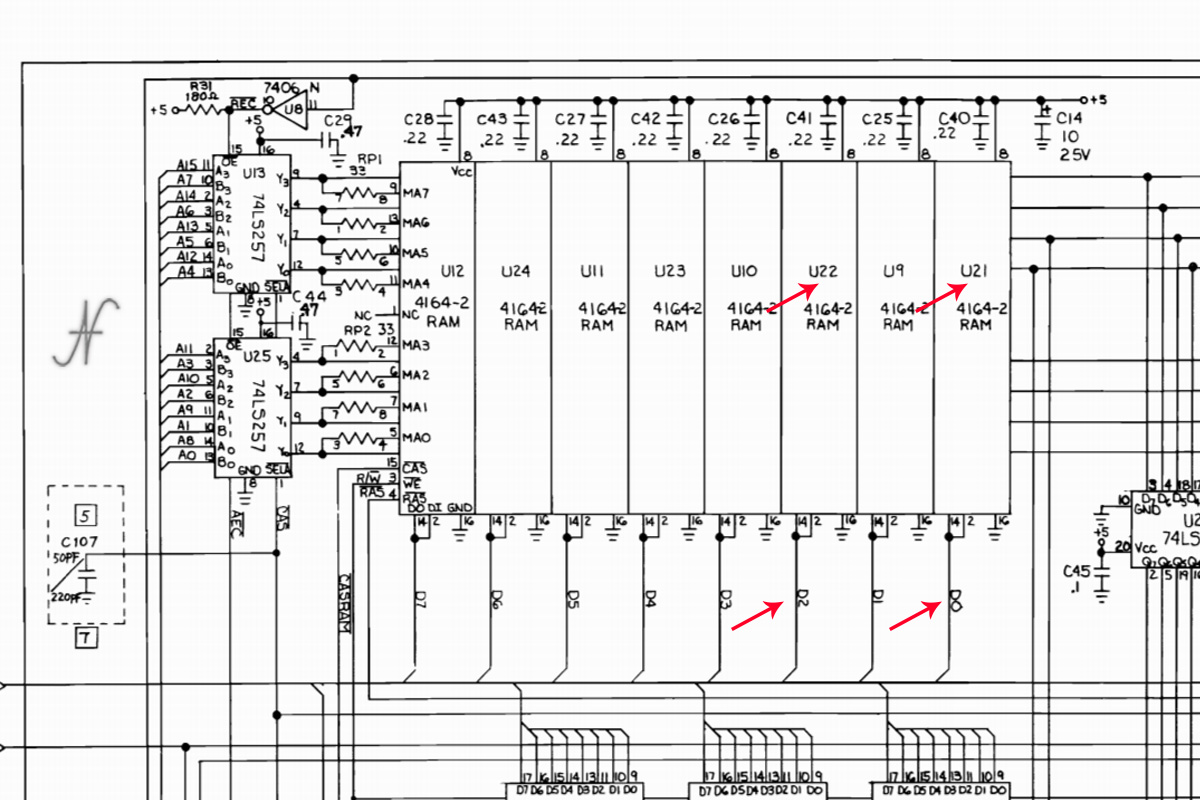
It can be seen that the RAM of the Commodore 64 is composed of 8 chips. Each chip contains 64K x 1 bit of memory - it does not contain integer bytes, but each chip takes care of a single bit. And so here is the correspondence between the RAM memory chips and the corresponding bits:

- D0 = U21
- D1 = U9
- D2 = u22
- D3 = U10
- D4 = U23
- D5 = u11
- D6 = U24
- D7=U12
A questo punto, dovevo solo capire quale bit fosse difettoso, che trasformava, sul monitor, il carattere "spazio" nel dollaro "$". Per questa analisi, si rende utile la tabella dei caratteri del Commodore 64, altrimenti chiamata CBM ASCII:
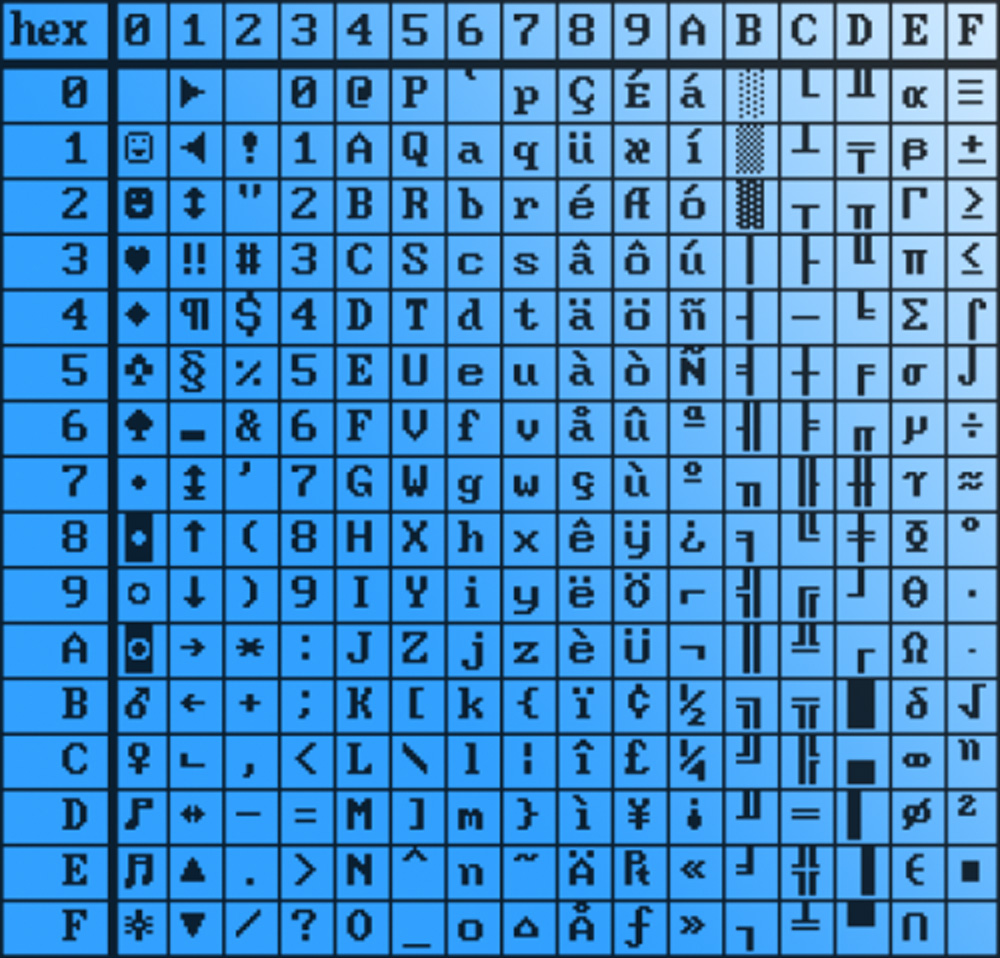
Il carattere "spazio" corrisponde al numero &H20 (in esadecimale), che è il 32 (espresso in numeri decimali). Invece, il carattere dollaro "$" corrisponde al numero &H24 (in esadecimale), che è il 36 (in decimale). Il numero del carattere si è quindi spostato da 32 a 36, con un incremento di 4. Esprimendo il numero 4 in potenze di 2, si ottiene 2^2. Da questo ragionamento, si evince che il bit difettoso della memoria RAM era il D2, corrispondente al chip U22.
Reading memory Commodore 64
Without fail, I replaced the C64's U22 chip with an identical one, an MT4264-15 purchased online. Obviously I bought a few more spare RAM chips, which, as we will see shortly, was useful to me.
To repair the memory of the Commodore 64, and then replace the RAM chip, I first removed the old defective chip, and then soldered a socket, where I housed the new MT4264-15 chip. I installed the new memory chip of the Commodore 64 on the socket, to do compatibility experiments of the various RAM memories, which I will describe shortly.

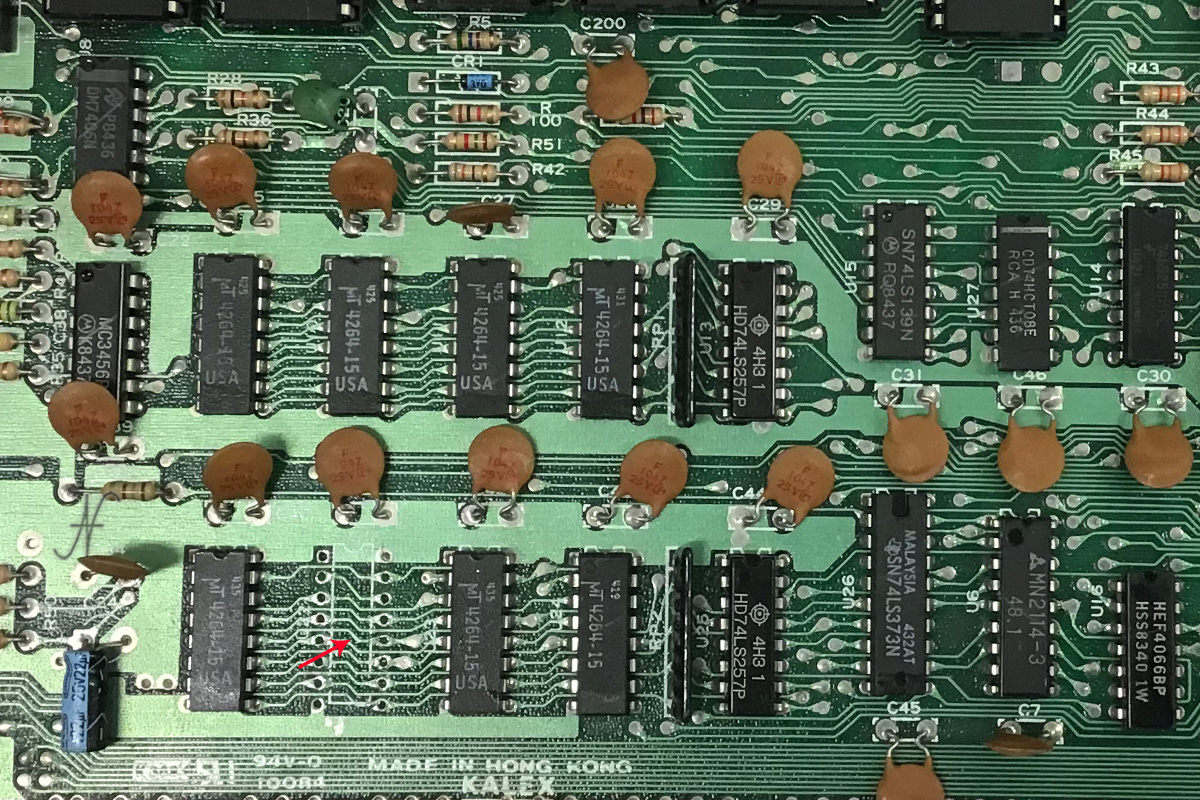
The replacement of the memory chip had positive effects, in fact the Commodore 64 started with the usual boot screen.
Another broken memory chip
Despite the replacement of the chip, the Commodore 64 did not have the expected amount of free RAM: 38911 bytes. Sometimes only 3K were available, sometimes 12k. In short: there was another defective memory chip. That's why it was convenient for me to buy a few more ram chips!
On the monitor I did not see strange characters, so the defective bits had to be in another memory area, outside the video memory. I therefore wrote a very compact program in Basic for the scan of all the RAM bytes and identify the defective ones. The idea is simple and is based on the principle of functioning of the RAM memory:
- RAM byte one by one are scanned (outside the area of the program itself!)
- you write the number 0
- you read the same box, which must return the number just written: 0
- you write the number 255
- you read the same box, which must return the number just written: 255
And here is my program to test the RAM memory of the Commodore 64 in operation.
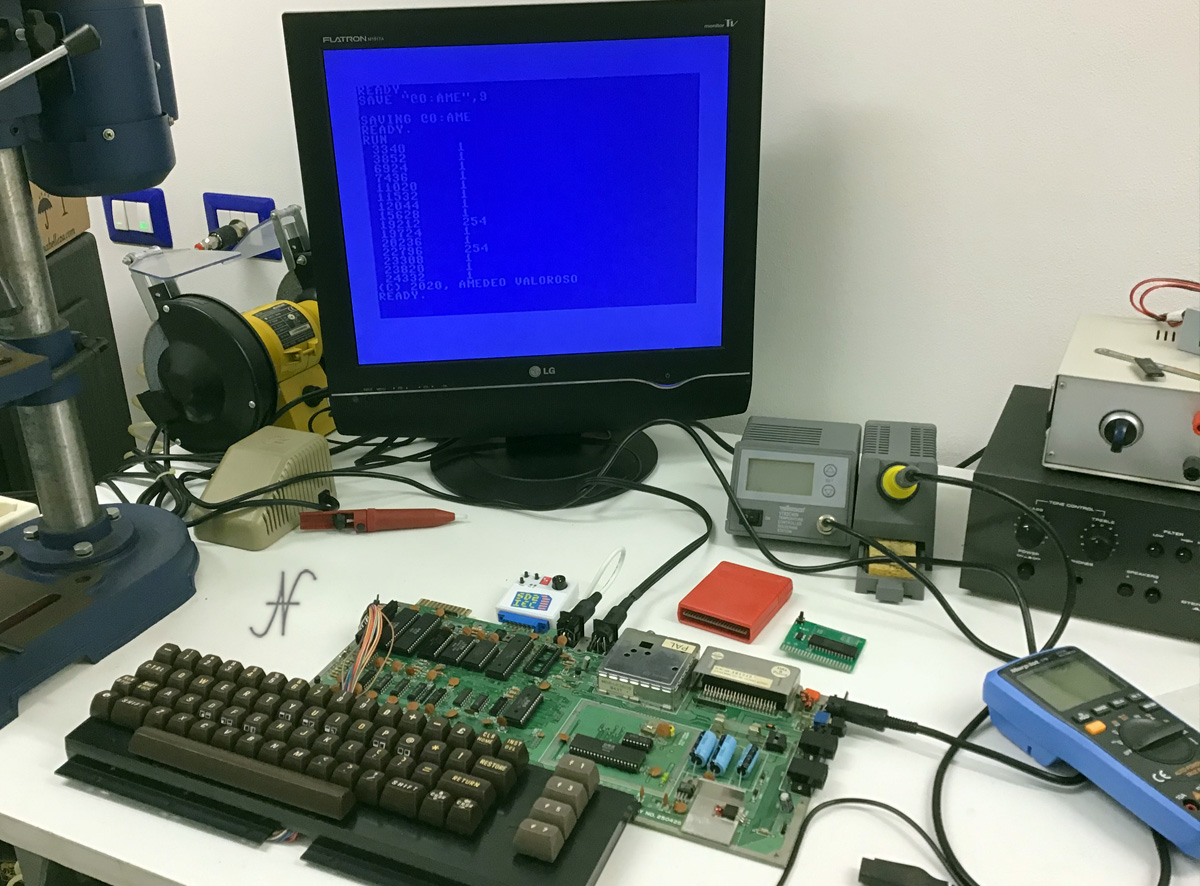
Scanning the RAM detected some faulty bytes. The number 0 turned into 1, while the number 255 turned into 254. From the reasoning already described in the previous paragraphs, it is clear that the difference between the correct number and the wrong one is 1, corresponding to 2 ^ 0 expressed in powers of 2. So the second faulty MT4264-15 RAM chip was U21, corresponding to the D0 bit line. I then replaced this second chip as well, mounting the new one on the socket.
Finally the memory of the Commodore 64 was in place!
Commodore 64 memory experiments
While searching online for the Commodore 64's RAM memory chips, I came across several alternatives. My computer was fitted with the MT4264-15 memory chip. Online I also found other acronyms, which, from datasheet, seemed to have the same characteristics, if not for the different speed (RAS access time).
Initially I replaced the chips with other identical ones, but, having mounted the socketes to replace the chips very quickly and without damaging them, I also tried to mount chips with other acronyms, and then test the operation of the C64.
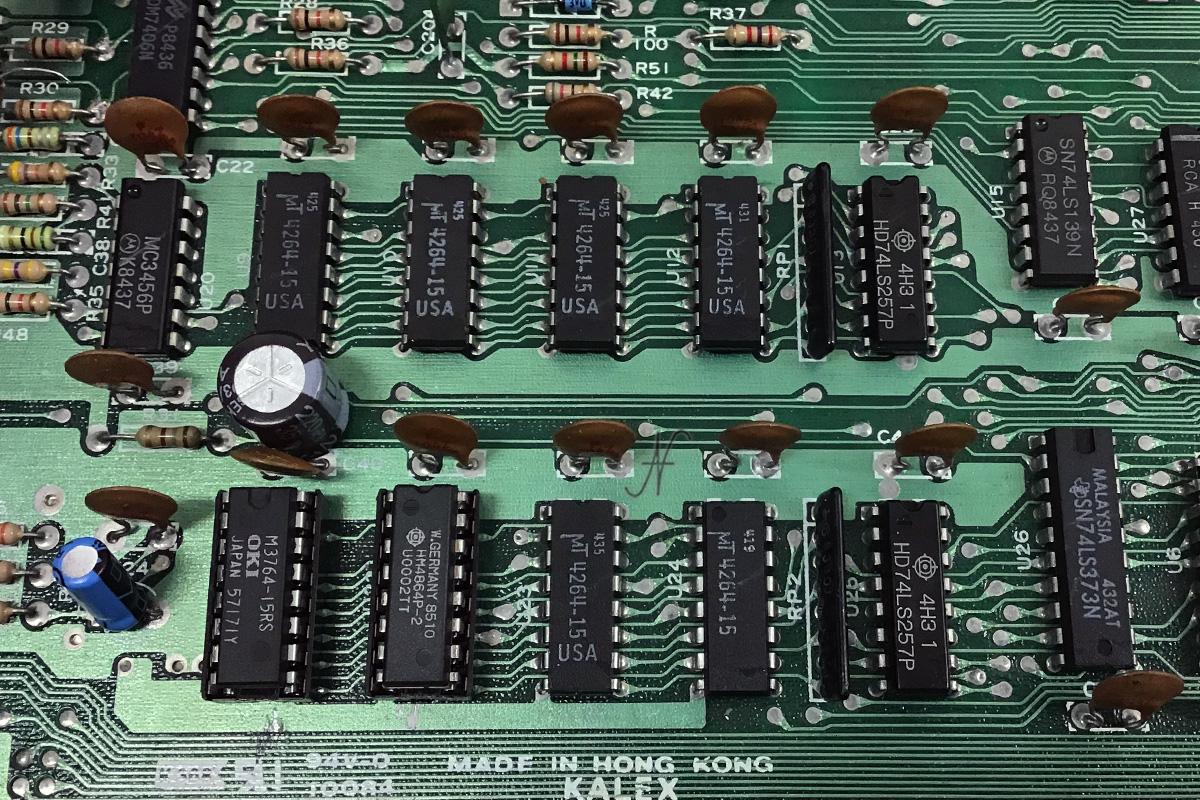
At the end of all the tests, I can conclude that it is possible to mount indifferently any RAM memory chip on the Commodore 64, even mixing the various acronyms on the same mainboard, as seen from the attached photo above.
It is therefore possible to replace the RAM memory chips with any present on this list: 4164-2, MT4264-15, MT4264-20, HM4864P-2, M3764-15rs.
Regarding the speed of the chip, it is good to choose one with RAS access time equal to or less than 200ns. The above abbreviations already take this into account.
Documentation
In support of this Article, I attach:
- il Commodore 64 Service Manual: it is a technical manual useful to understand the operation of the Commodore C64 and C64C circuits;
- the datasheet of the RAM chip MT4264-15.
interesting! Thanks for sharing.
Amedeo, I would like to see videos on how to repair the power supplies of the commodore 64 and C64C, as well as on the power supplies of the floppy drives 1541-II and the repair on the datassettes. Can you prepare them ??
And if you can best buy these products, or the power supplies just mentioned. Greetings
It is certainly an interesting topic. Repair is never a trivial thing: the defects can be many and in different sections of the power supply. I had made 2 articles/videos in which I repaired two different Atari power supplies and, as you can see, the defects and types were different:
https://www.valoroso.it/floppy-disk-drive-atari-1050-riparazione-alimentatore-prova/
https://www.valoroso.it/atari-800xl-atari-1050-con-alimentatore-in-corto-circuito/
Hi Amedeo
I am writing to you just to tell you that this page on repairing RAM memory C64 I was
very useful for which I wanted to thank you, very interesting also the reasoning you have
followed to find the failed ram based on the displayed characters.
I already follow you on Youtube and Facebook.
Hello Andrea, thank you very much! I am very pleased!
Congratulations, Amedeo. I have a commodore 64 with a power supply, 3 recorders, 2 joystik. I bought it in 1983, I played for a couple of years and then, suddenly, he stopped working. In ignition he no longer gave me the initial writing. I don't remember what he wrote. I tried to ask a technician at the time and told me that he had lost his memory and that he wanted 500,000 lire to repair him. (If I remember well I had paid 450,000). I put it in the garage, where it is still located. I would like to be able to put it back into operation but without spending a capital. Any advice on this? Thank you
Thank you! I'm sorry for your computer. Definitely worth getting it repaired. I do not repair on behalf of third parties, but if you contact me I can introduce you to someone who repairs professionally: https://www.valoroso.it/contatta-amedeo-valoroso