Welcome to the @ValorosoIT blog! Here we deal with vintage computers and electronics. Today, I will walk you step by step through the process of disassembling and cleaning the IBM 8513 CRT monitor. This guide is intended for vintage electronics enthusiasts who want to keep their devices in perfect cosmetic condition.

Technical characteristics of the IBM 8513 monitor
Before we get started with the disassembly and cleaning process, here are some technical specifications of the IBM 8513 monitor:
- Monitor type: CRT (Cathode Ray Tube)
- Year of production: late 80s
- Screen size: 12 inches
- Resolution: 720x400 pixels in text mode and 640x480 in graphic mode
- Colors supported: 256 simultaneous colors, selected from a palette of 256000
- Weight: over 10 kg
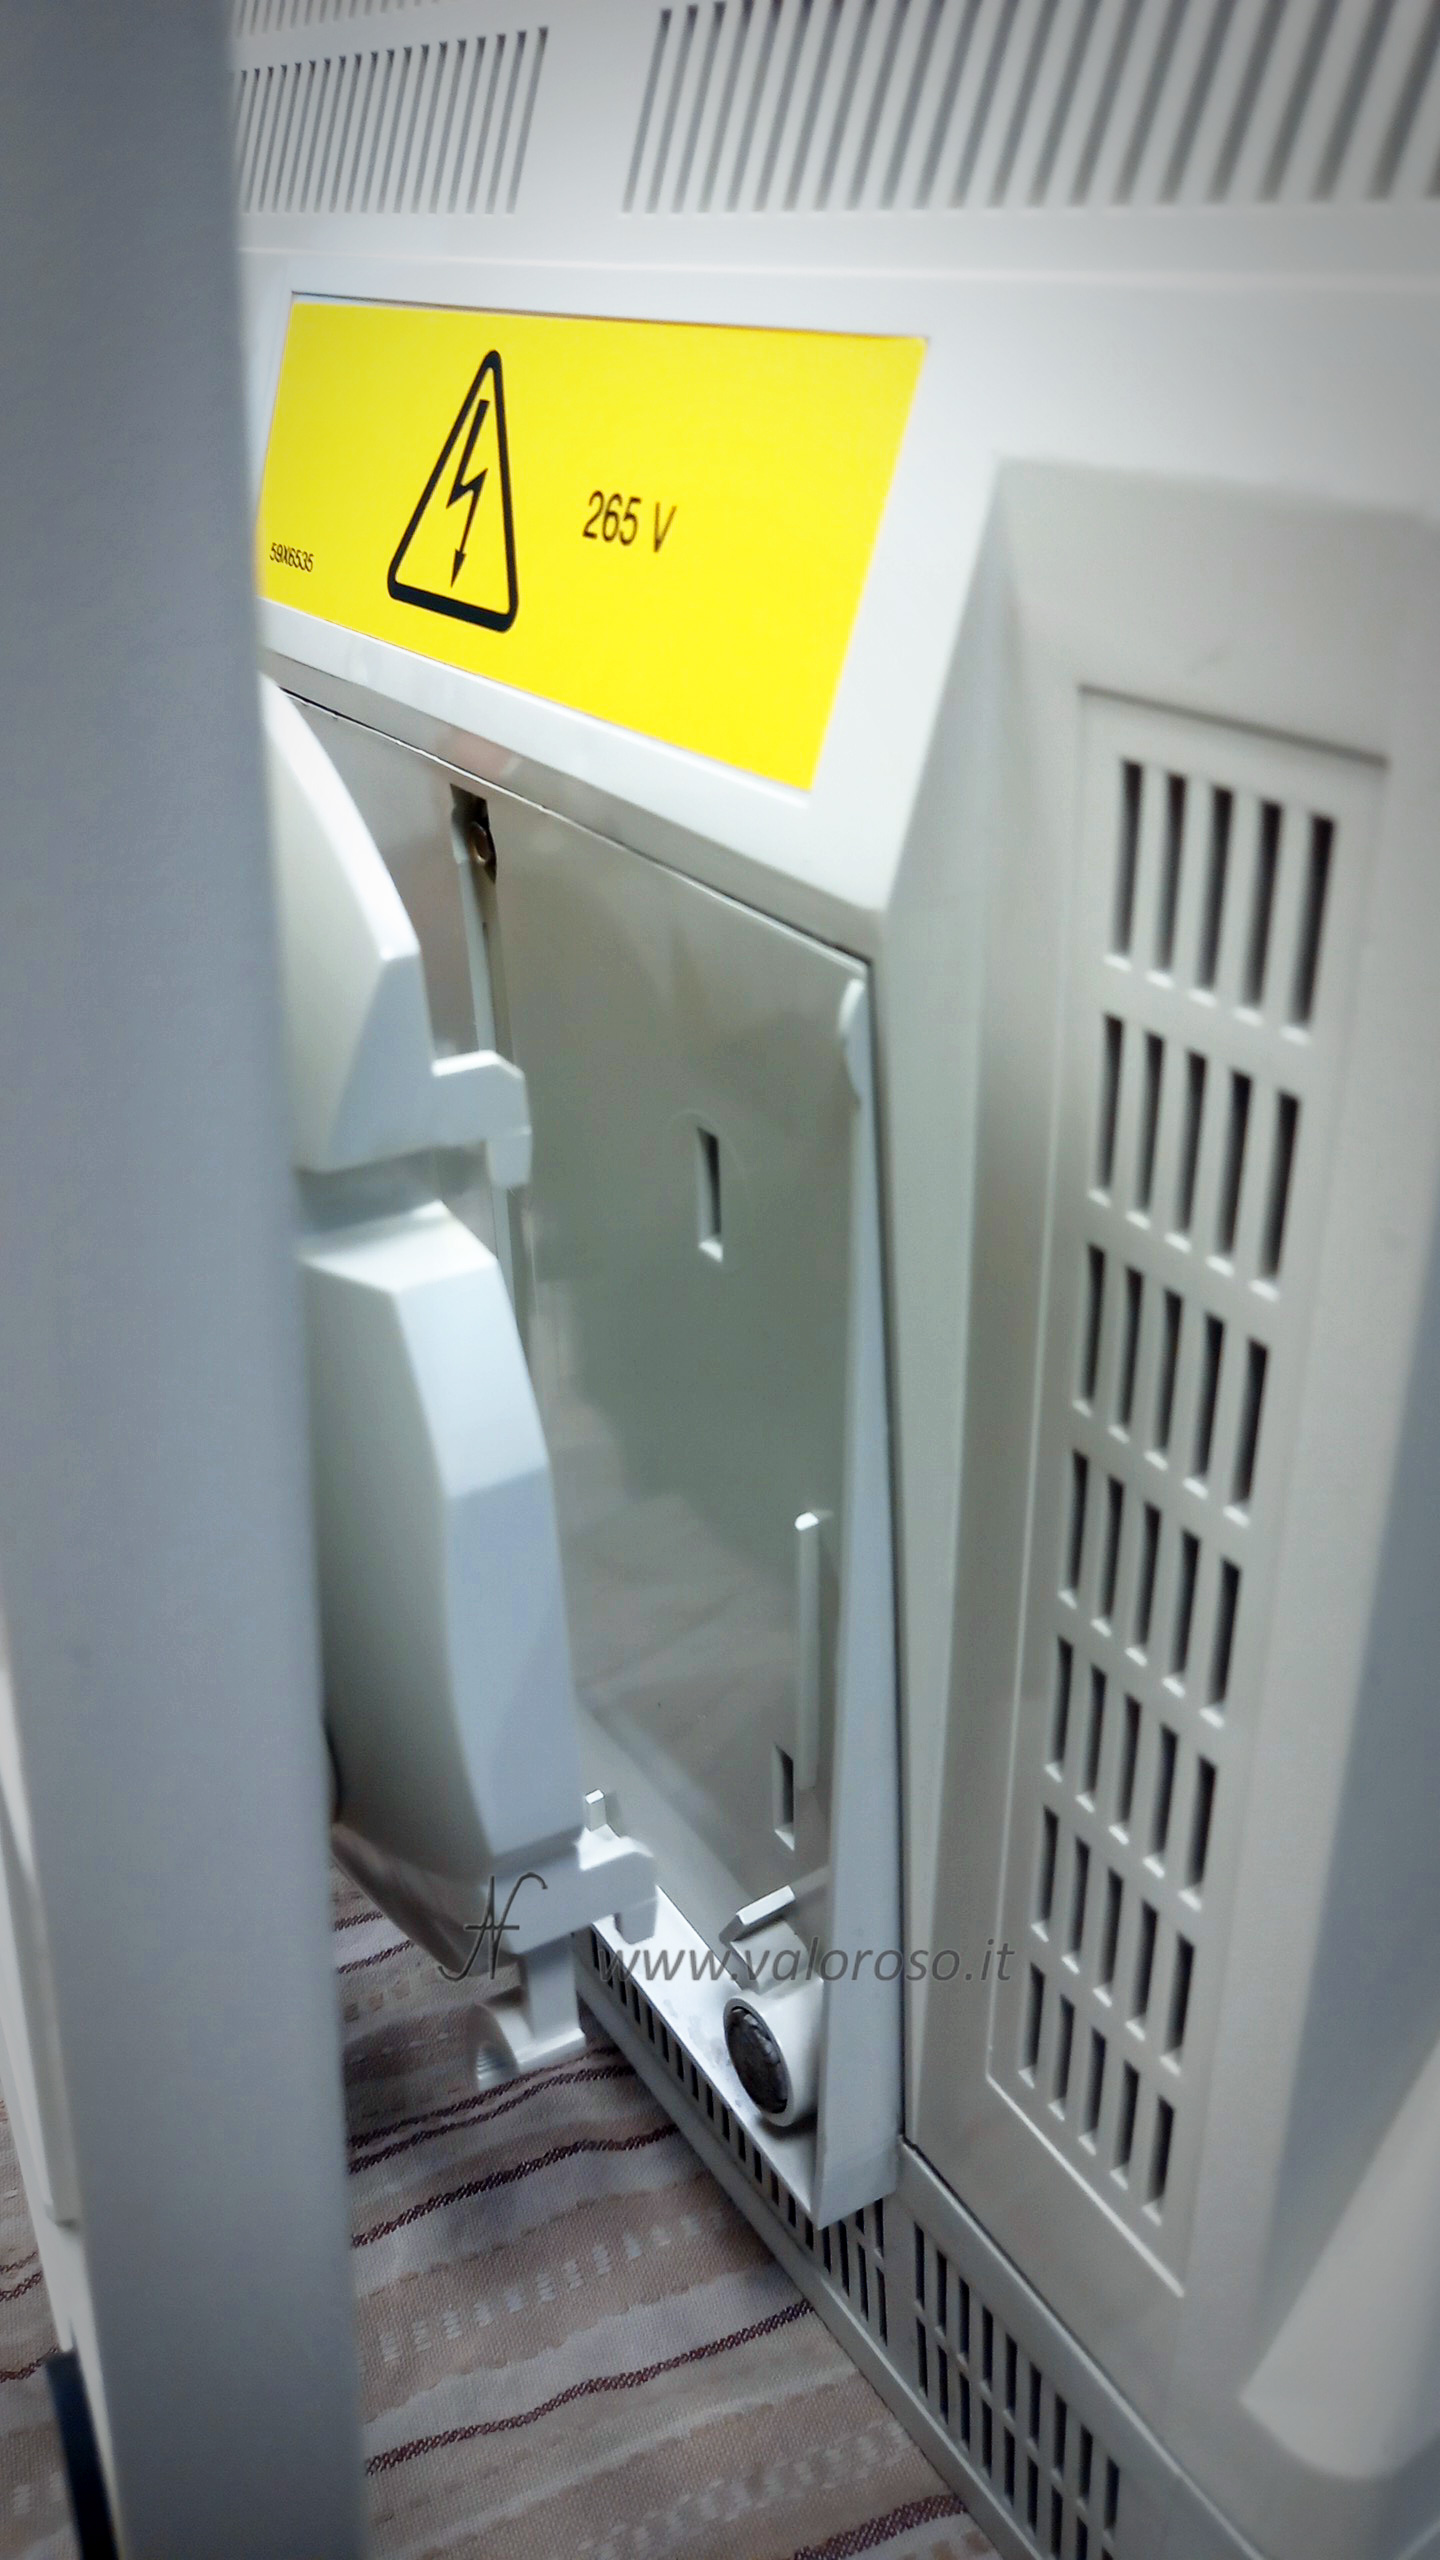
- Power supply: 230 Vac
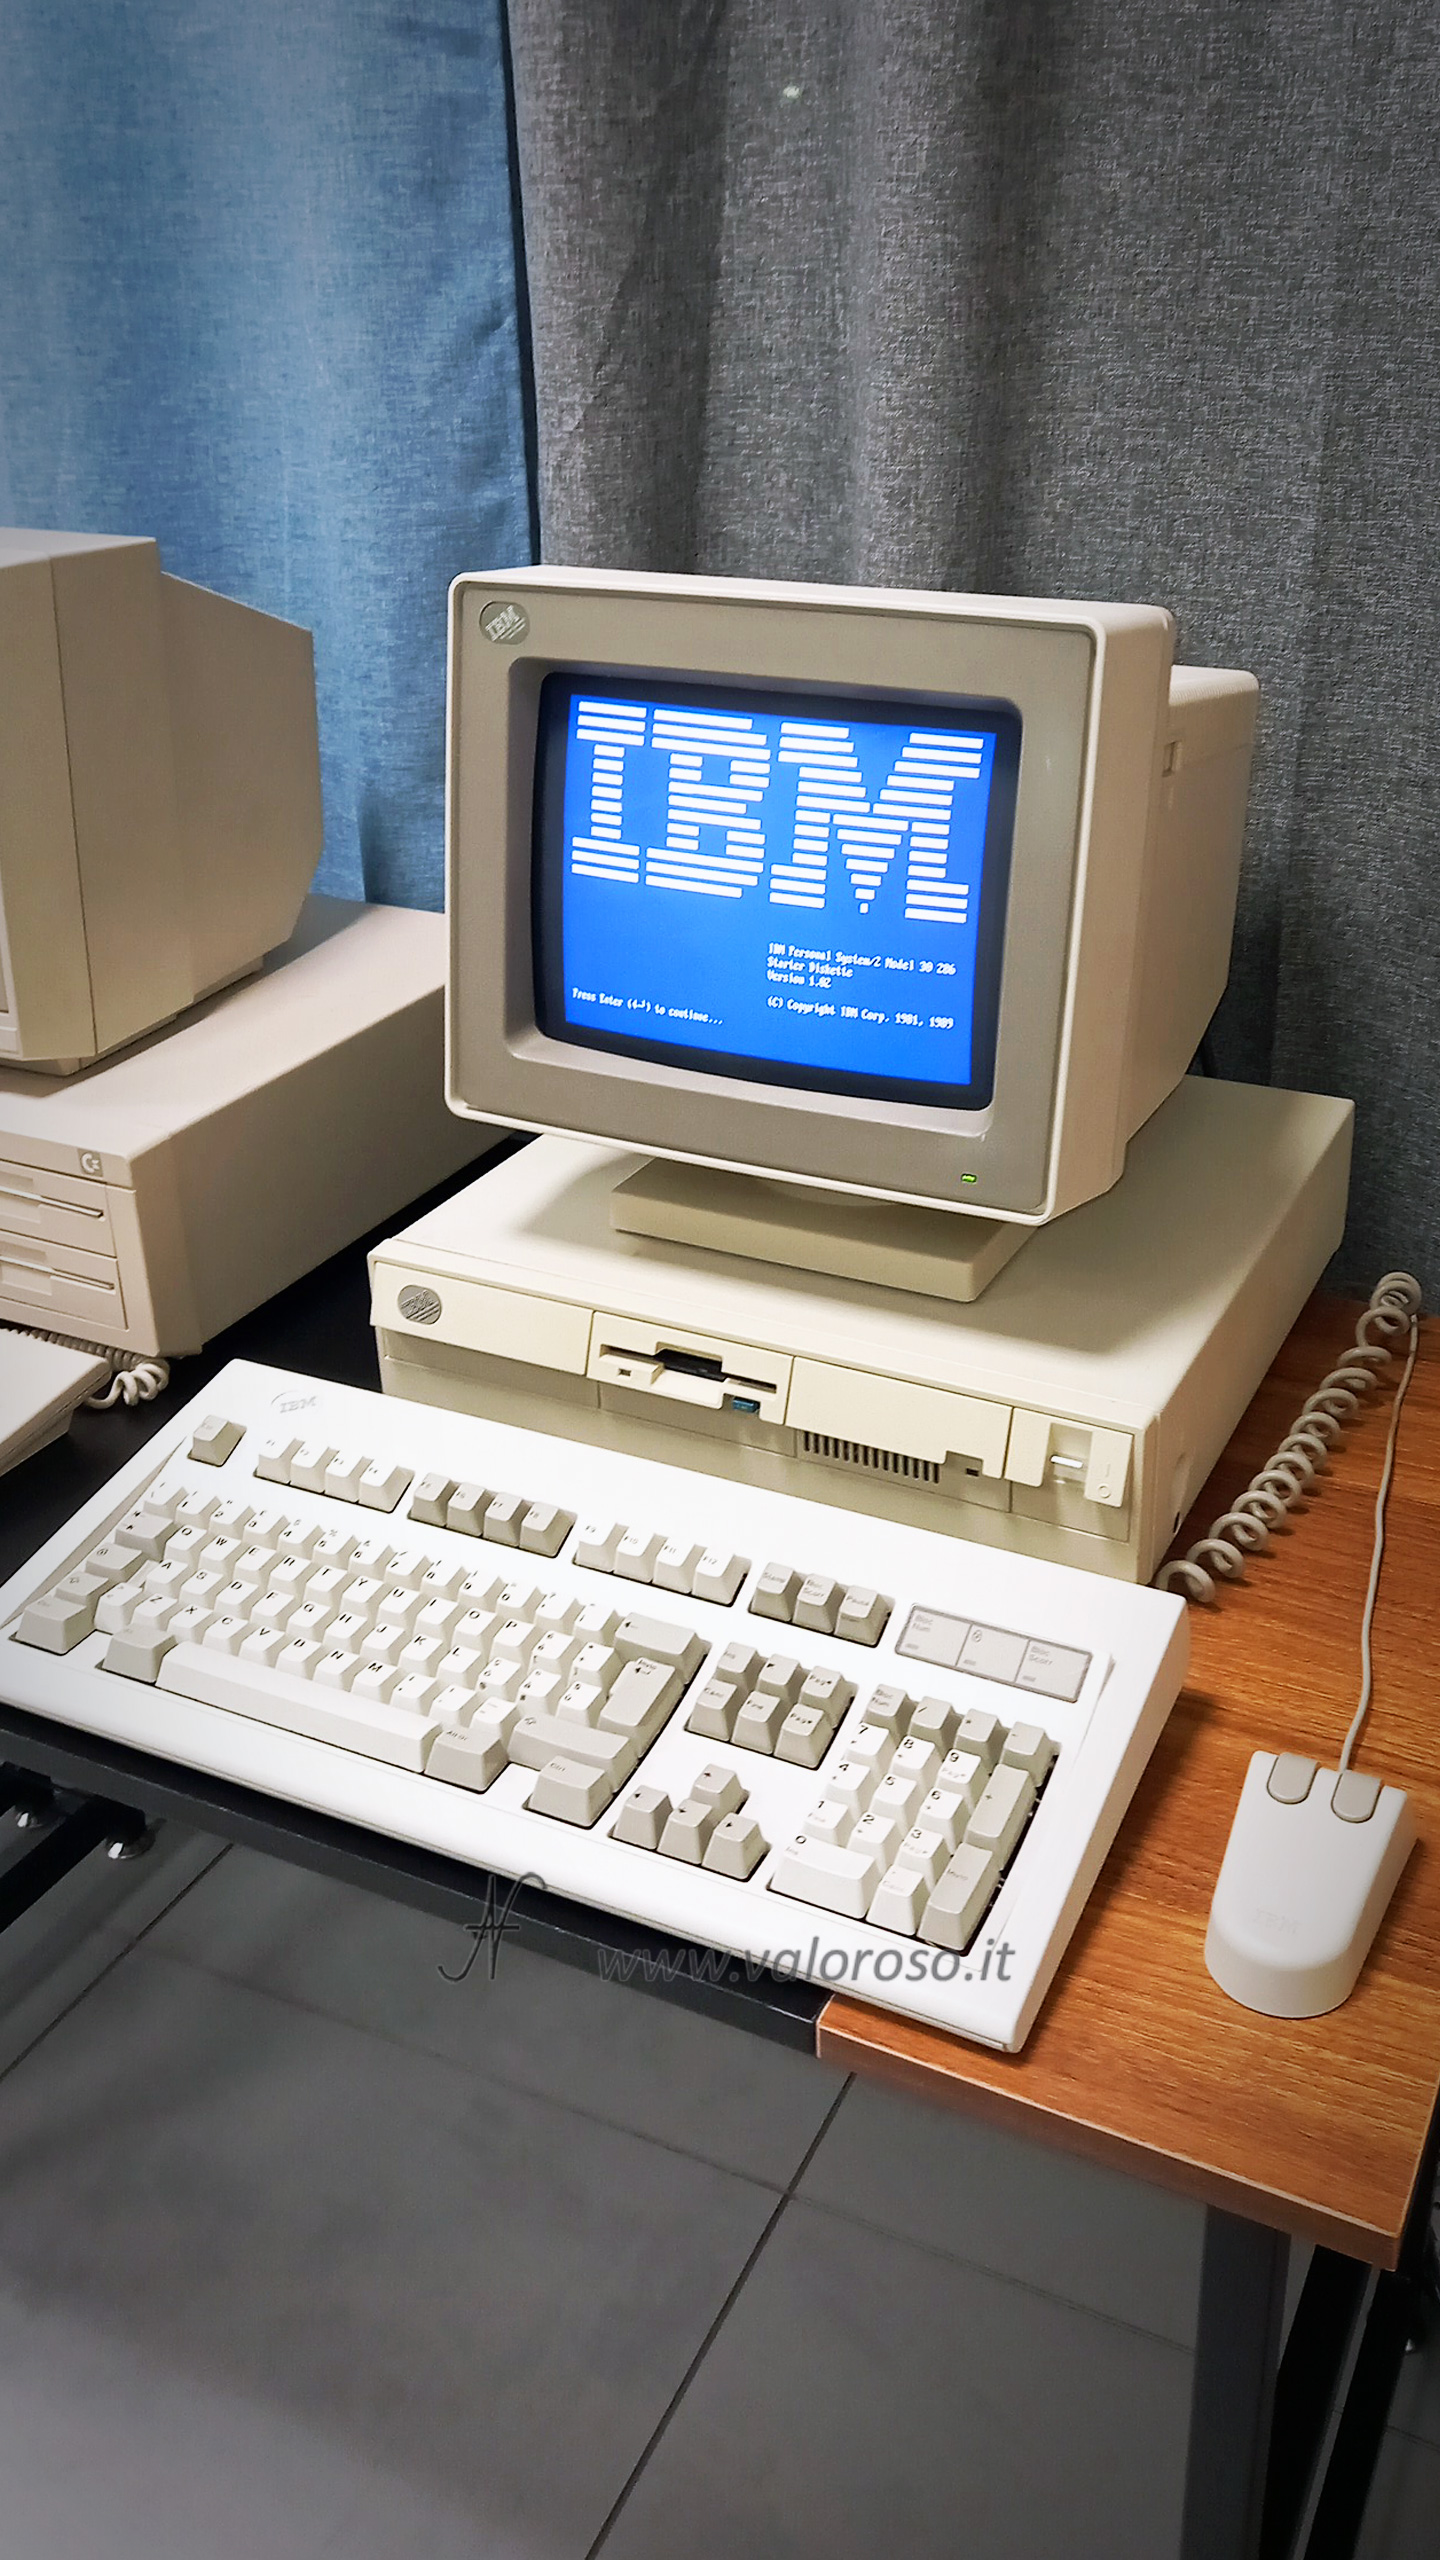
The IBM 8513 monitor was sold in combination with IBM/2 IBM computers. The specimen I have in the collection dates back to 1987: it was combined with the IBM PS/2 Model 60 computer that I have kept since I was a child.
Necessary equipment
Before you begin, make sure you have the following tools and materials available:
- Long, thin screwdriver to use as a lever
- A caliper to unscrew the only closing screw, head -on -headed
- Plastic lever for body shops
- Degreaser
- Soft brush
- Toothbrush
- Soft and clean cloths
- Compressed air
Safety first
Before disassembling the monitor, it is essential to work safely.

Leave the monitor turned off for at least a couple of days, to allow the internal capacitors to discharge completely. Capacitors can maintain a dangerous electrical charge even after the monitor has been turned off.
It is clear that this article is aimed at people who are already electronic practices and know the basics of safety in the electrical field. Those who do not have these skills is better to turn to a technician to avoid damage to themselves and the monitor.
IBM 8513 monitor disassembly procedure, removal of the bottom support
Turn up the monitor to facilitate access to the lower support tabs. They are found in the front of the support.
Press the two front tabs at the same time and remove the support by pushing it towards the rear of the monitor.

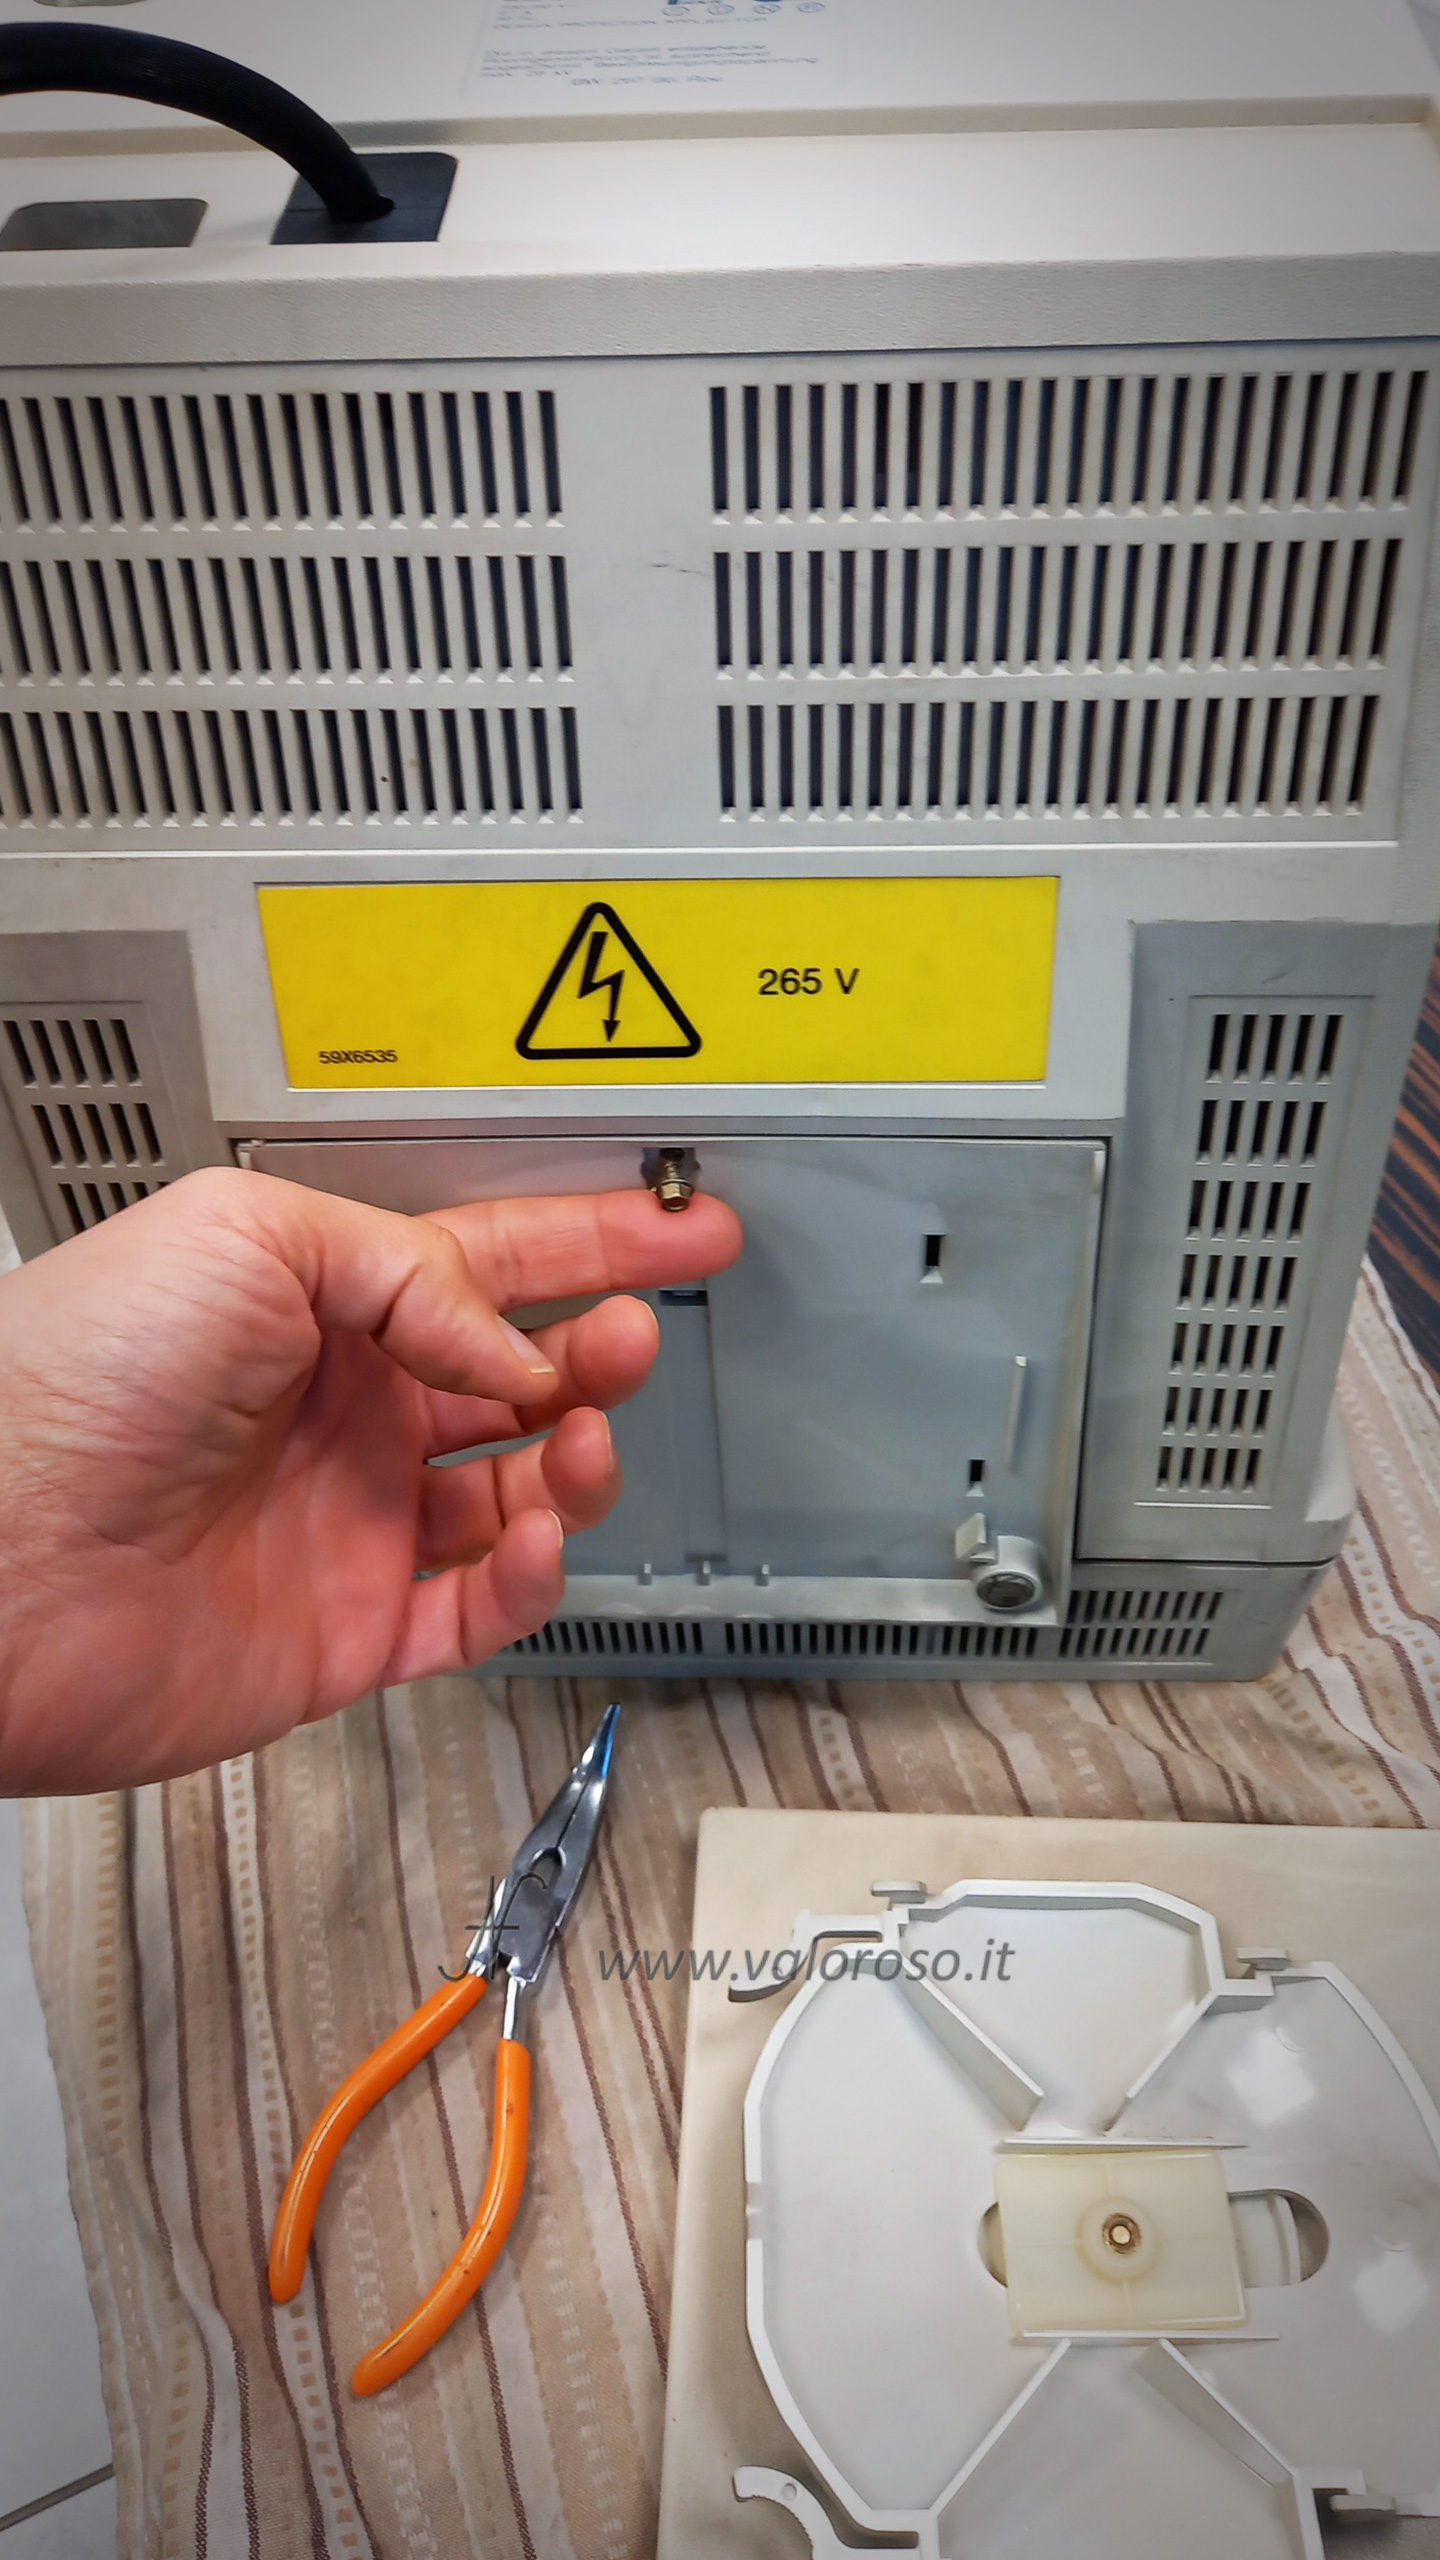
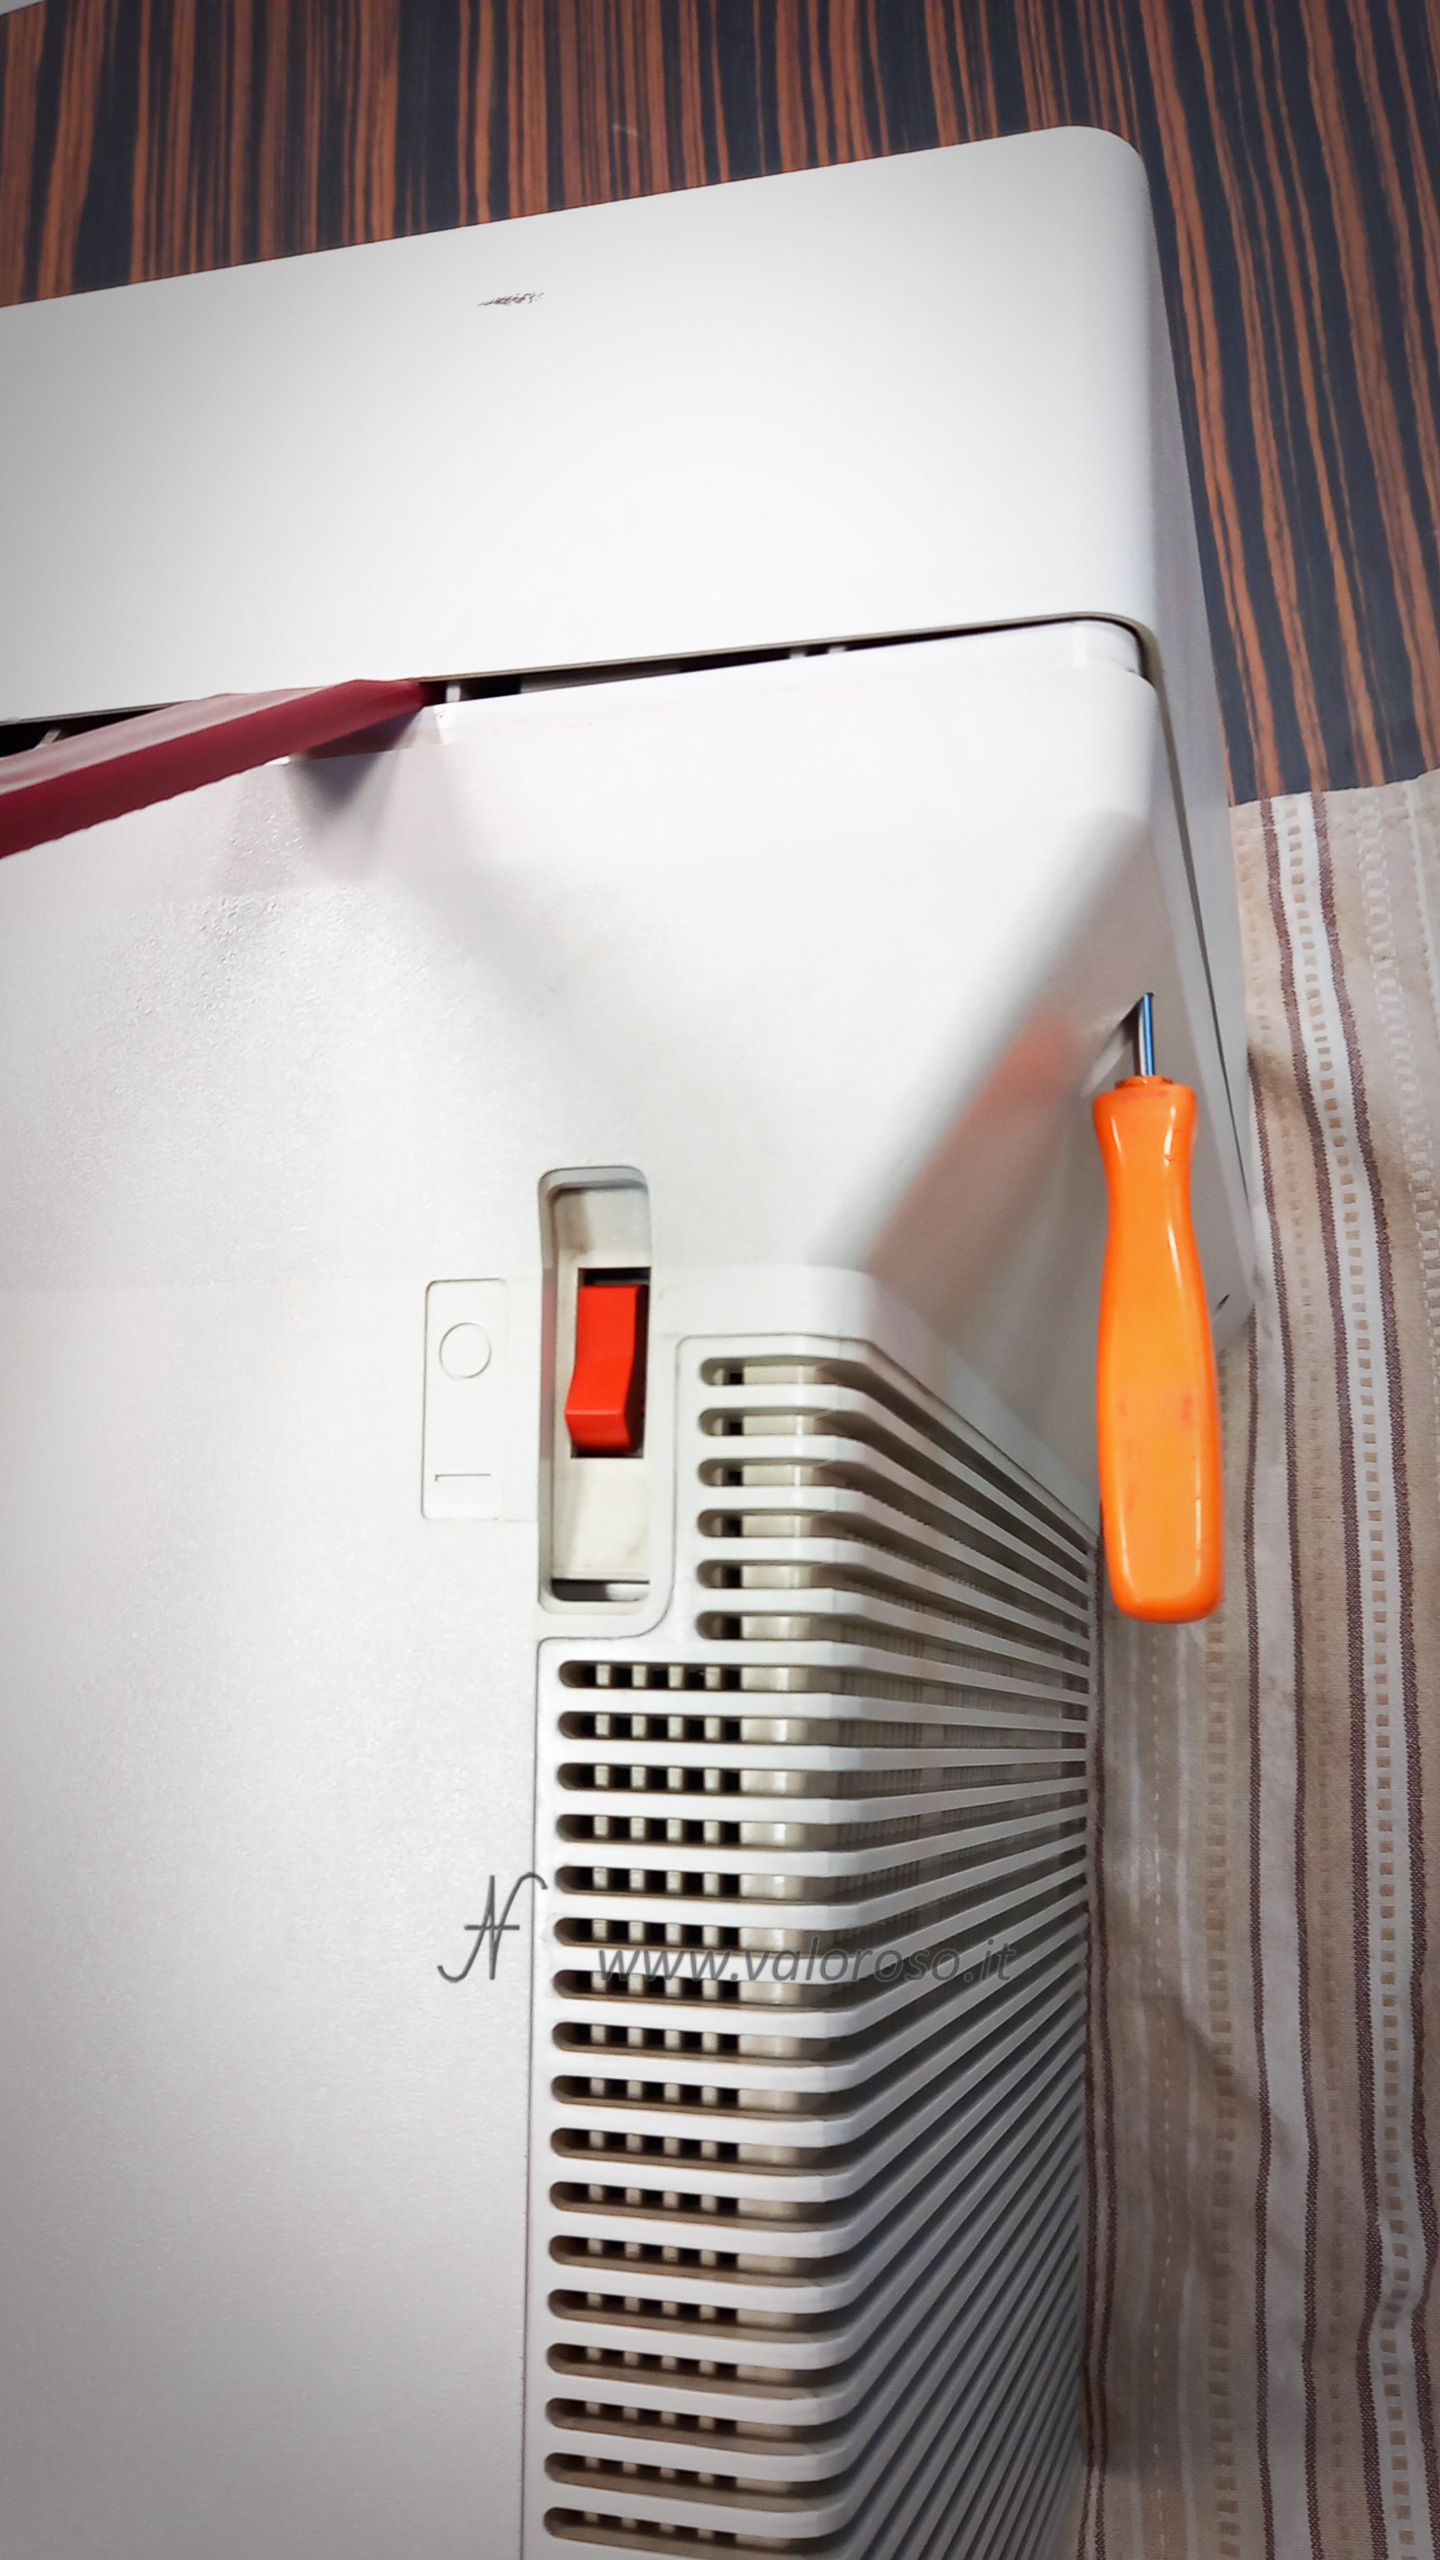
Removal of the closing screw
Identify and unscrew the only closing screw, positioned under the lower support, using the caliper (or a pipe key of appropriate size).
Separation of plastic shells
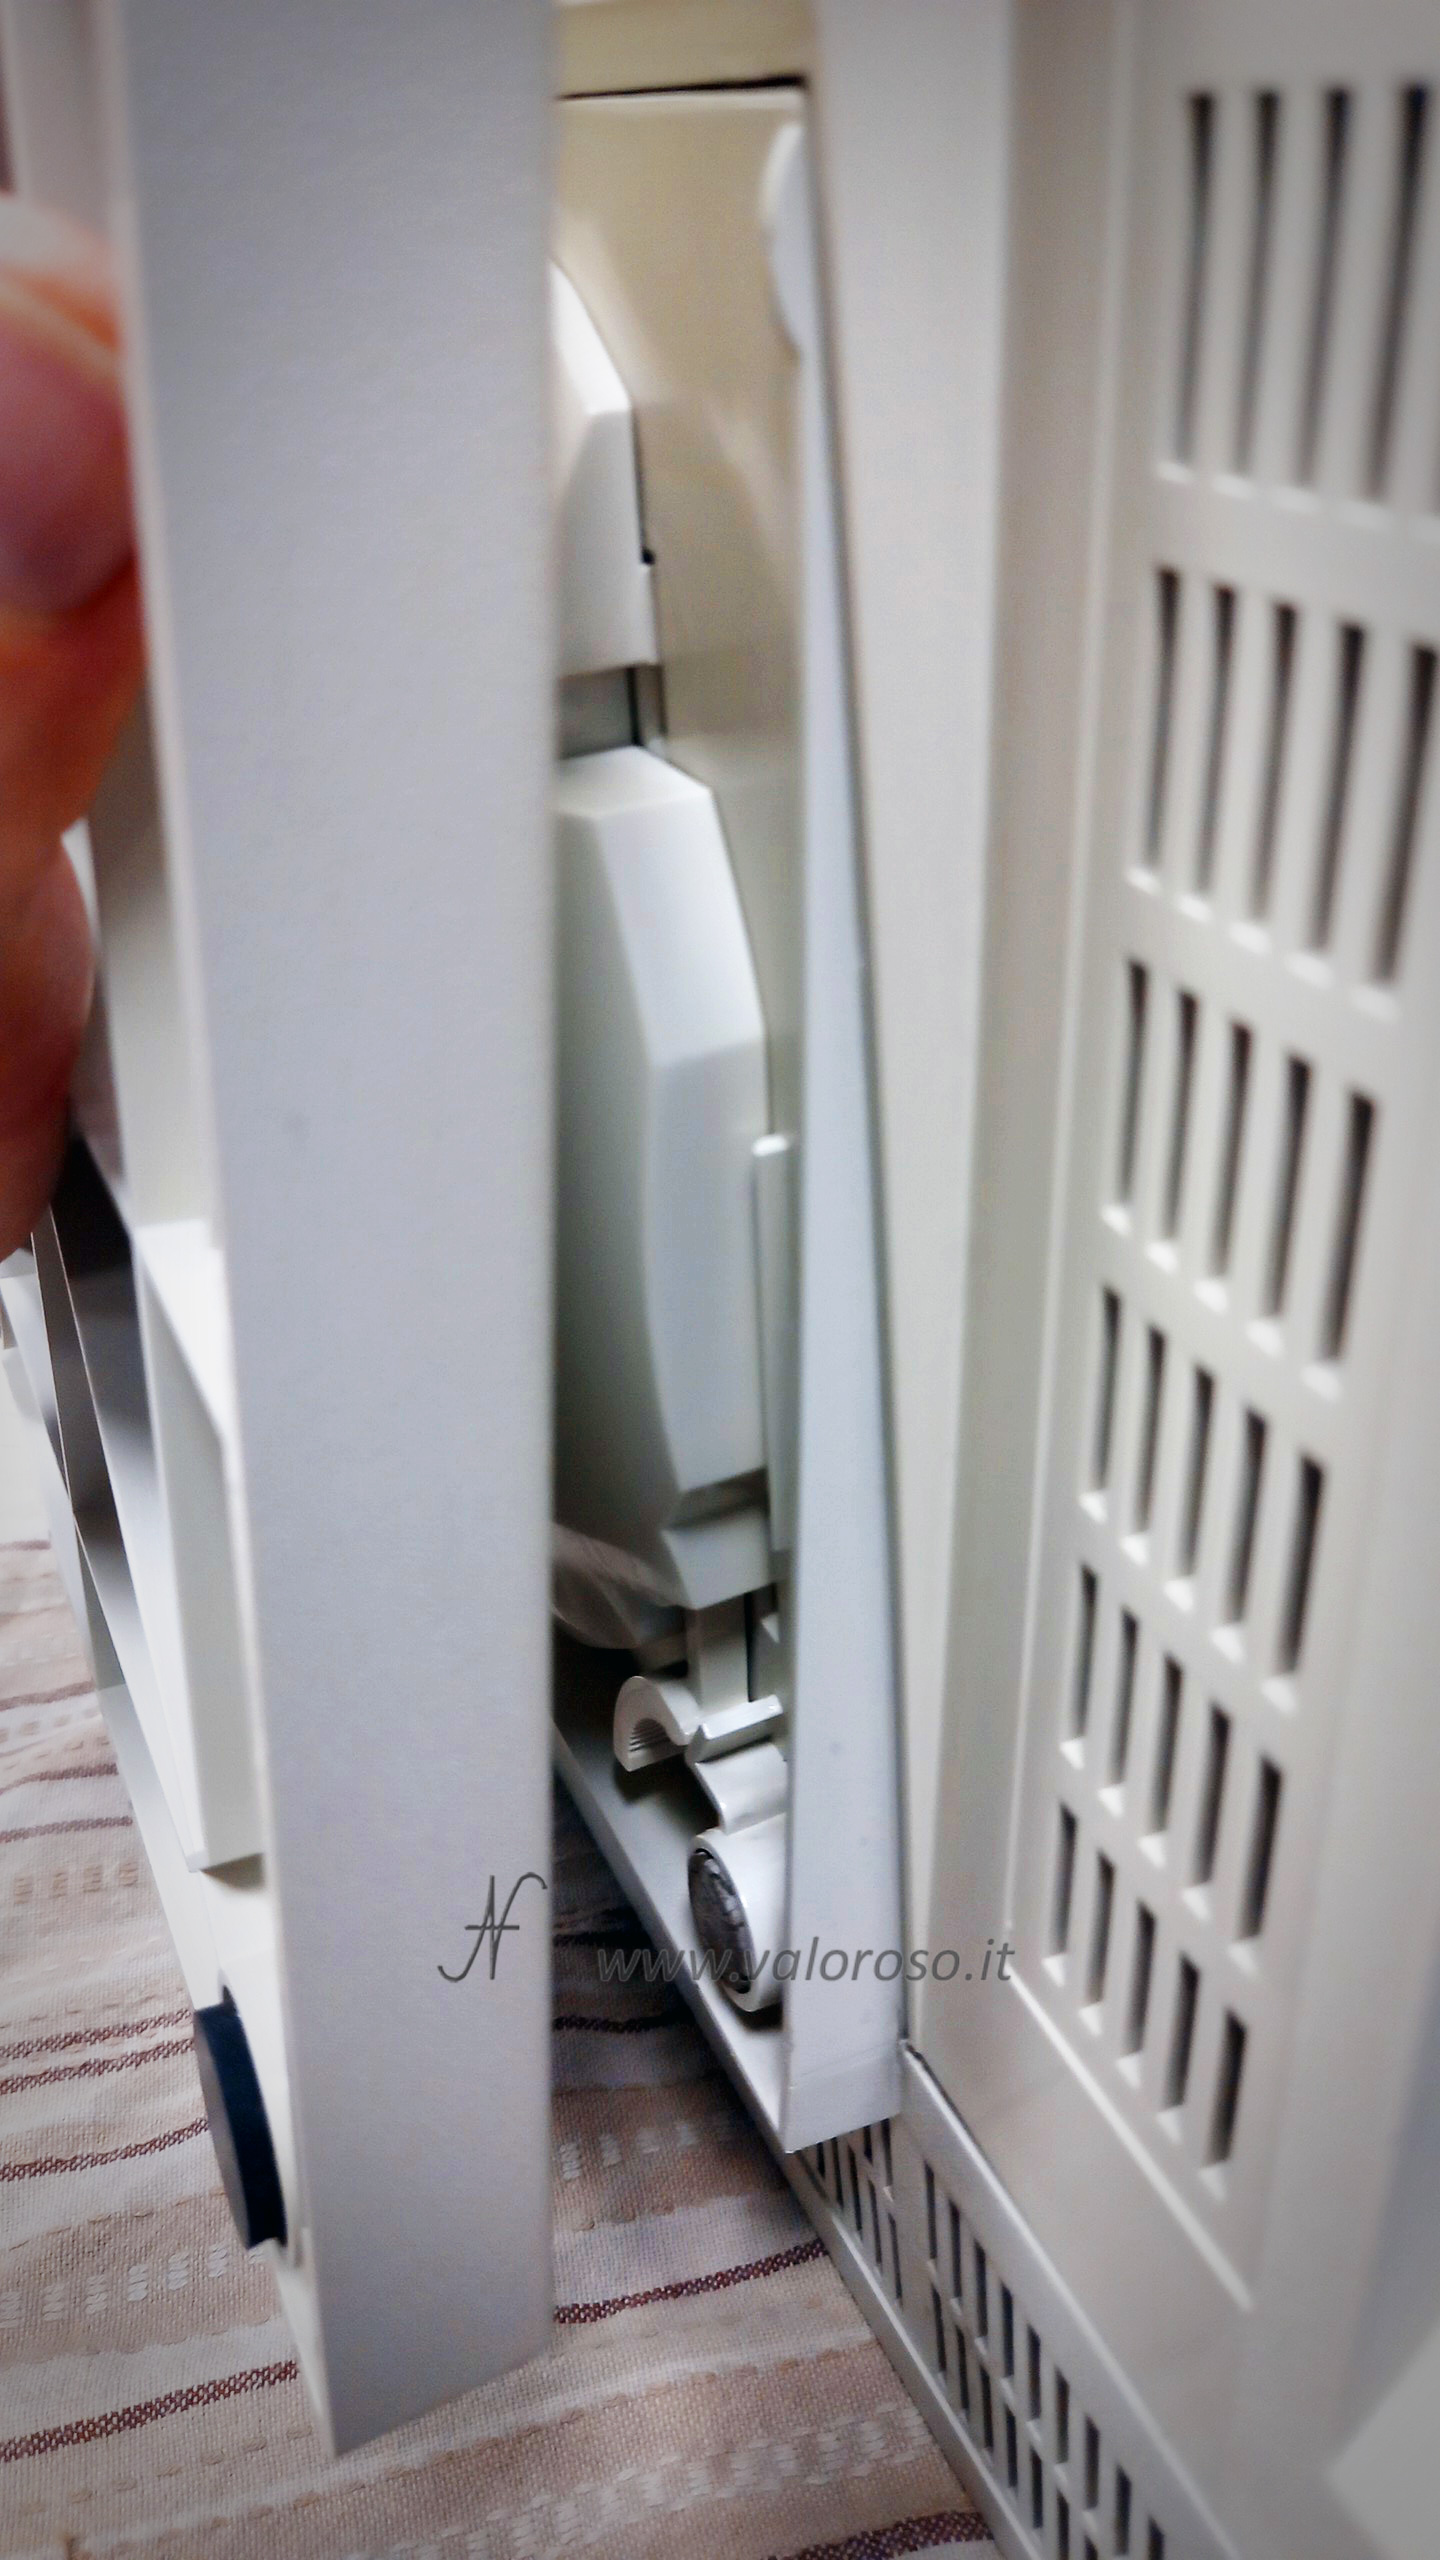
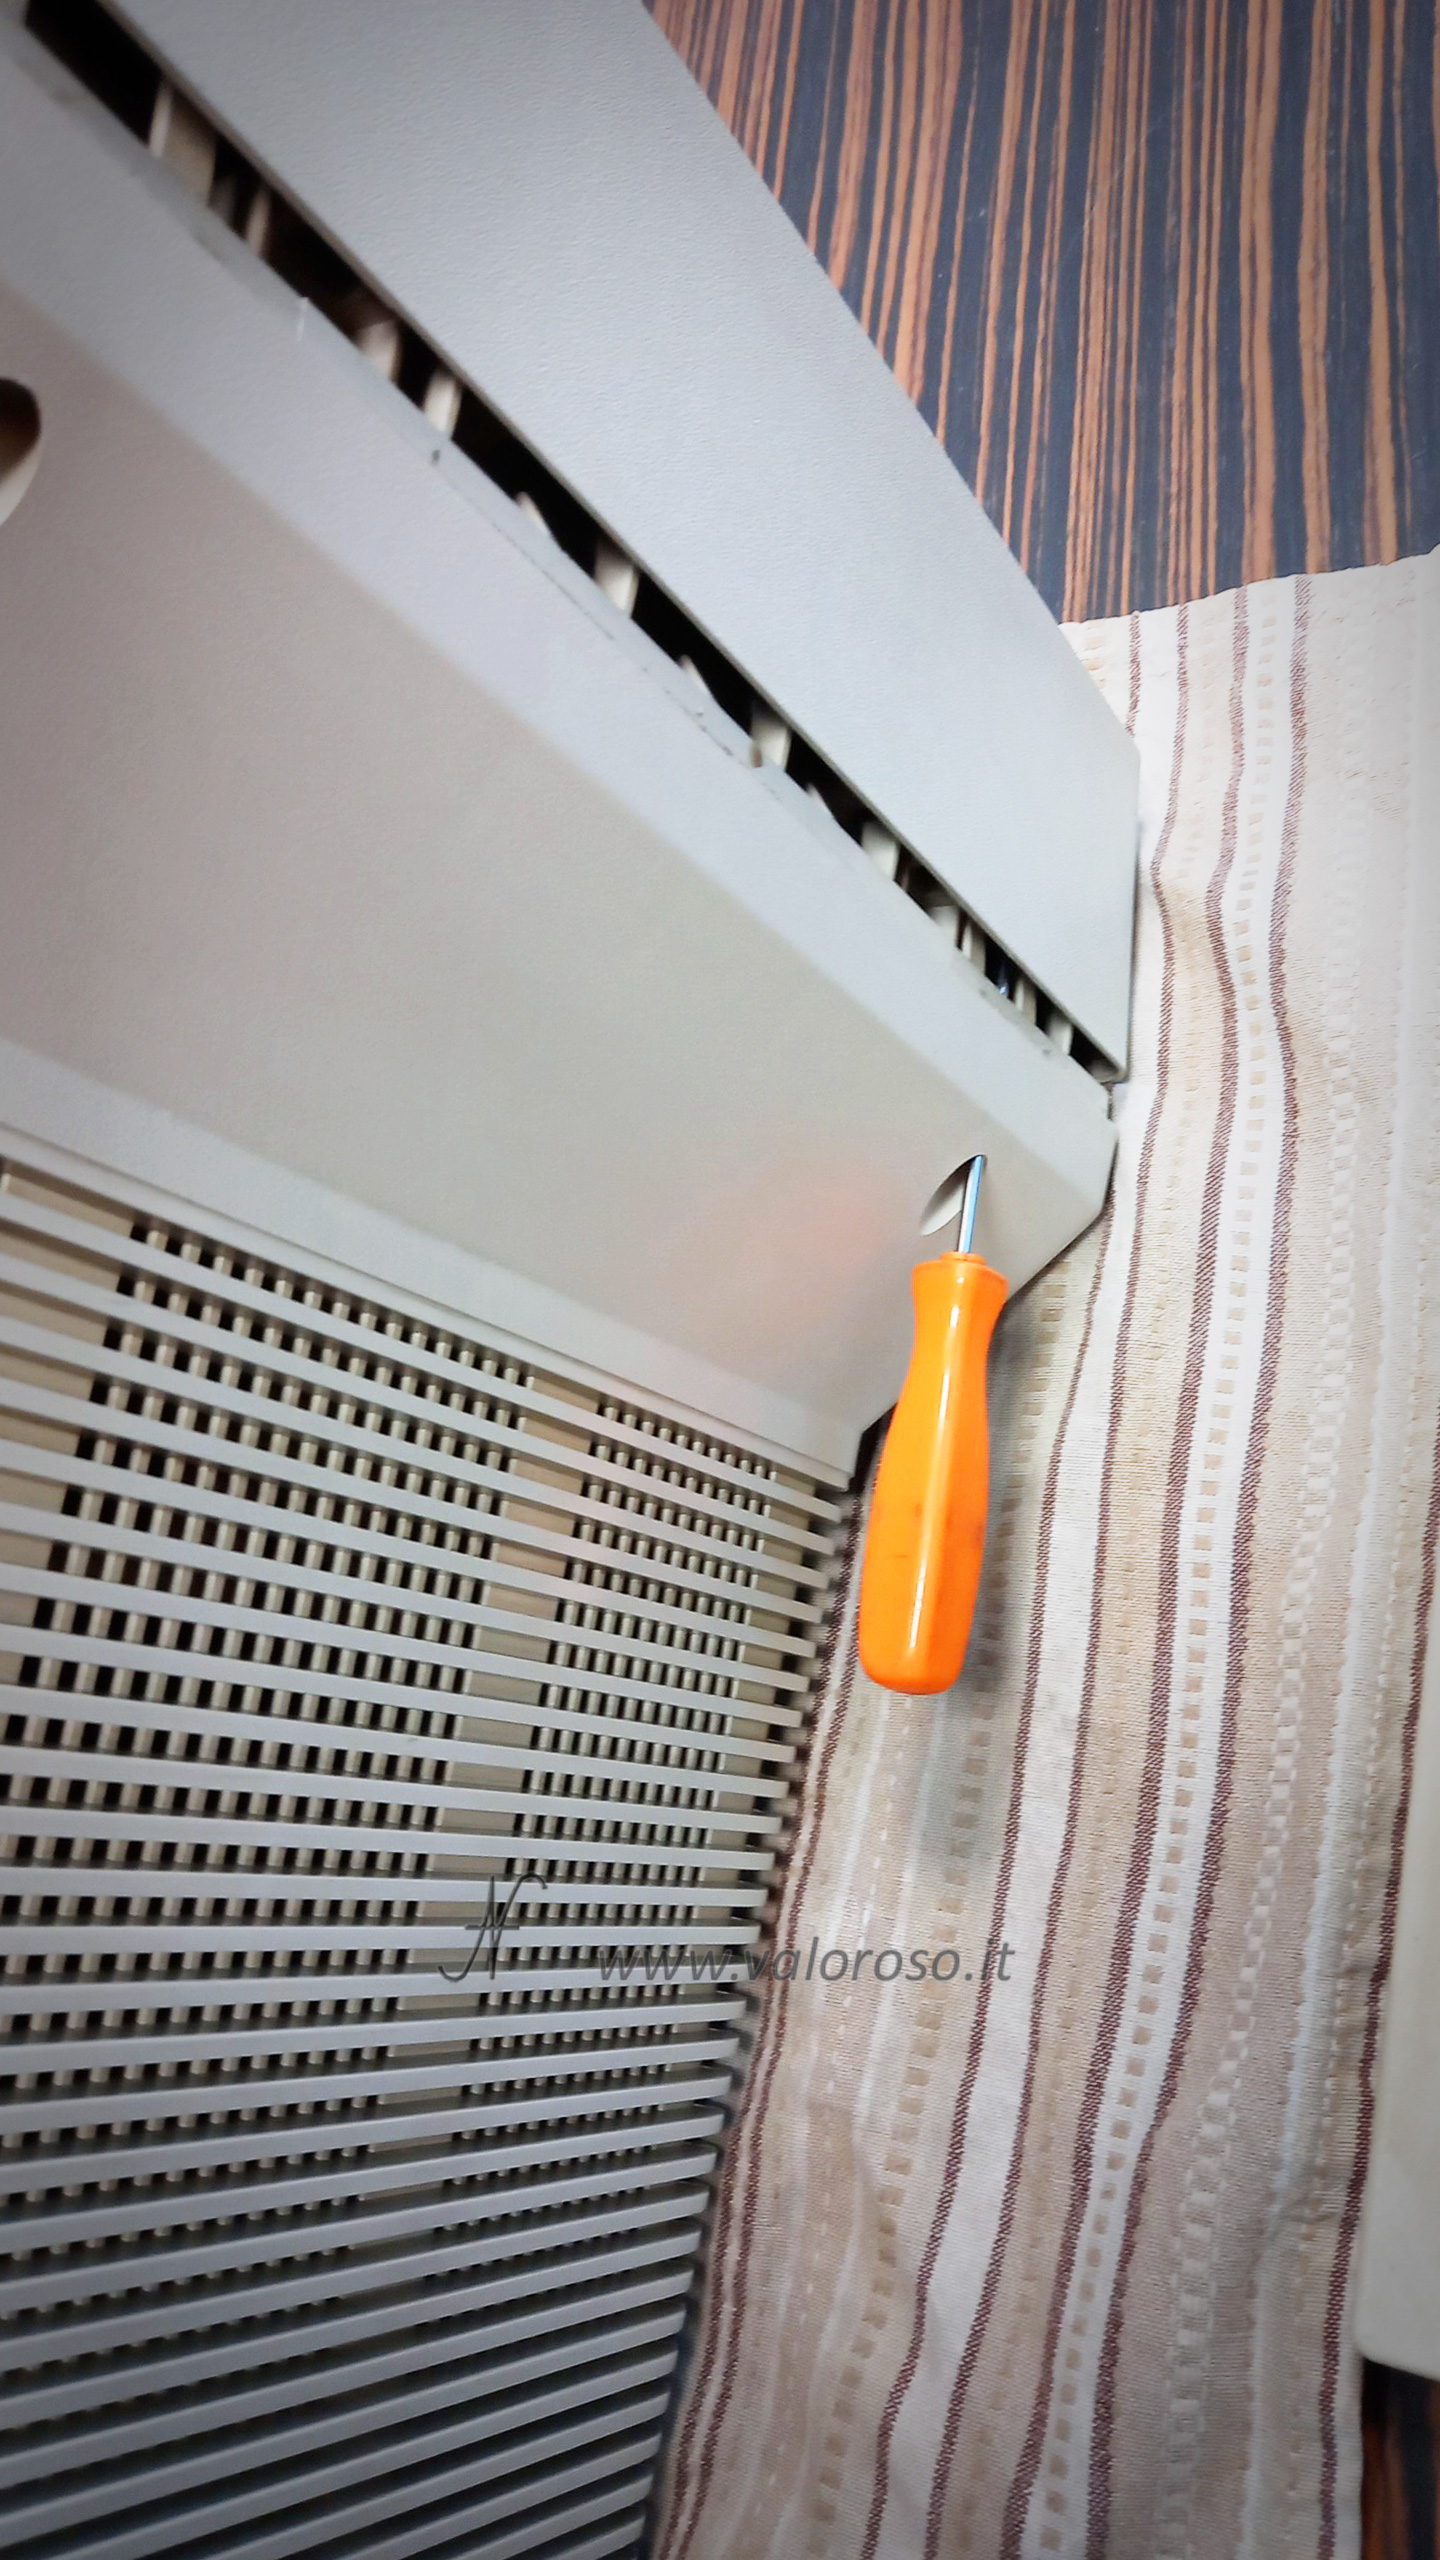
Locate the two slots at the top back of the monitor.
Insert a screwdriver into the first crack, hooking the internal hook. The screwdriver must be long enough to reach the plastic hook inside the monitor. At the same time, it must be thin enough to enter the cracks without deforming them. In the following photos, you can observe the shape of the hooks for more clarity.
Move the hook from the top of the monitor downwards, levering it with the screwdriver. Do not apply excessive force to avoid breaking the hook!
Use a plastic leverage for bodies to slightly remove the two plastic shells of the monitor. Do not force excessively to avoid breaking the hooks. I know that some people use cutting screwdrivers to leverage and separate plastic shells. I advise against the use of metal tools, because they leave unworthy signs on the plastic parts.
Repeat the operation with the second crack, up to completely release the plastic shells.
Removing the back shell
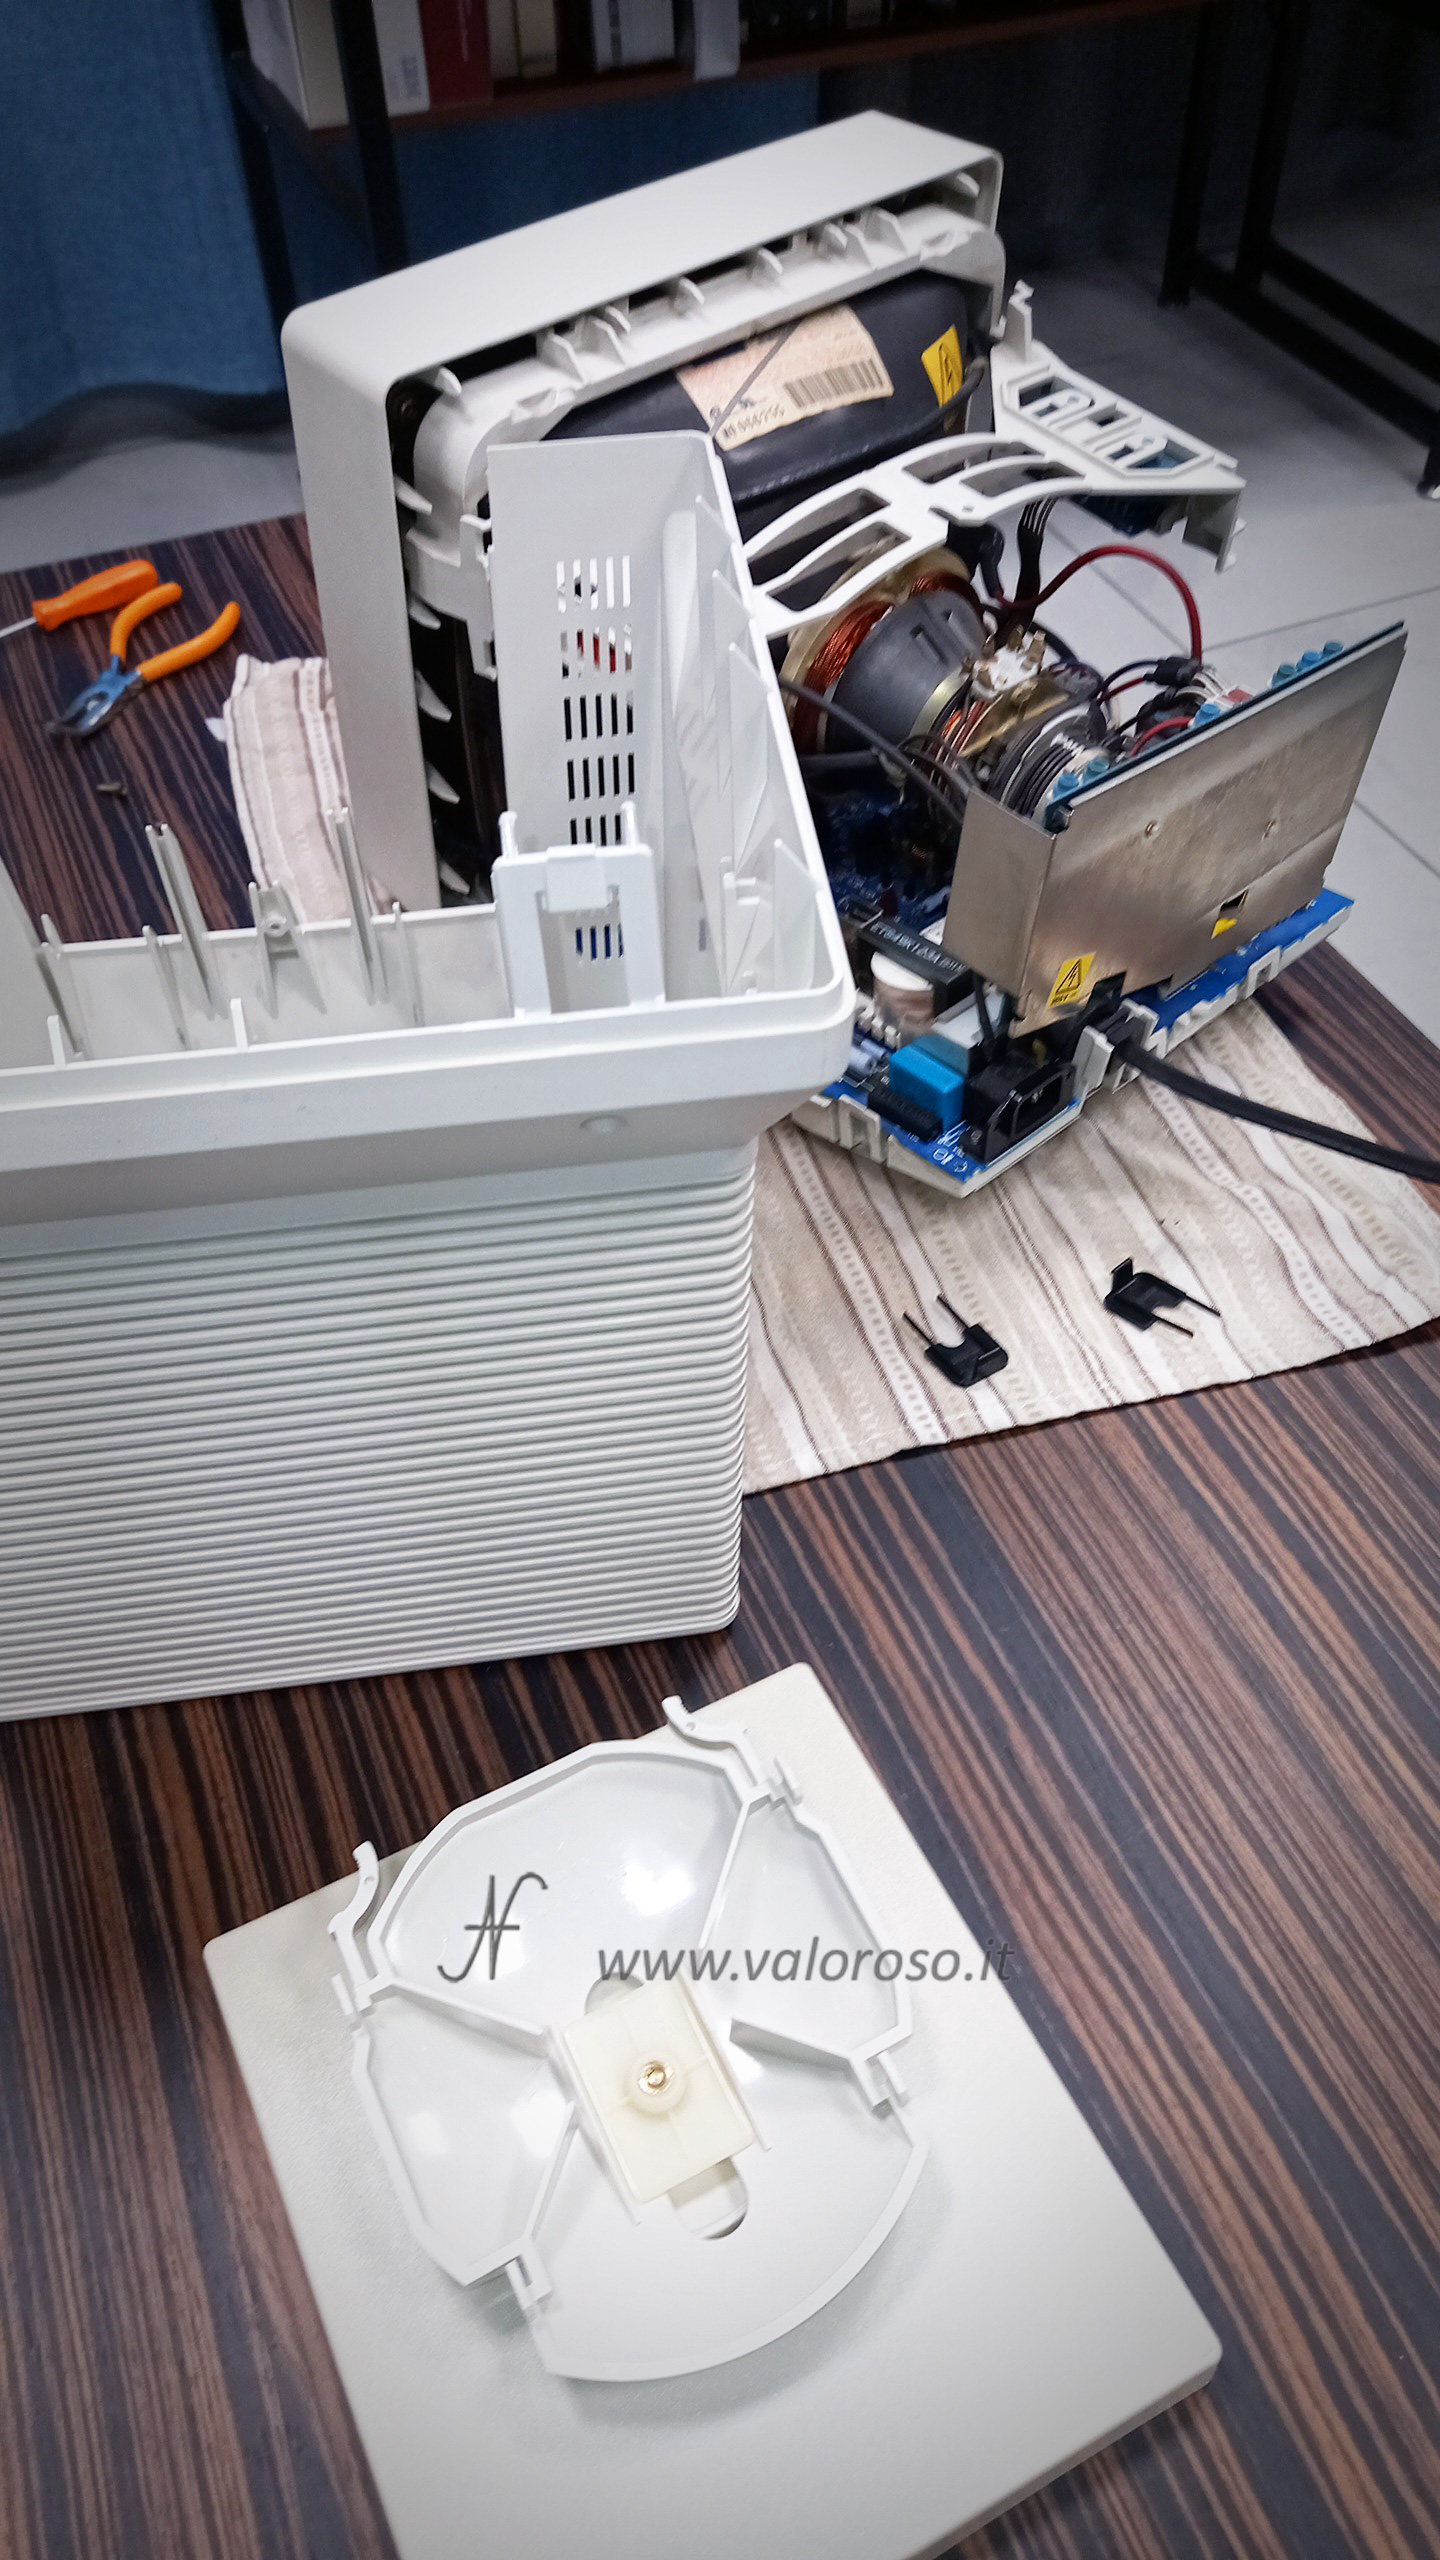
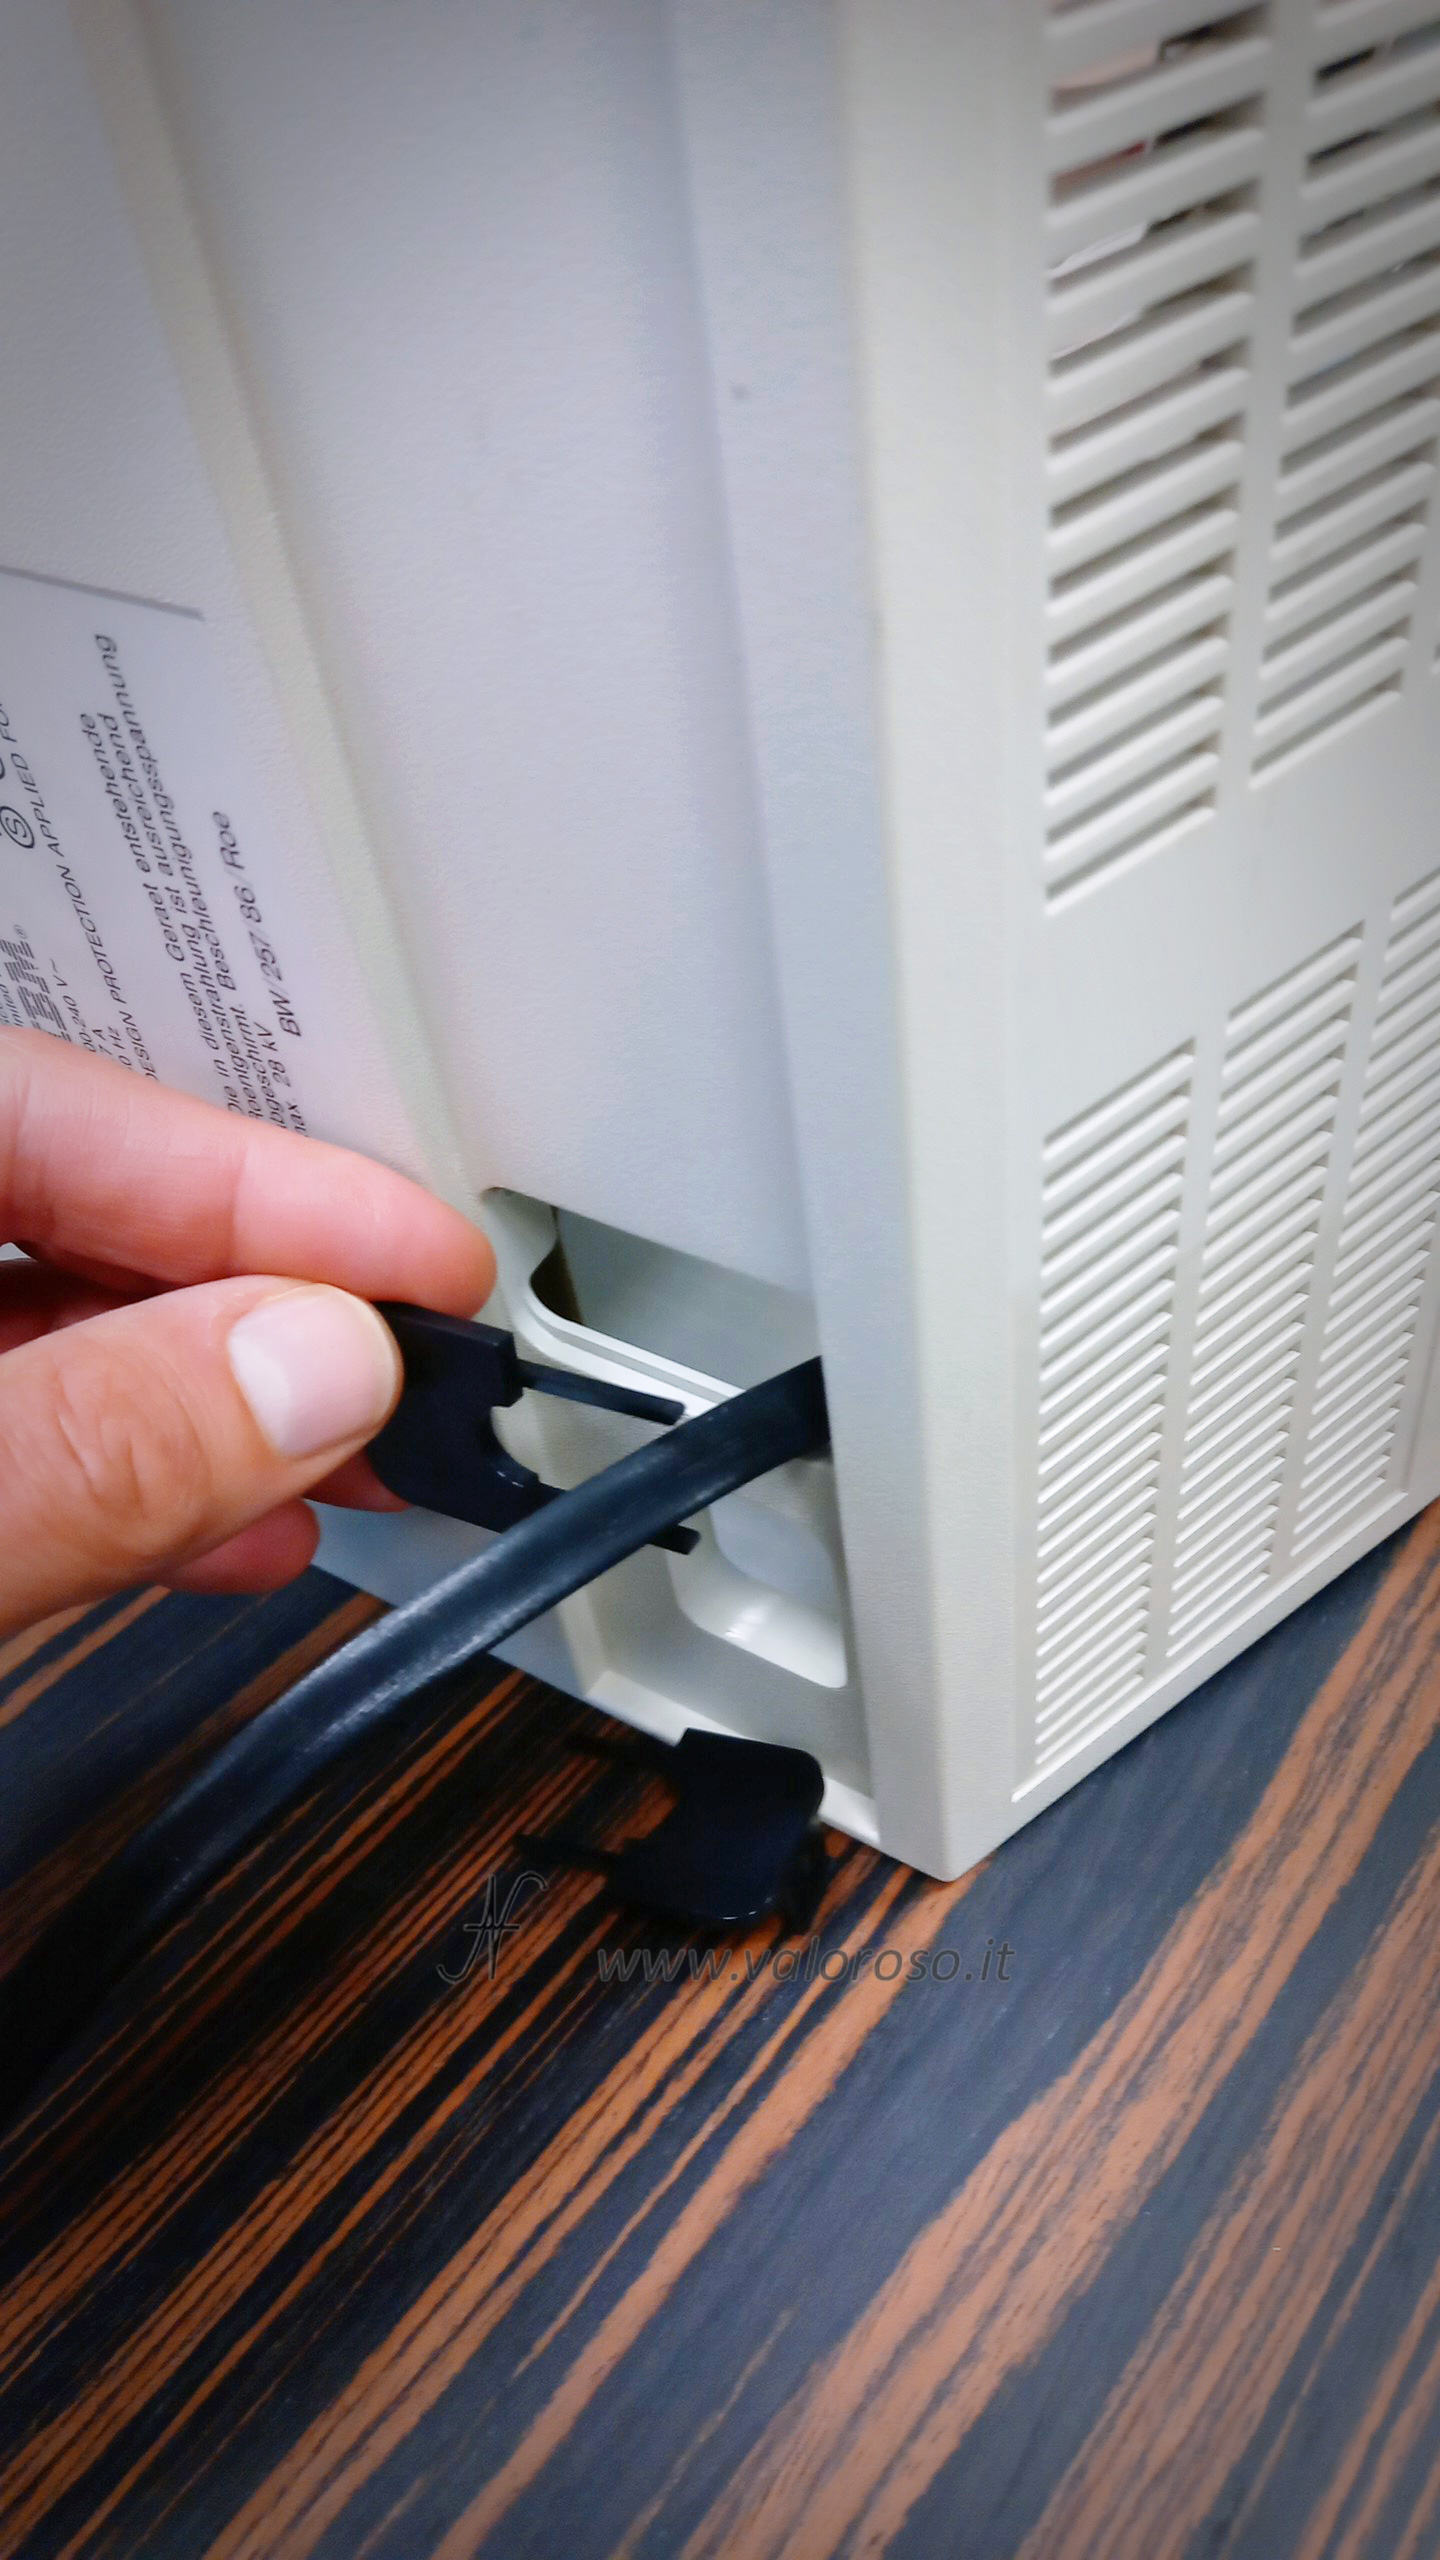
Remove the rear shell of the monitor by pulling it towards the rear, exposing the internal components.
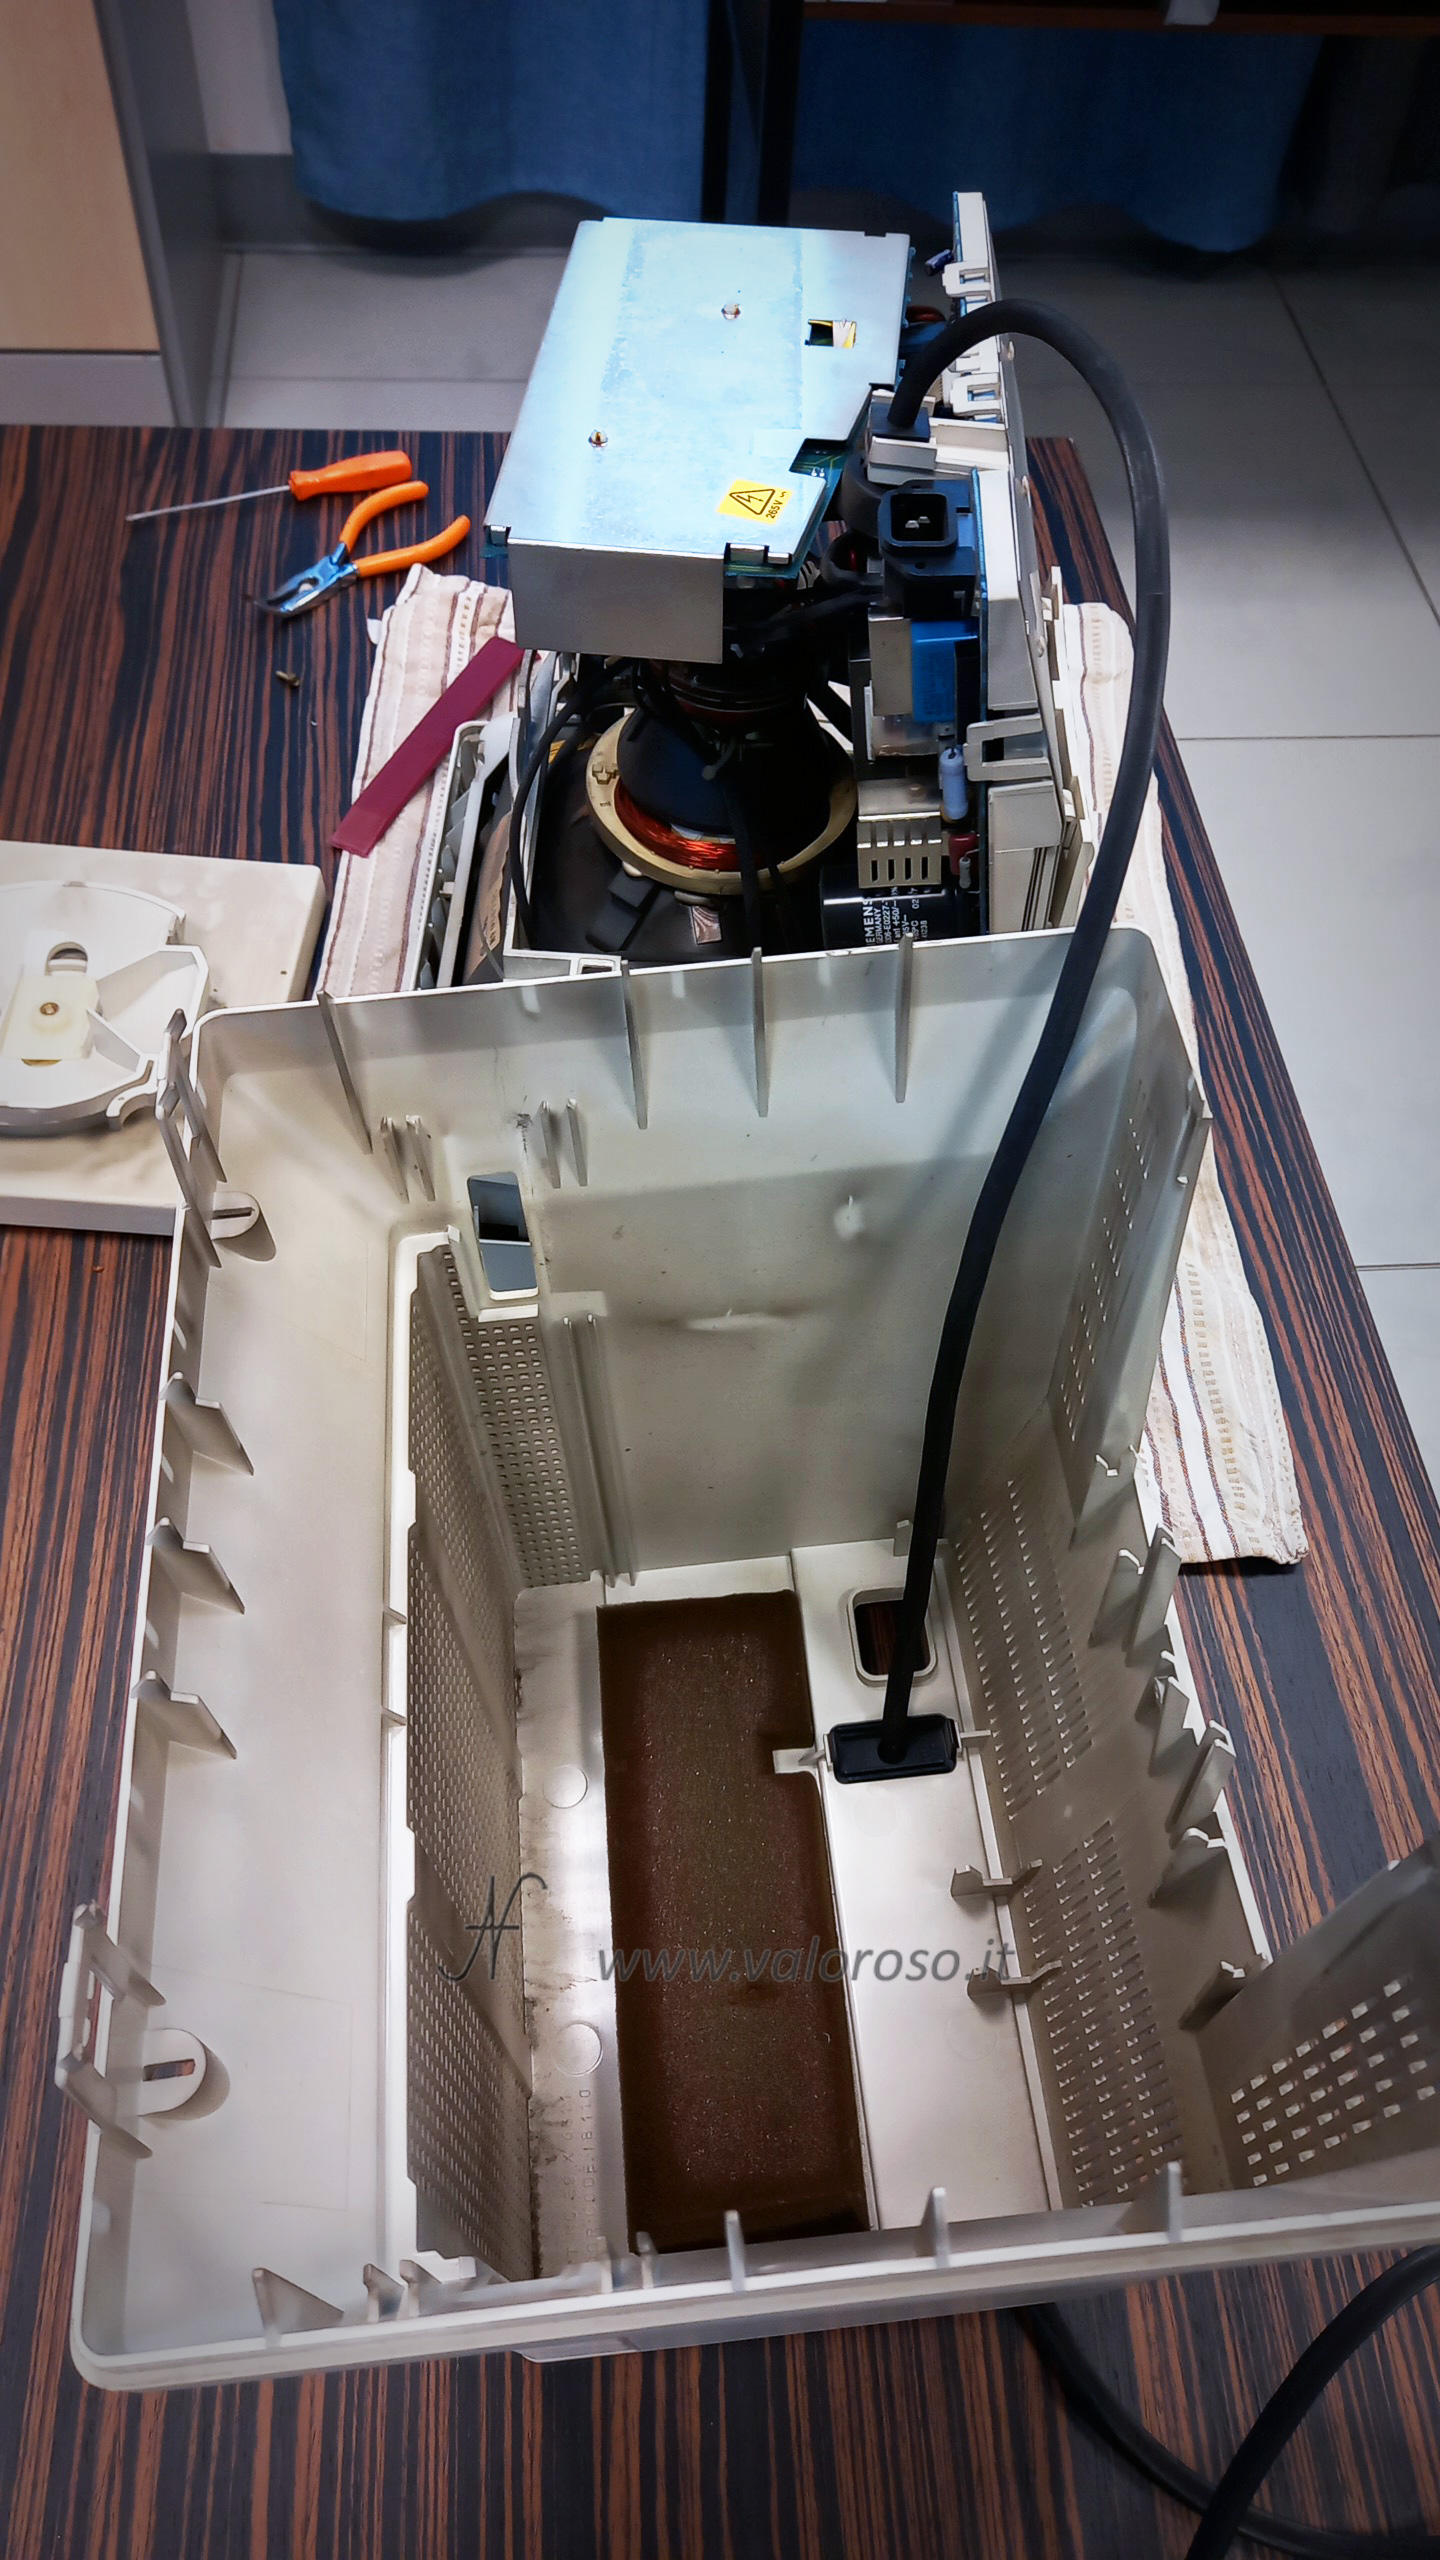
Separate the plastic cable gland to allow the VGA cable to slide out unobstructed.
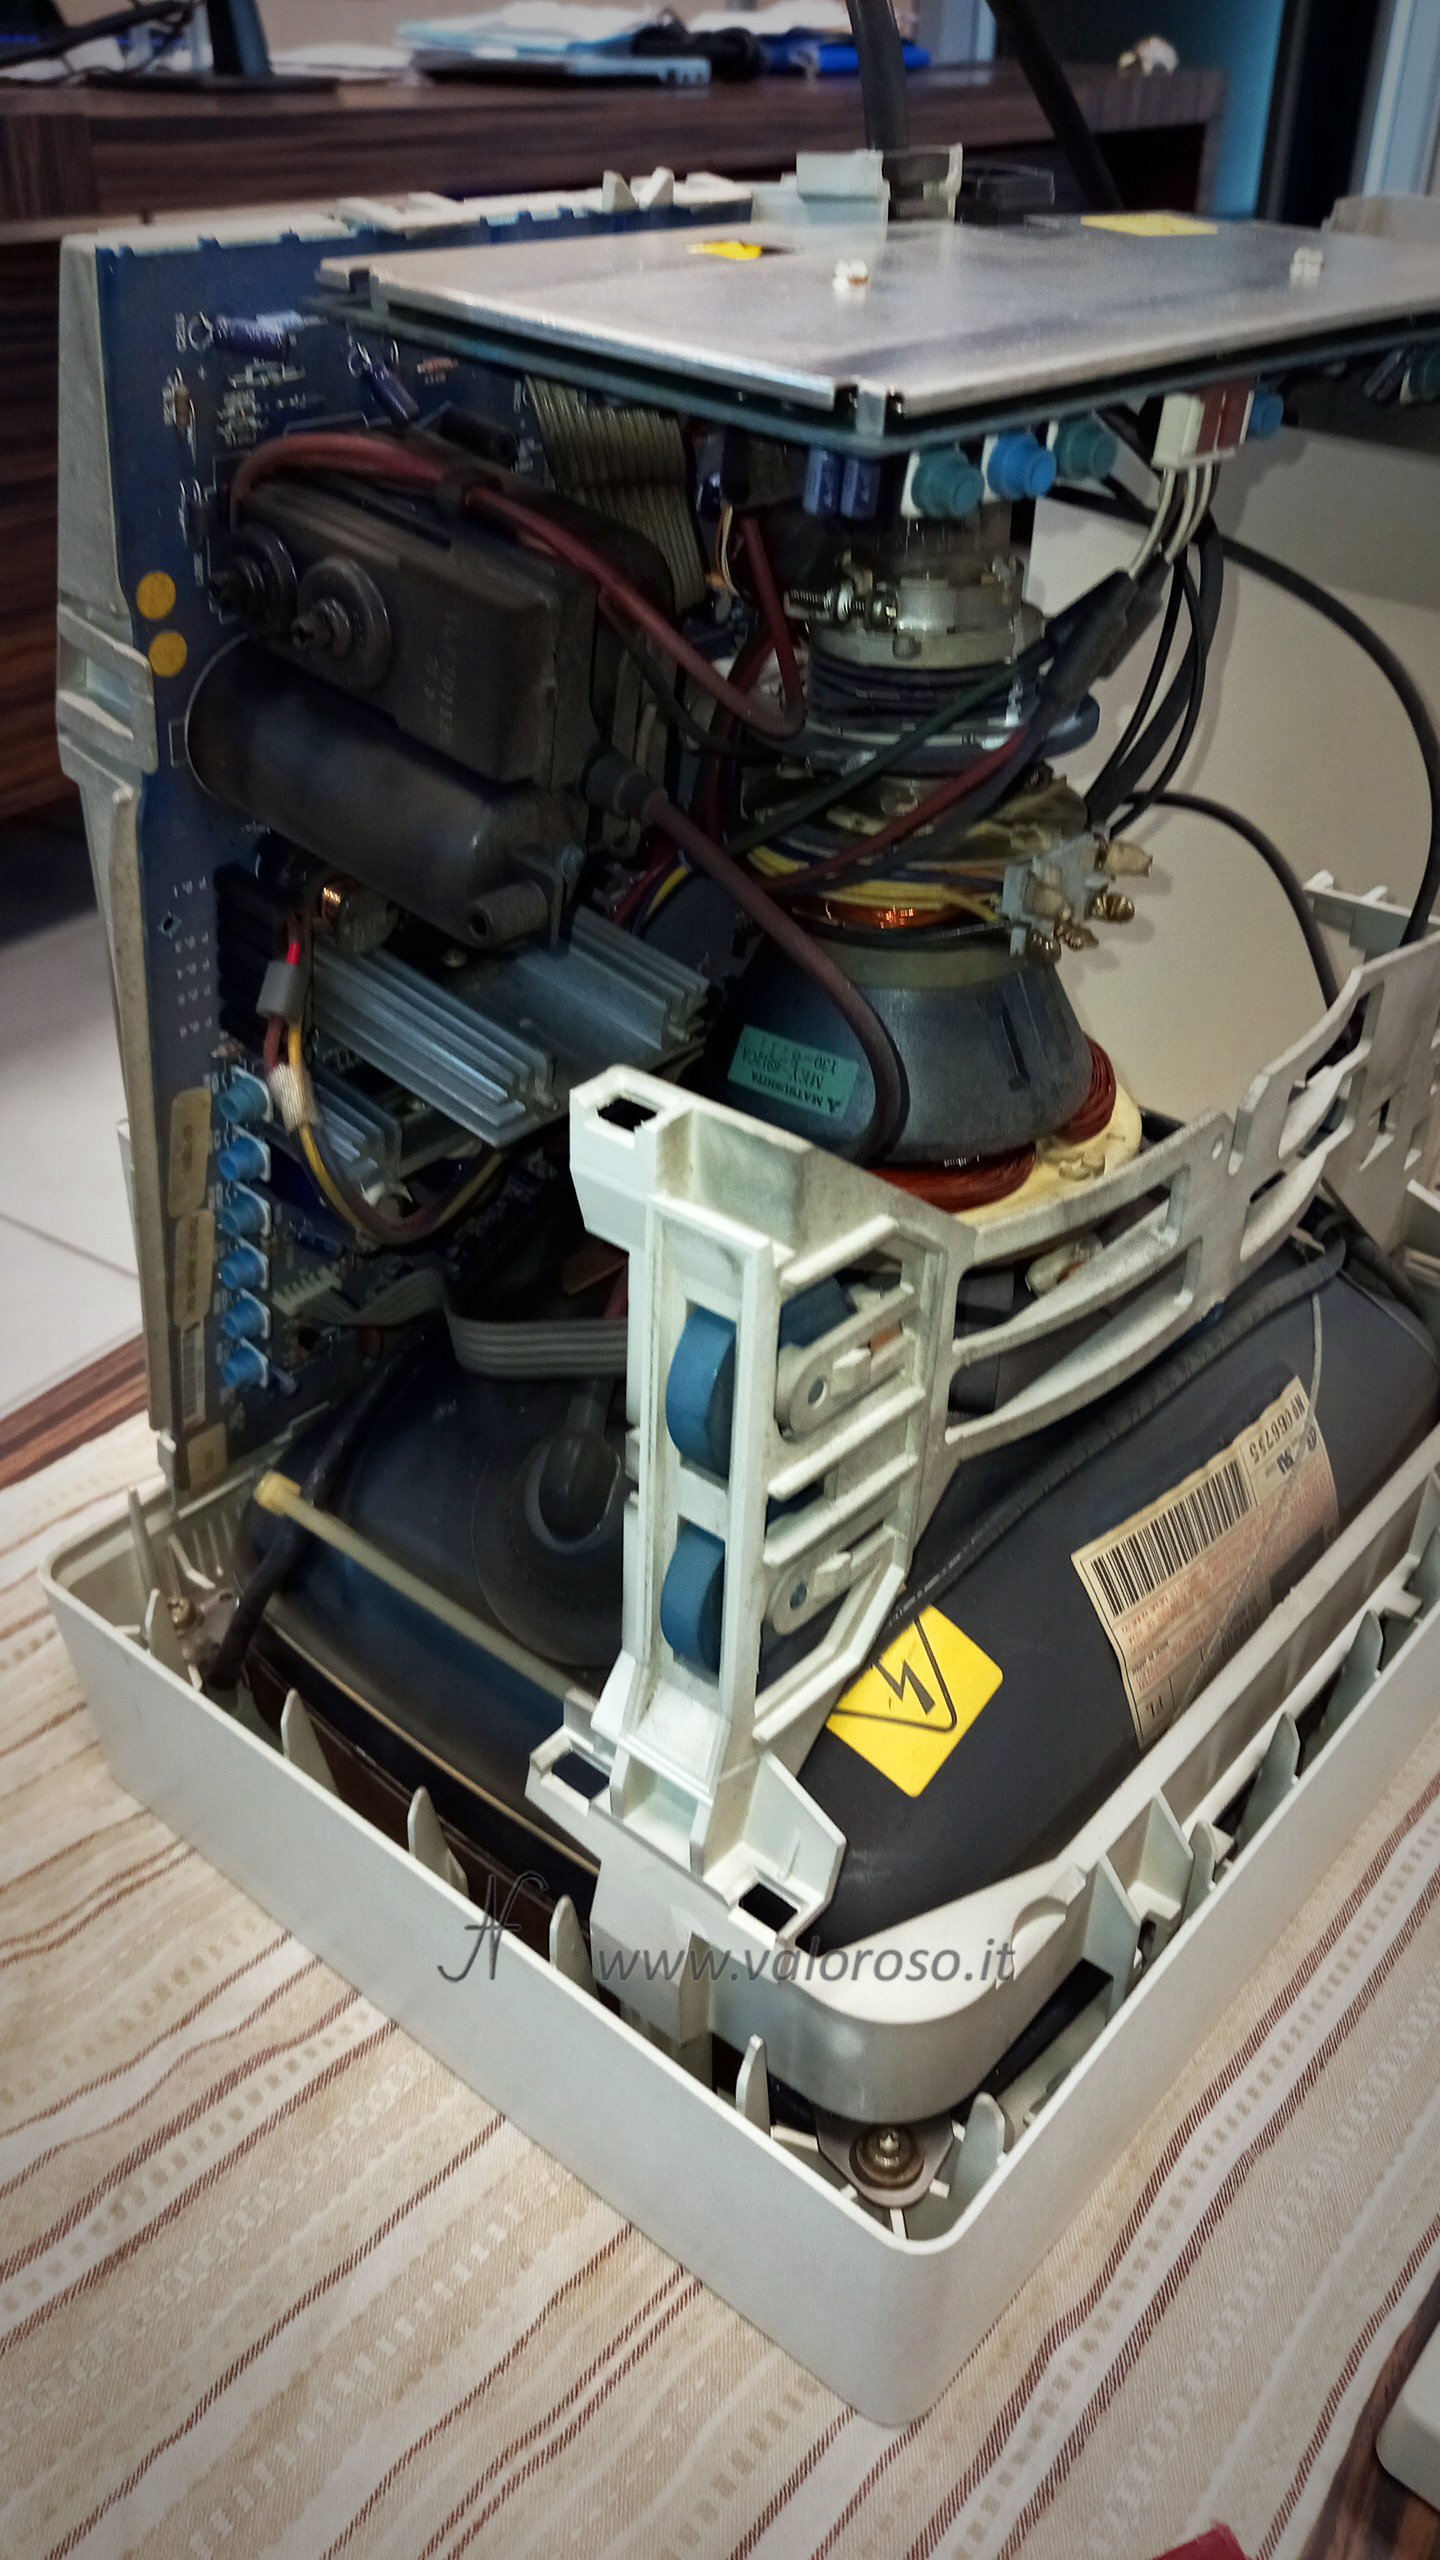
Internal cleaning of the IBM 8513 monitor
Use a soft dry brush to remove dust from internal components.
For harder to reach areas, use a dry toothbrush to brush away the dust.
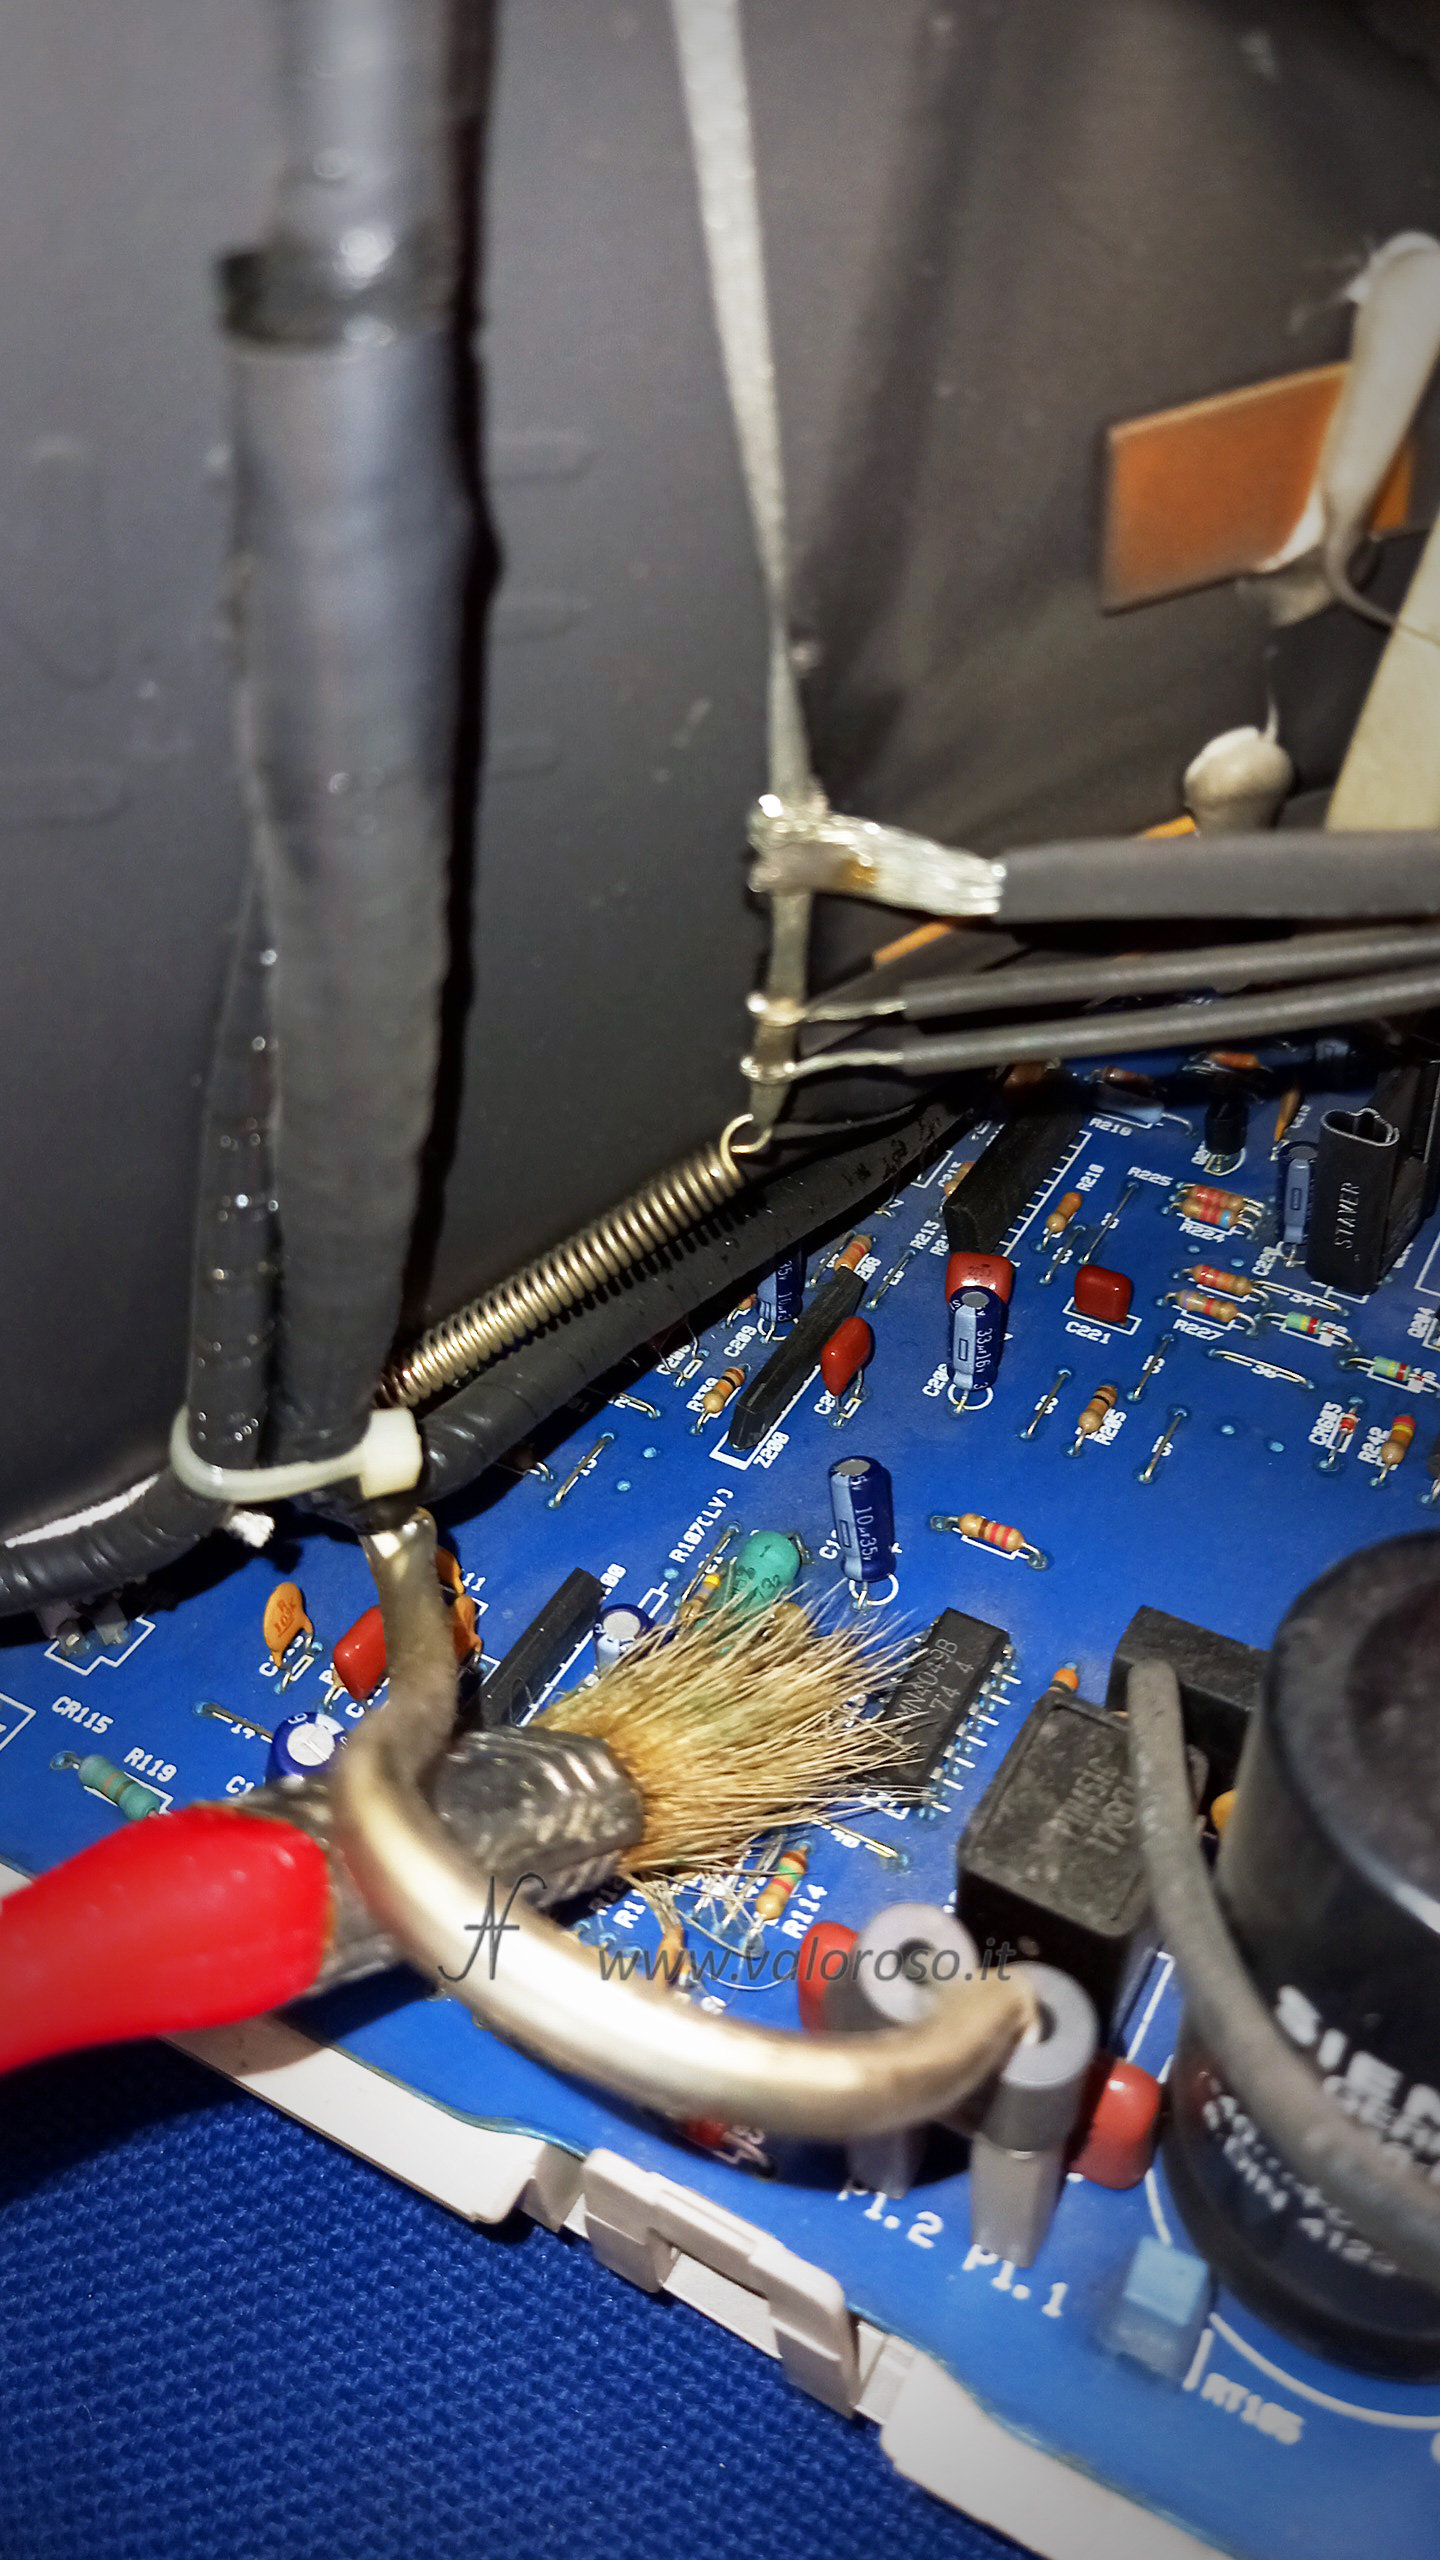
Only on electronic parts with more stubborn dirt, it is possible to soak the toothbrush with a little alcohol and rub. Wait for the alcohol to dry.
Cleaning of plastics
Apply the degreaser to a sponge and completely moisten the plastic parts. Be careful not to let the degreaser come into contact with the electronic components.
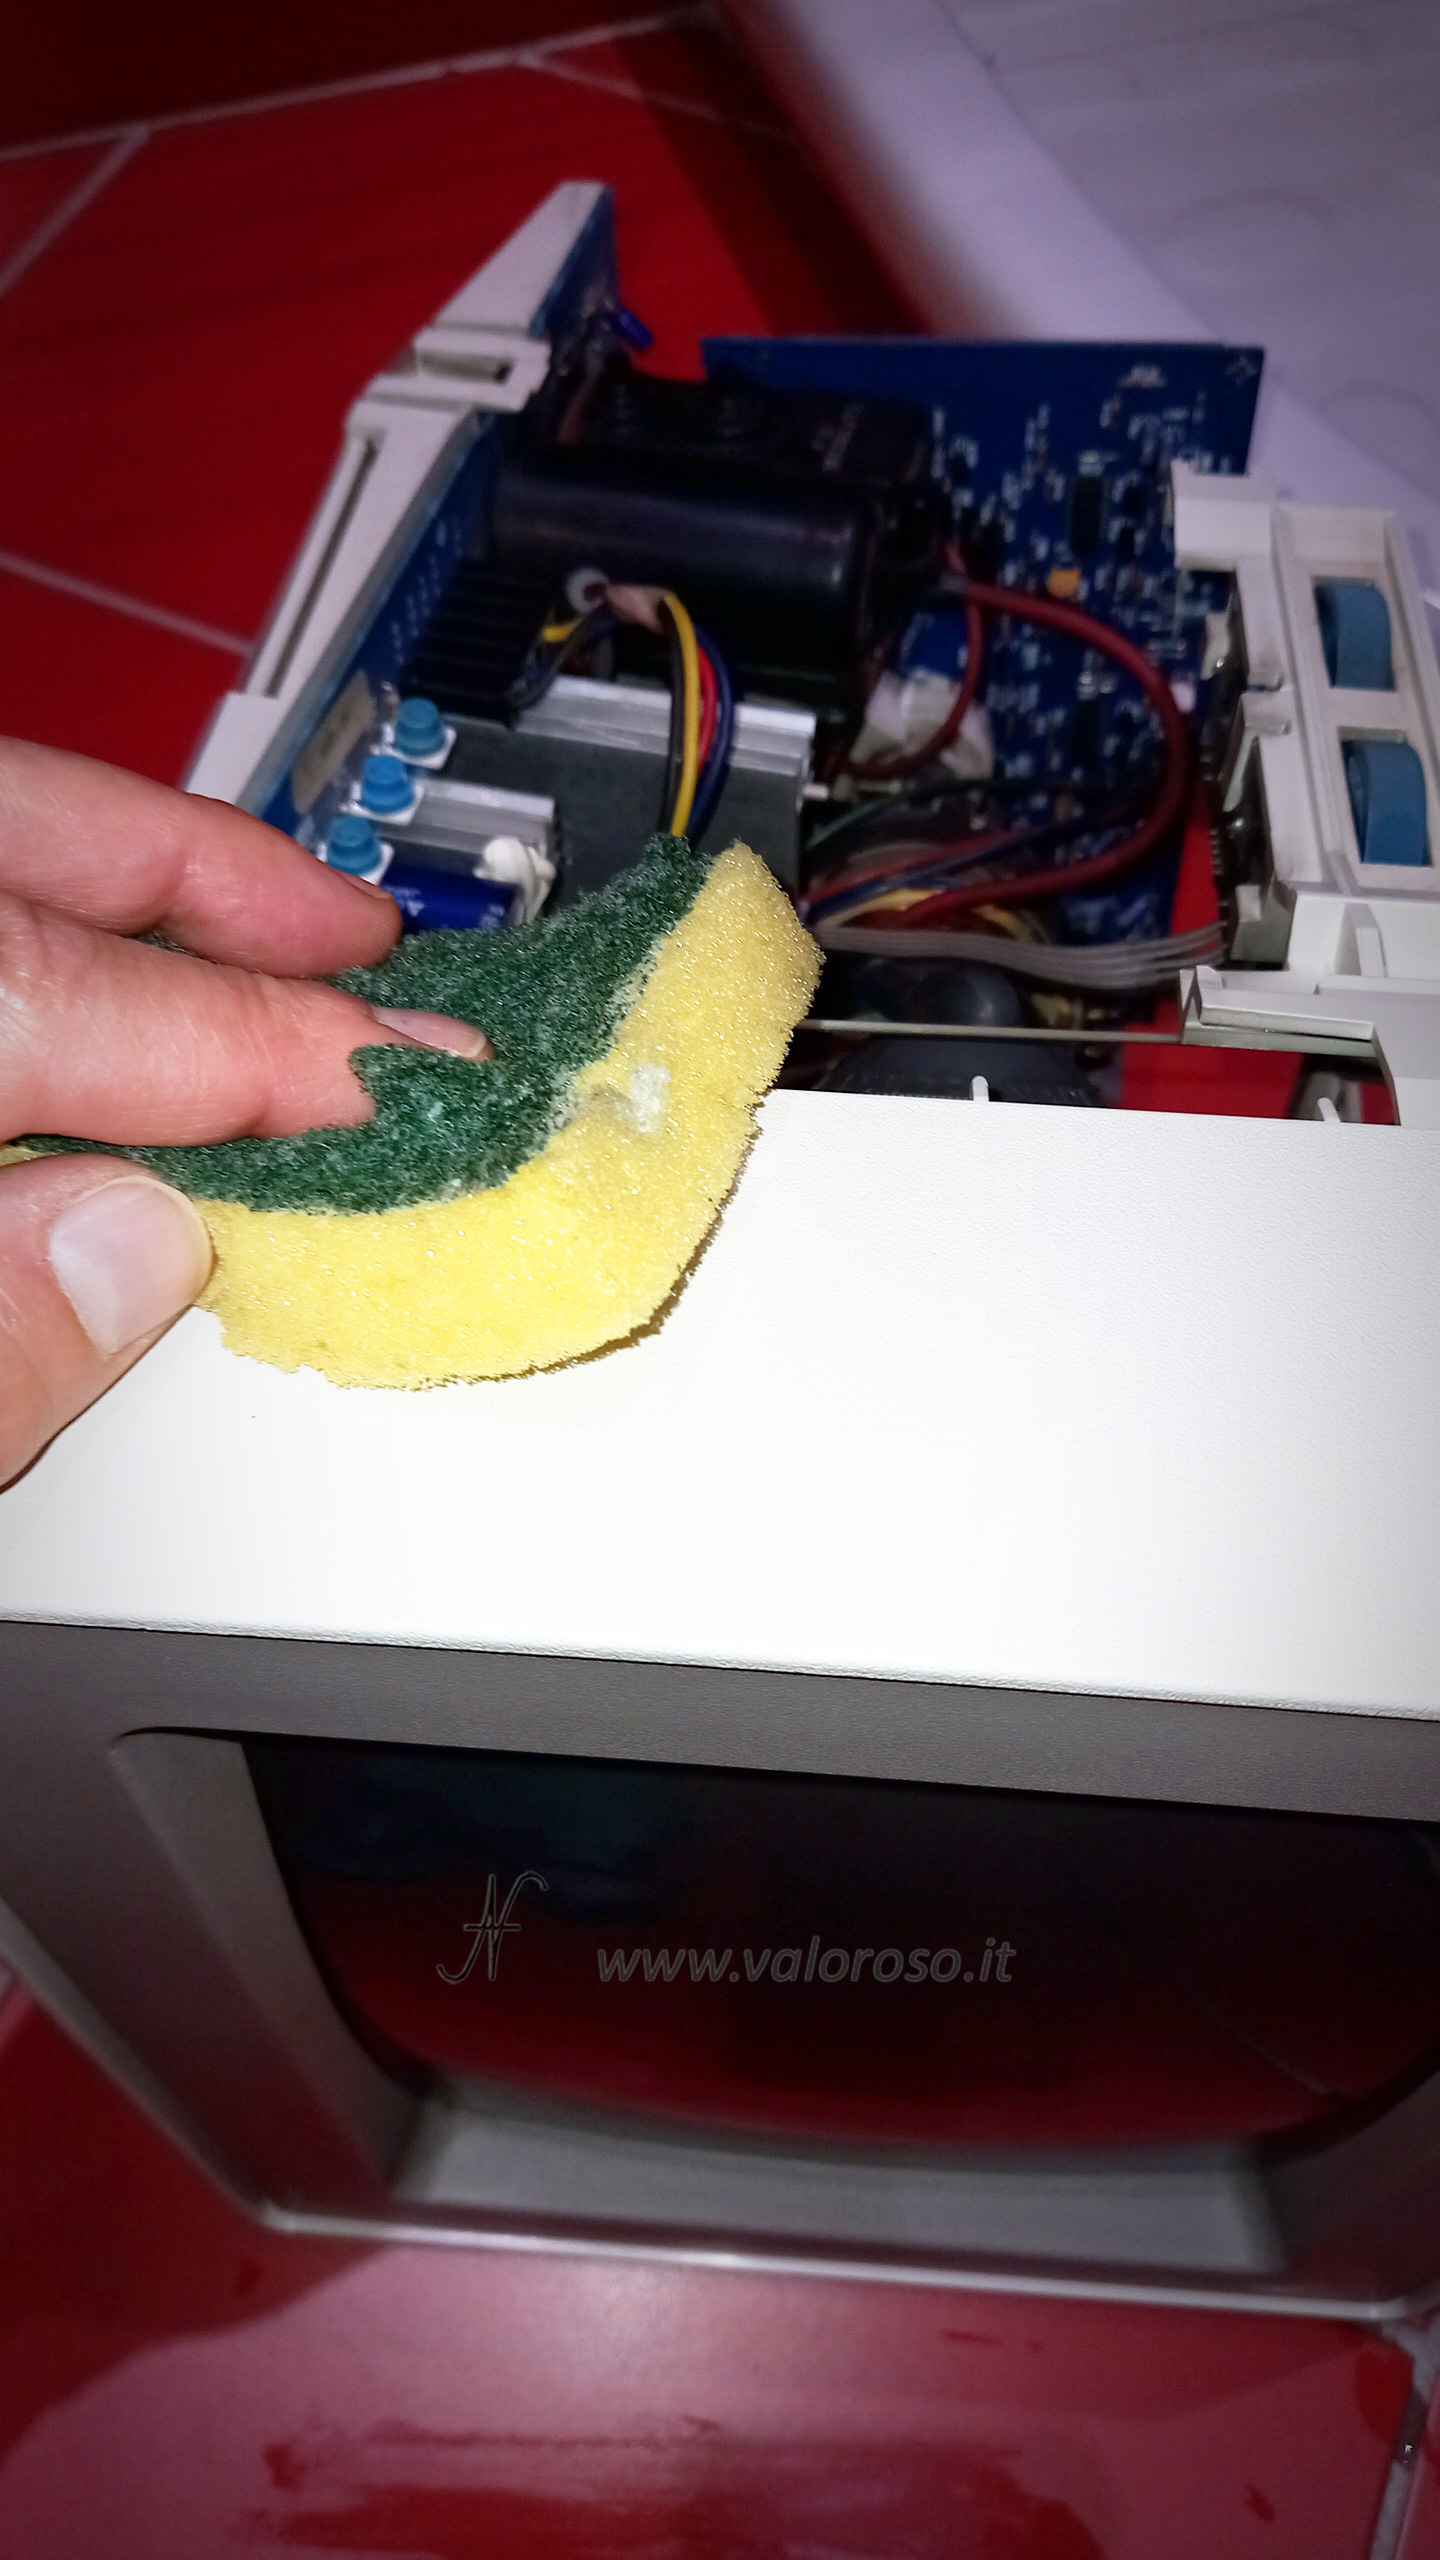
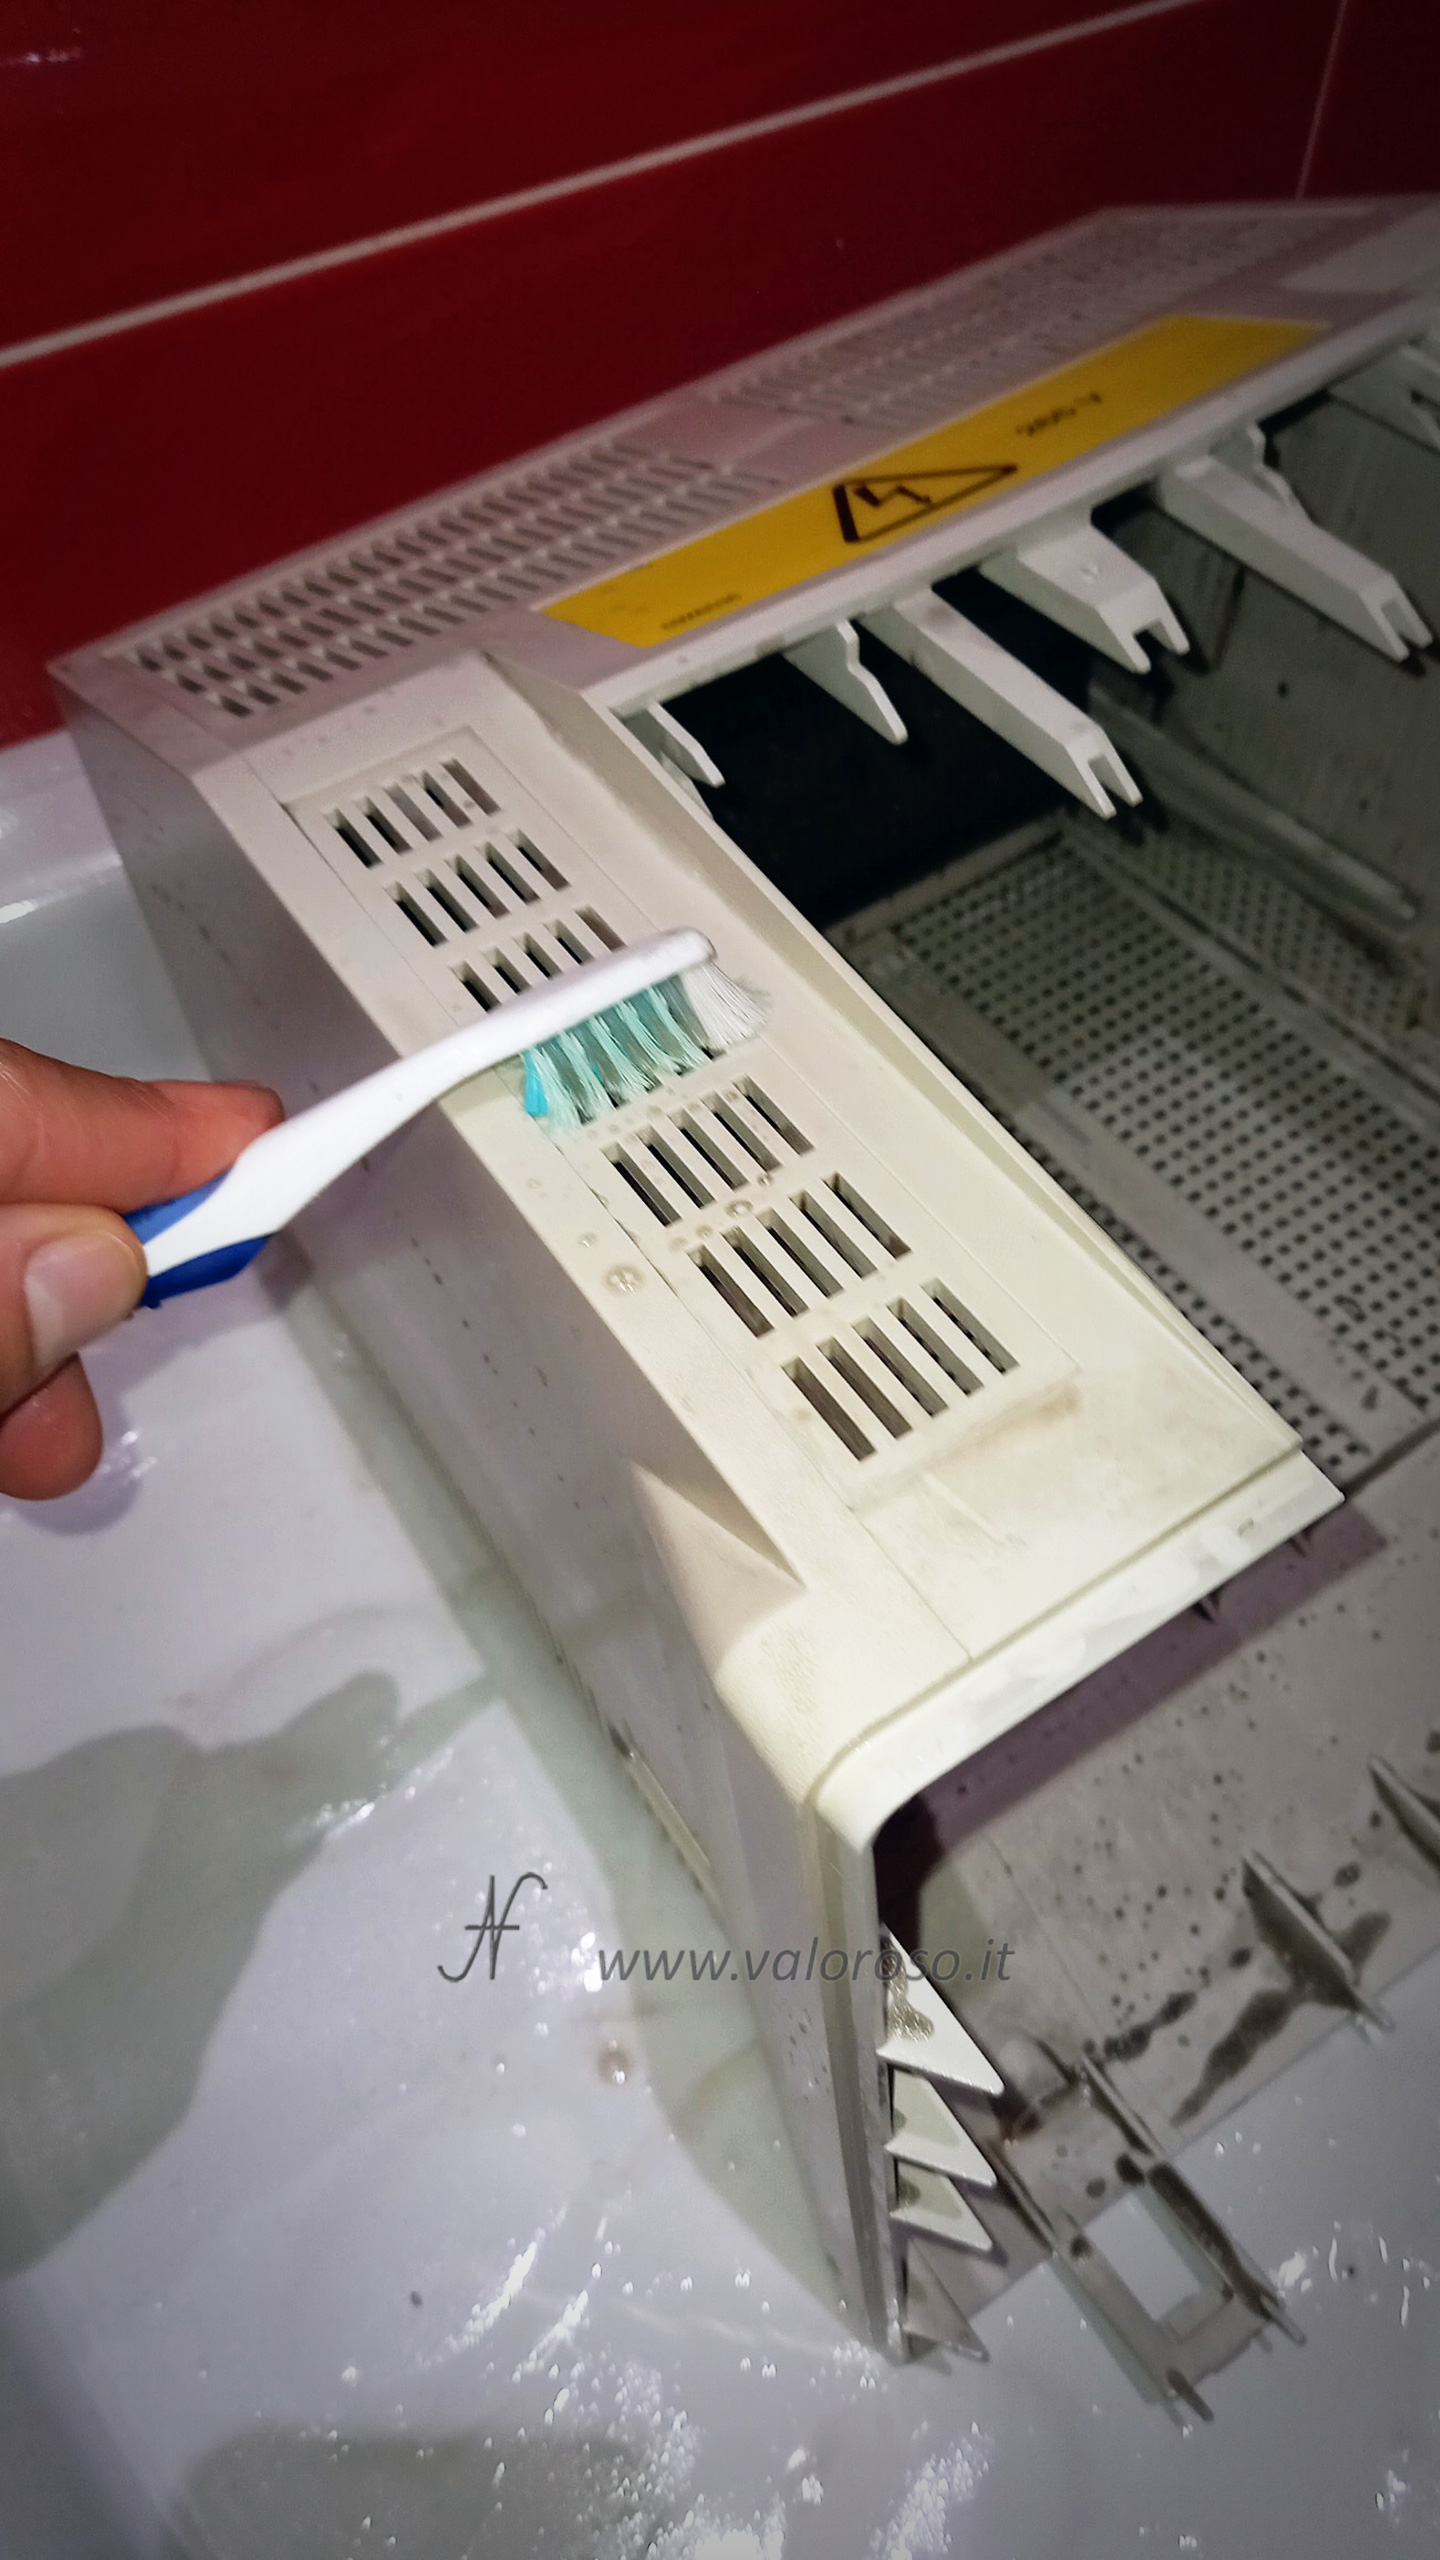
Use the toothbrush to clean crevices and finer areas.
Leave the degreaser to act for a few minutes.
Also clean the VGA cable and connector, taking care not to get the contacts wet.
Rinse with warm water, being very careful not to wet the electronic boards. The rear part of the monitor shell can be easily rinsed under a jet of water, as it has no electronic components.
The front part of the shell should be wiped several times with a cloth moistened with water to remove dirt and excess degreaser.
Dry with soft cloths and complete drying using compressed air.
Wait a full day to ensure all parts are completely dry before reassembling. In particular, there is a sponge at the back of the shell, which is more difficult to dry.
Reassembling the IBM 8513 monitor: replacing the back shell
Pass the VGA cable through its hole and reattach the black cable gland.
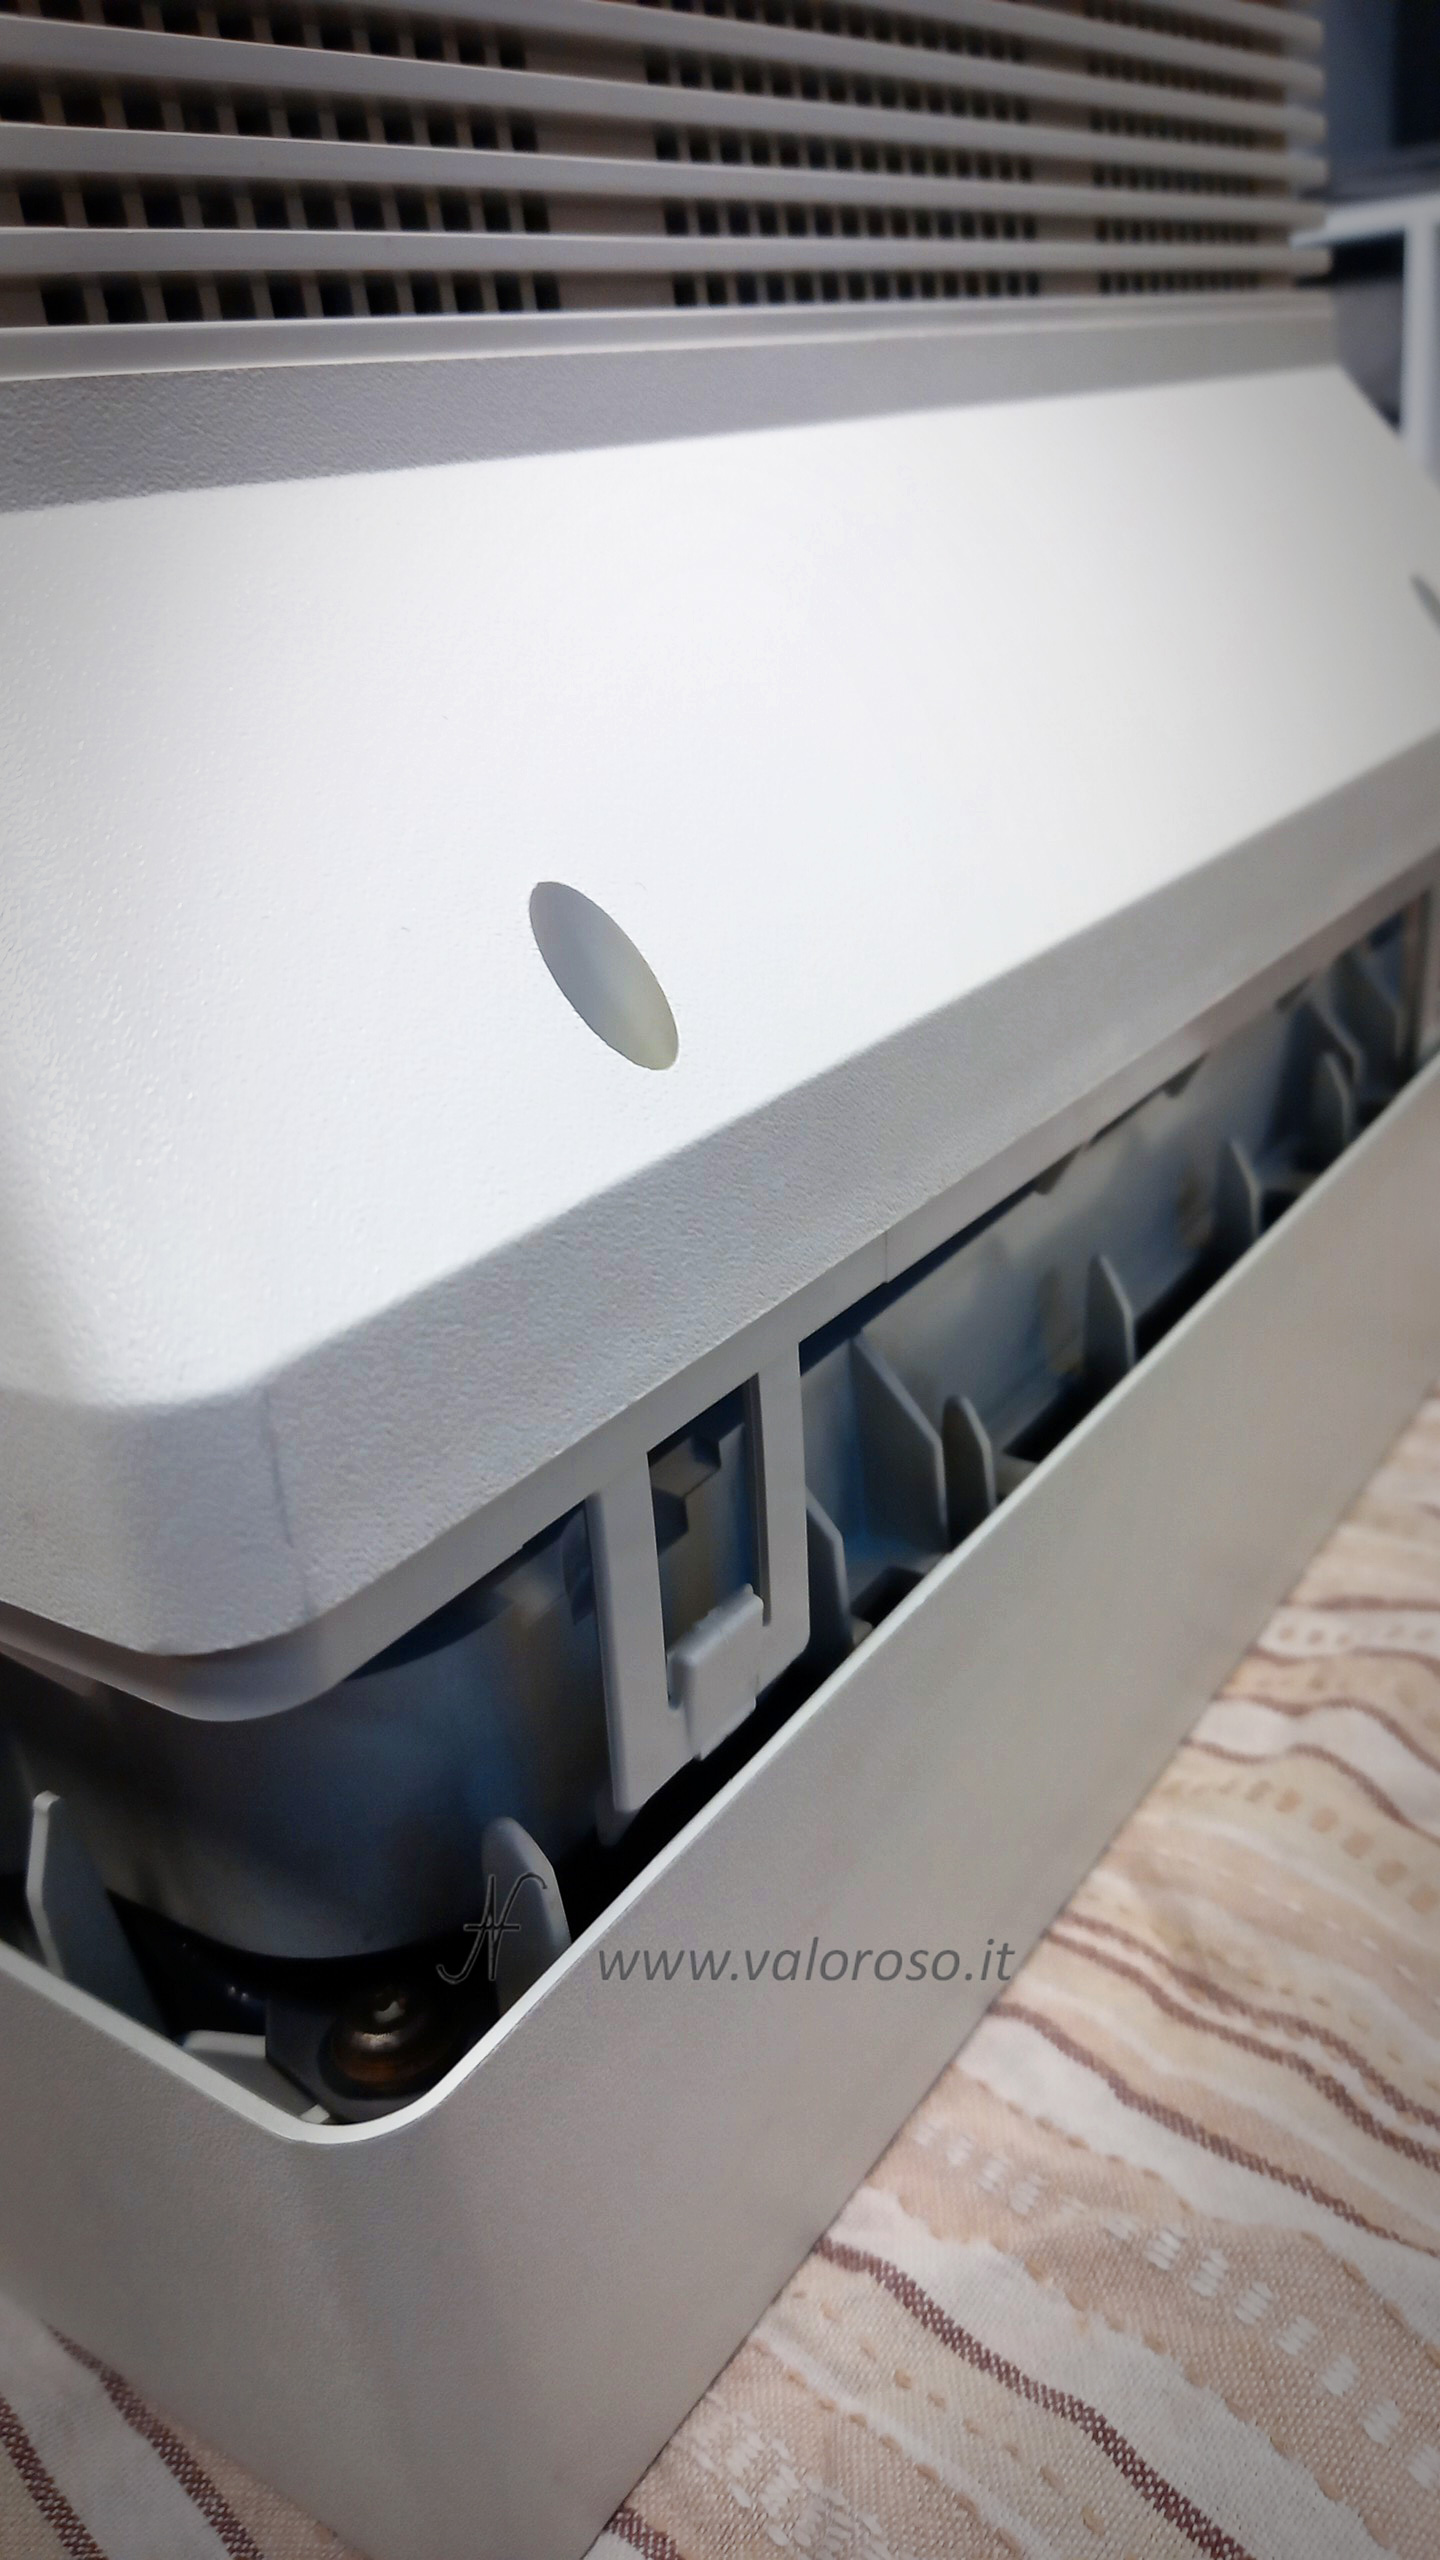
Position the rear part of the plastic shell so that it fits perfectly with the front one. Inside the back shell, there are guides for the monitor's electronic board. Make sure the card is in the correct position before closing the monitor.
When inserting the rear shell, if the position of the internal card is correct, there is no need for excessive force. In the following photo you can see the shape of the hooks that are used to hold the two parts of the monitor shell together.
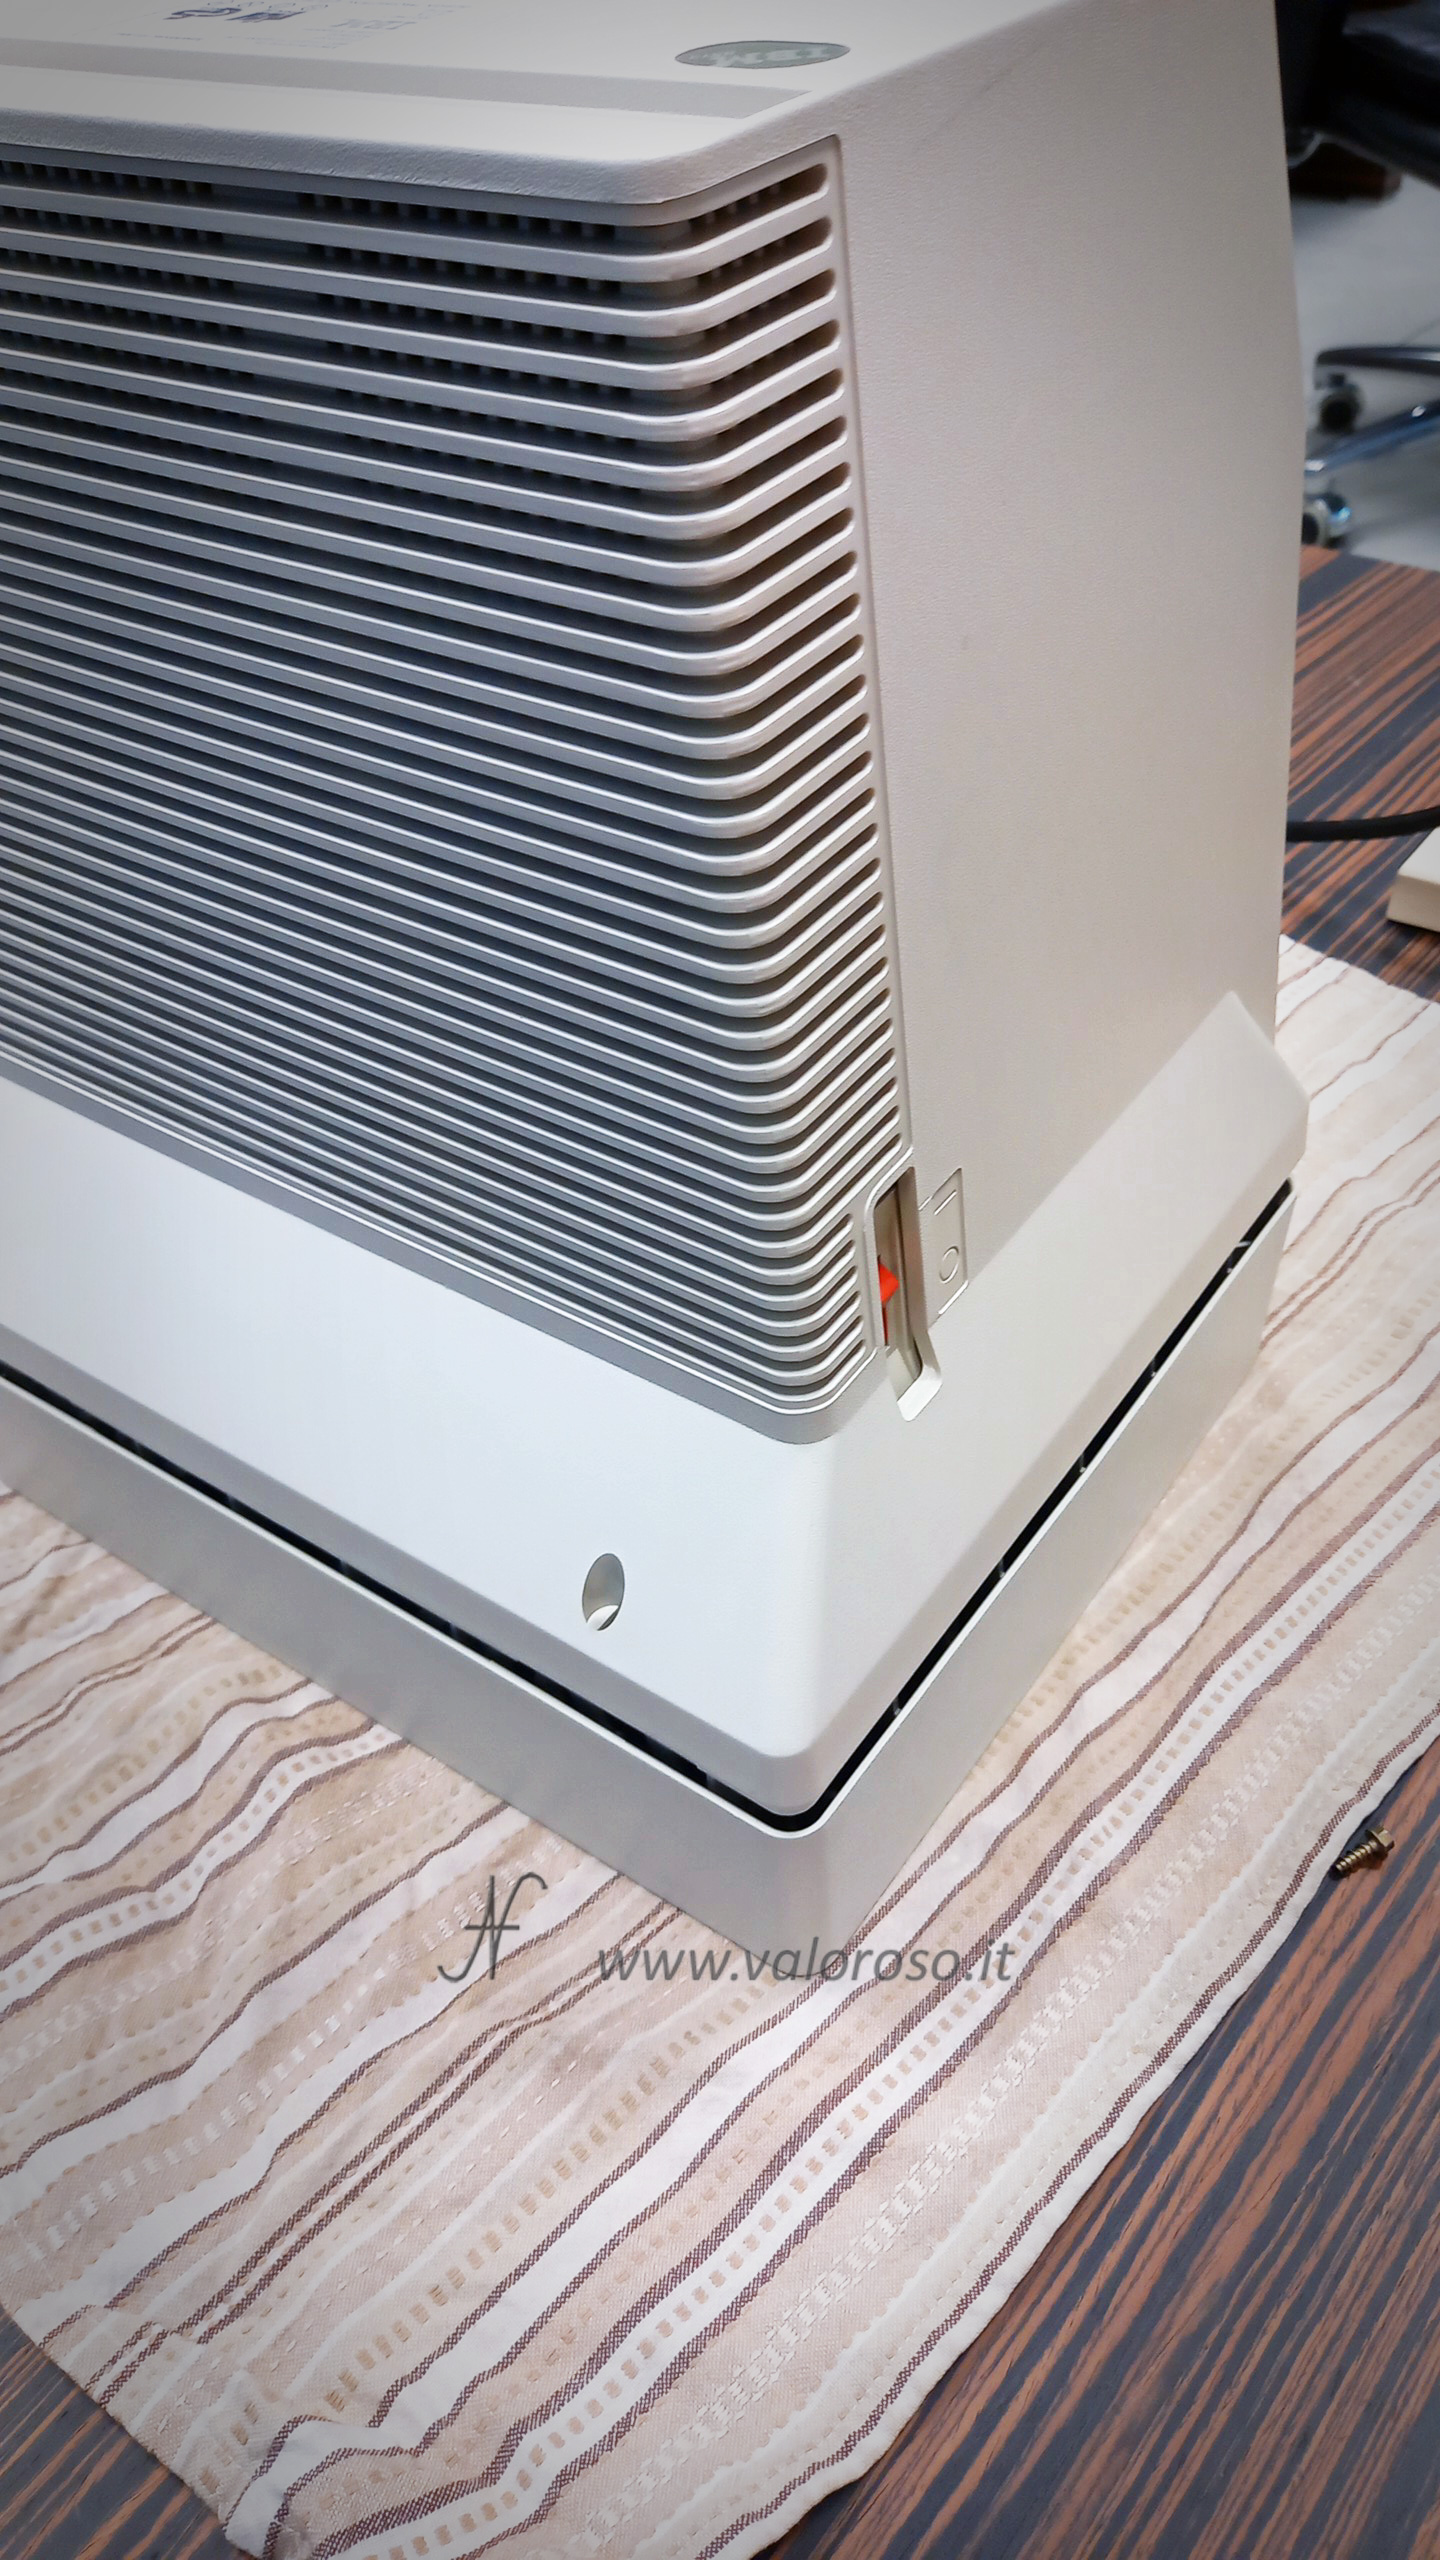
Fixing of plastic shells
Pair the two halves of the monitor shell, making sure that the plastic hooks hook in independently without the need for excessive pressure.
Tighten the only lower screw to permanently fix the shells. Use pliers or a socket wrench.
Reassembly of the lower support
Reassemble the lower support by inserting the hooks into the appropriate slots.
Slide the stand towards the front of the monitor until it locks into place.
Final results
Here is my IBM 8513 monitor after completing the disassembly and cleaning process! The device looks like new. Thorough cleaning not only improves the aesthetic appearance of the monitor, but also contributes to its correct functioning and longevity, as the accumulation of dust, together with humidity, can become electrically conductive and, moreover, can block the passage of air for cooling.
Happy cleaning and have fun with your vintage electronics projects!
Don't forget to subscribe to my channels @ValorosoIT on YouTube, Instagram, Facebook and TikTok for further tutorials and content on the world of vintage computers.